Spey flies feature long, flowing hackles, slender lines and, on occasion, a beautiful, streamlined, bronze mallard wing. For the most part, spey patterns are straightforward to tie. However, selecting, preparing and tying in the bronze mallard wing can be frustrating.
Advertisement

Matt King is one of the most talented fly tyers I know. His tying skill and attention to detail radiate through every pattern, from simple nymphs to complex patterns. Matt’s steelhead patterns are works of art, showcasing his tying skills, especially his winged spey flies, such as the Winter Spey.
Advertisement
Bronze mallard feathers, named for the colouration of their tips, come from the shoulder region of a mallard drake. They come in twos, and there are only a few pairs per bird, typically five to six. Feather size also varies. They are a common component for the distinct, curved, low-tapered wings on spey and Atlantic salmon patterns, a look often compared to a capsized boat. Selected and tied in correctly, bronze mallard wings provide a veil or roof to the fly that plays a vital role in how the fly swims.
The best bronze mallard feathers feature married fibres and grey roots adjacent to the stem. The grey roots indicate softness, an essential trait for tying in matched wing pairs. Stiff bronze-coloured fibres at the roots are difficult to manage and become disobedient during the tie-in process. They tend to stand up and will not flow along the top side of the fly. Tying in the wings is where most tyers struggle with bronze mallard wings.
Advertisement
Most bronze mallard wings feature two paired slips tied one on top of each other. Two narrow slips are trimmed from the right feather, and two are trimmed from the left. Some tyers prefer a single pair wing. For his Winter Spey, Matt likes two wing pairs.
When selecting feathers, choose matching pairs of similar overall size, fibre length and colouration. Choose a pair with a fibre length appropriate for the size of the pattern. A wing that extends rear of the barb is standard. Aligning the hook along the inside edge of the feather is an excellent method to ensure both the fibre length and curvature are correct. Avoid using longer-length slips on smaller flies, as you end up tying in the wings on the stiffer bronze-coloured fibres and your wings will not behave.
Once a pair has been selected, prepare the feathers by removing the shorter fibres from the backside of the feather. On a right feather, this would be the left side of the stem. Remove the soft flue and the lower, softer grey fibres devoid of bronze colouration.
The best place to find suitable wing material is in each feather’s one-and-a-half to two-inch mid-section sweet spot. Depending on their width, you should be able to produce about four to six slips from a single feather. Narrow wings are much easier to work with. Matt prefers his wing slips to be approximately 3/16-inches wide.
Use a bodkin or scissor points to isolate the individual slips from both paired feathers. Trim the slips from the feather by nipping out the section that also includes a portion of the feather stem. Leaving the fibres attached to the stem helps manage the slips, especially if you make a mistake and need to reset the wing. Matt assured me that this frequently happens when first working with bronze mallard wing pairs.
Now for the moment of truth, tying in the wing slips. First, ensure the thread base at the tie-in area is smooth and flat. Take a right and left slip and place them beside each other, so the natural curve of each slip is against each other. This helps veil the upper portion of the fly, creating the signature roof or capsized boat look. If you are a right-handed tyer, grip the single pair and place it on top of the hook using your right thumb and forefinger. Now, gently pinch the pair with your left thumb and forefinger. Place a couple of controlled, encapsulating thread wraps around the wings and then apply firm thread tension. This practice ensures even thread pressure around the entire tie-in area. Make sure you are tying in the wing pair on the soft grey portion of the wing. Repeat this process for the second wing pair, securing them on top of the first pair. If you have one wing pair slightly narrower than the other, tie in the narrow pair first and the wider pair second.
Matt recommends adding five to six temporary wraps underneath the wing butts to steady the wing. Carefully trim the butts, including the attached stem, using a pair of ultra-fine-point razor scissors. After removing the butts, unwind the temporary wraps to avoid unnecessary thread bulk.
With the wing in place, all that is left to do is build a neat, tiny head, whip finish and apply a couple of coats of good quality, high-gloss head cement. Delicate, small heads are common to a well-tied spey fly, allowing the water to flow smoothly around the fly, bringing it to life.
How to tie the Winter Spey
Designed by Matt King
- Hook: Blue Heron #2, Daiichi 2051 1.5, Alec Jackson 2061 1.5
- Thread: Red 6/0 or 70D
- Tag: Mirage Tinsel medium
- Rib: Mirage Tinsel medium and Lagartun oval tinsel silver small
- Body rear: Lagartun or Veevus floss, fluorescent pink
- Body front section: Dubbing, SLF purple blend, seal or angora
- Hackle: Lagartun heron large, blue-eared pheasant or spey marabou
- Collar: Guinea, natural
- Wing: Bronze mallard
Tying Instructions
- Start the thread at the end of the hook eye return loop and wind it back to the mid-point of the hook. Secure the Mirage tinsel at the mid-point. Using close-touching turns, wrap the Mirage tinsel down to hook point. Reverse direction and bring the tinsel back up the shank to the mid-point using touching turns.

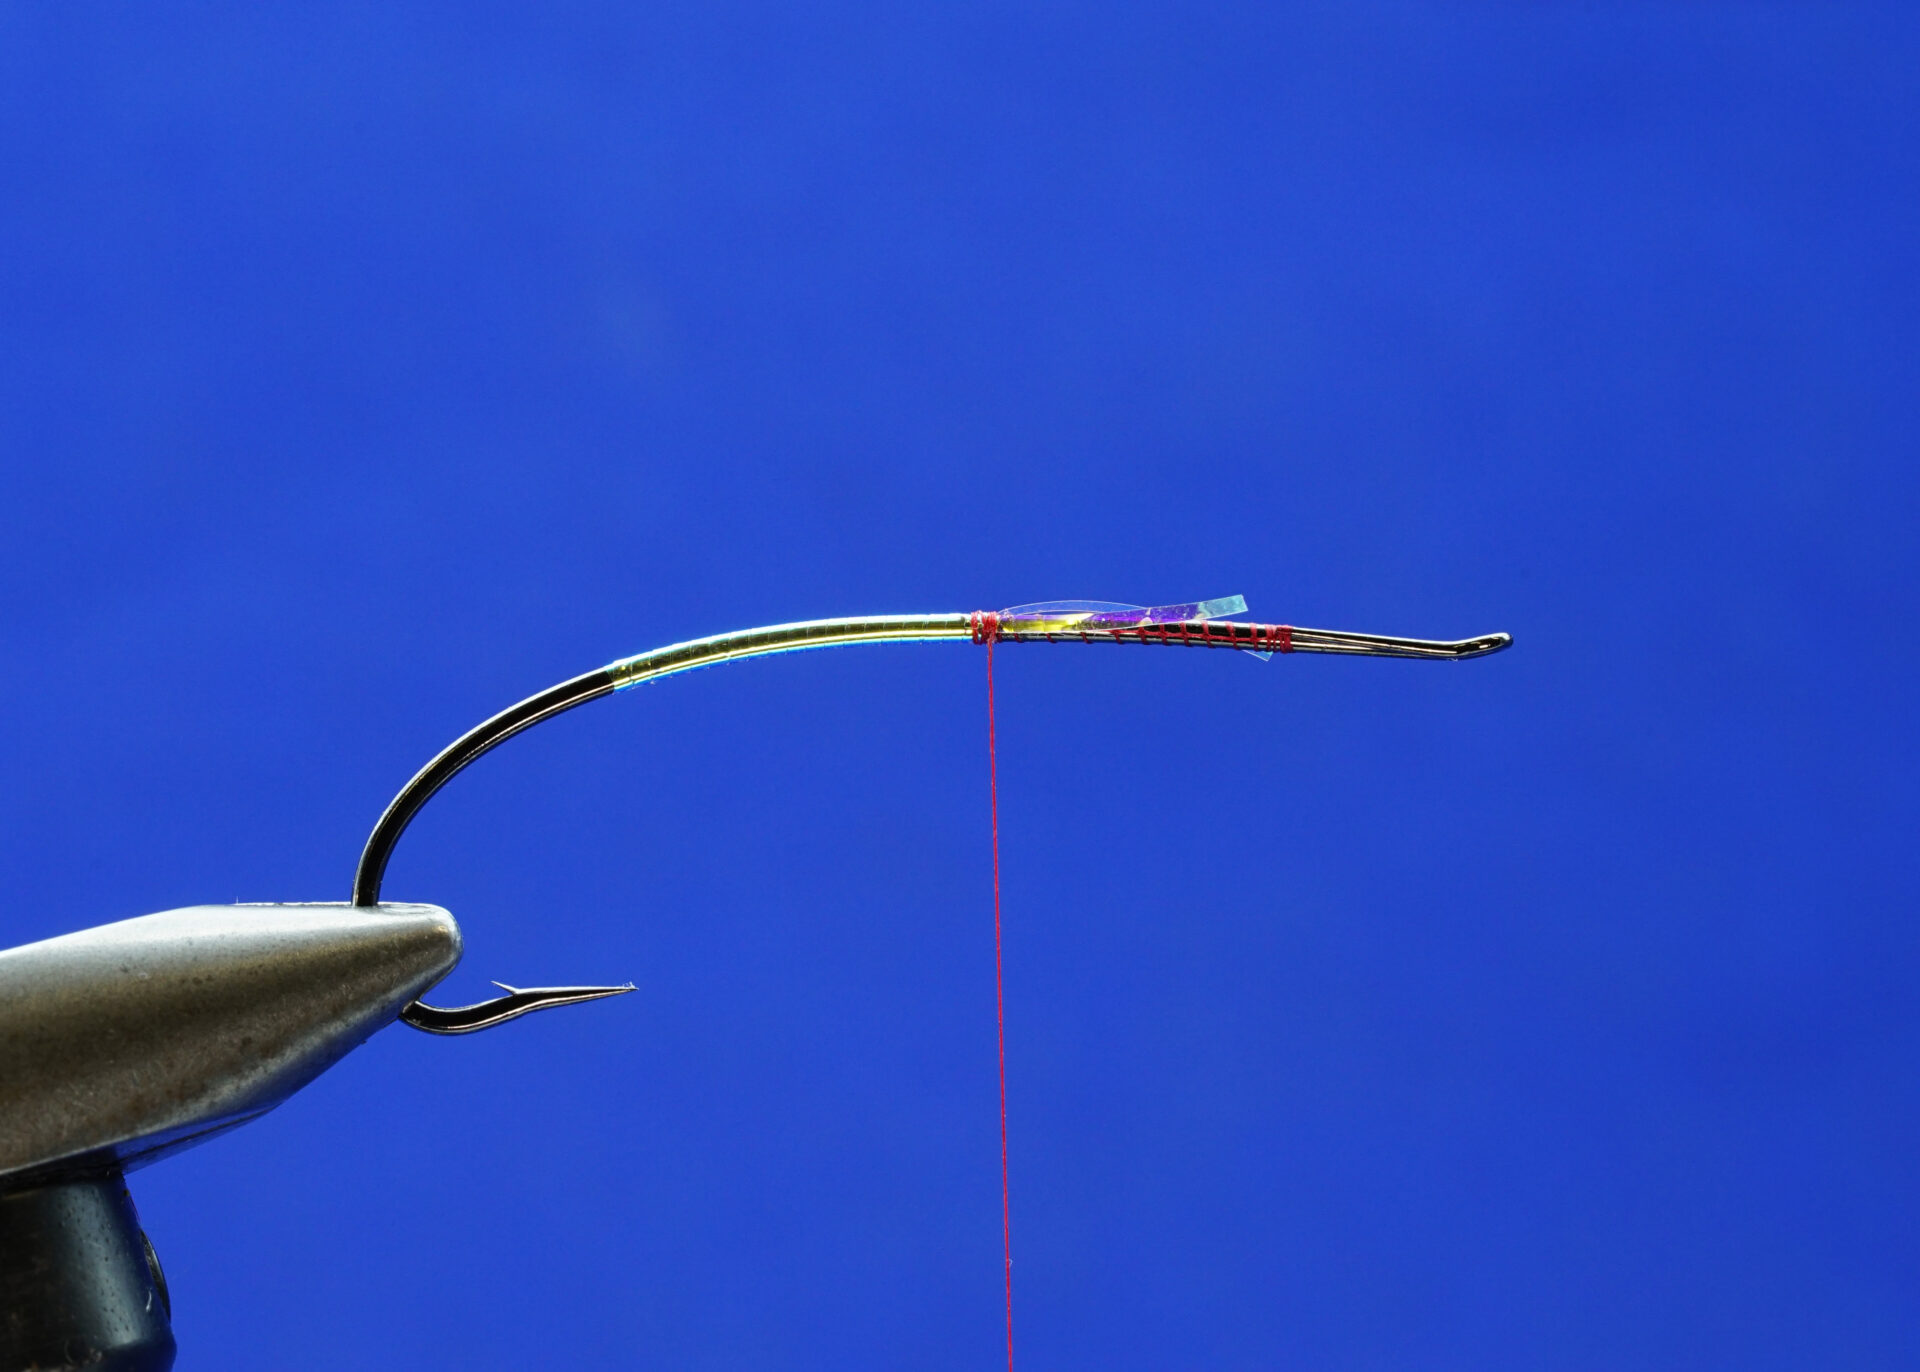 The Winter Spey: Step 1.
 - Tie in both the Mirage tinsel and oval tinsel ribbing, followed by the fluorescent pink floss at the mid-point of the hook.
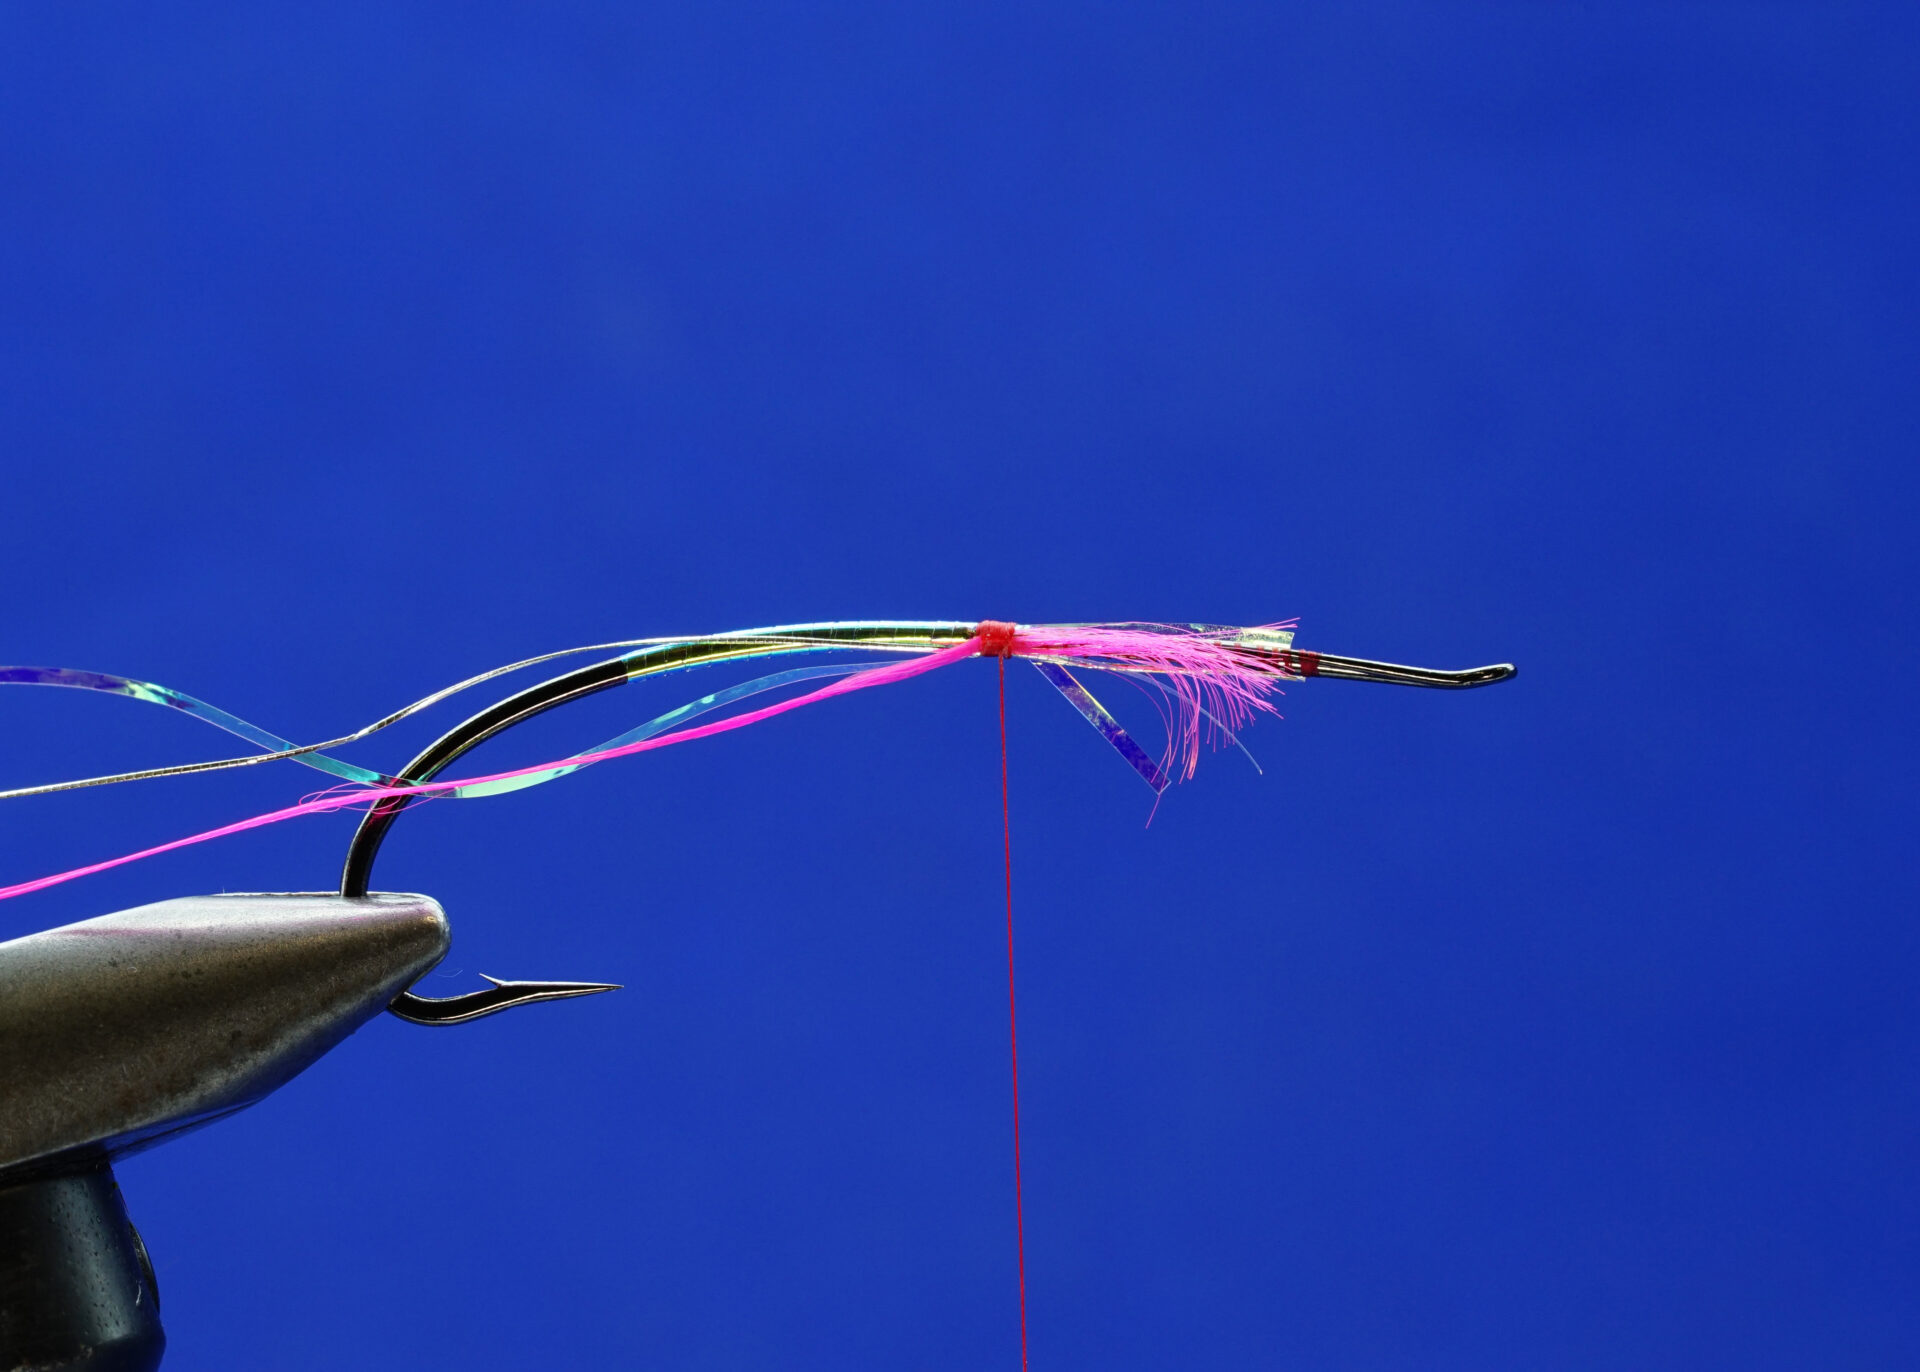 The Winter Spey: Step 2.
 - Form the rear body by wrapping the floss back down the hook using touching turns, securing both the Mirage and oval tinsel ribs in the process. Stop winding the floss at a point just forward of the hook point forming a neat, 3/16-inch to 1/4-inch tag. Wrap the floss forward over itself to complete the rear body section. Tie off the remaking floss at the mid-point of the shank and carefully trim the excess. Tie in the front body hackle by the tip at the mid-point of the hook. Return the tying thread to the mid-point of the shank.
 The Winter Spey: Step 3.
 - Dub a thin front body section from the mid-point to the rear of the hook eye return loop. Wind the Mirage tinsel forward over both body sections using four to six even-spaced wraps.

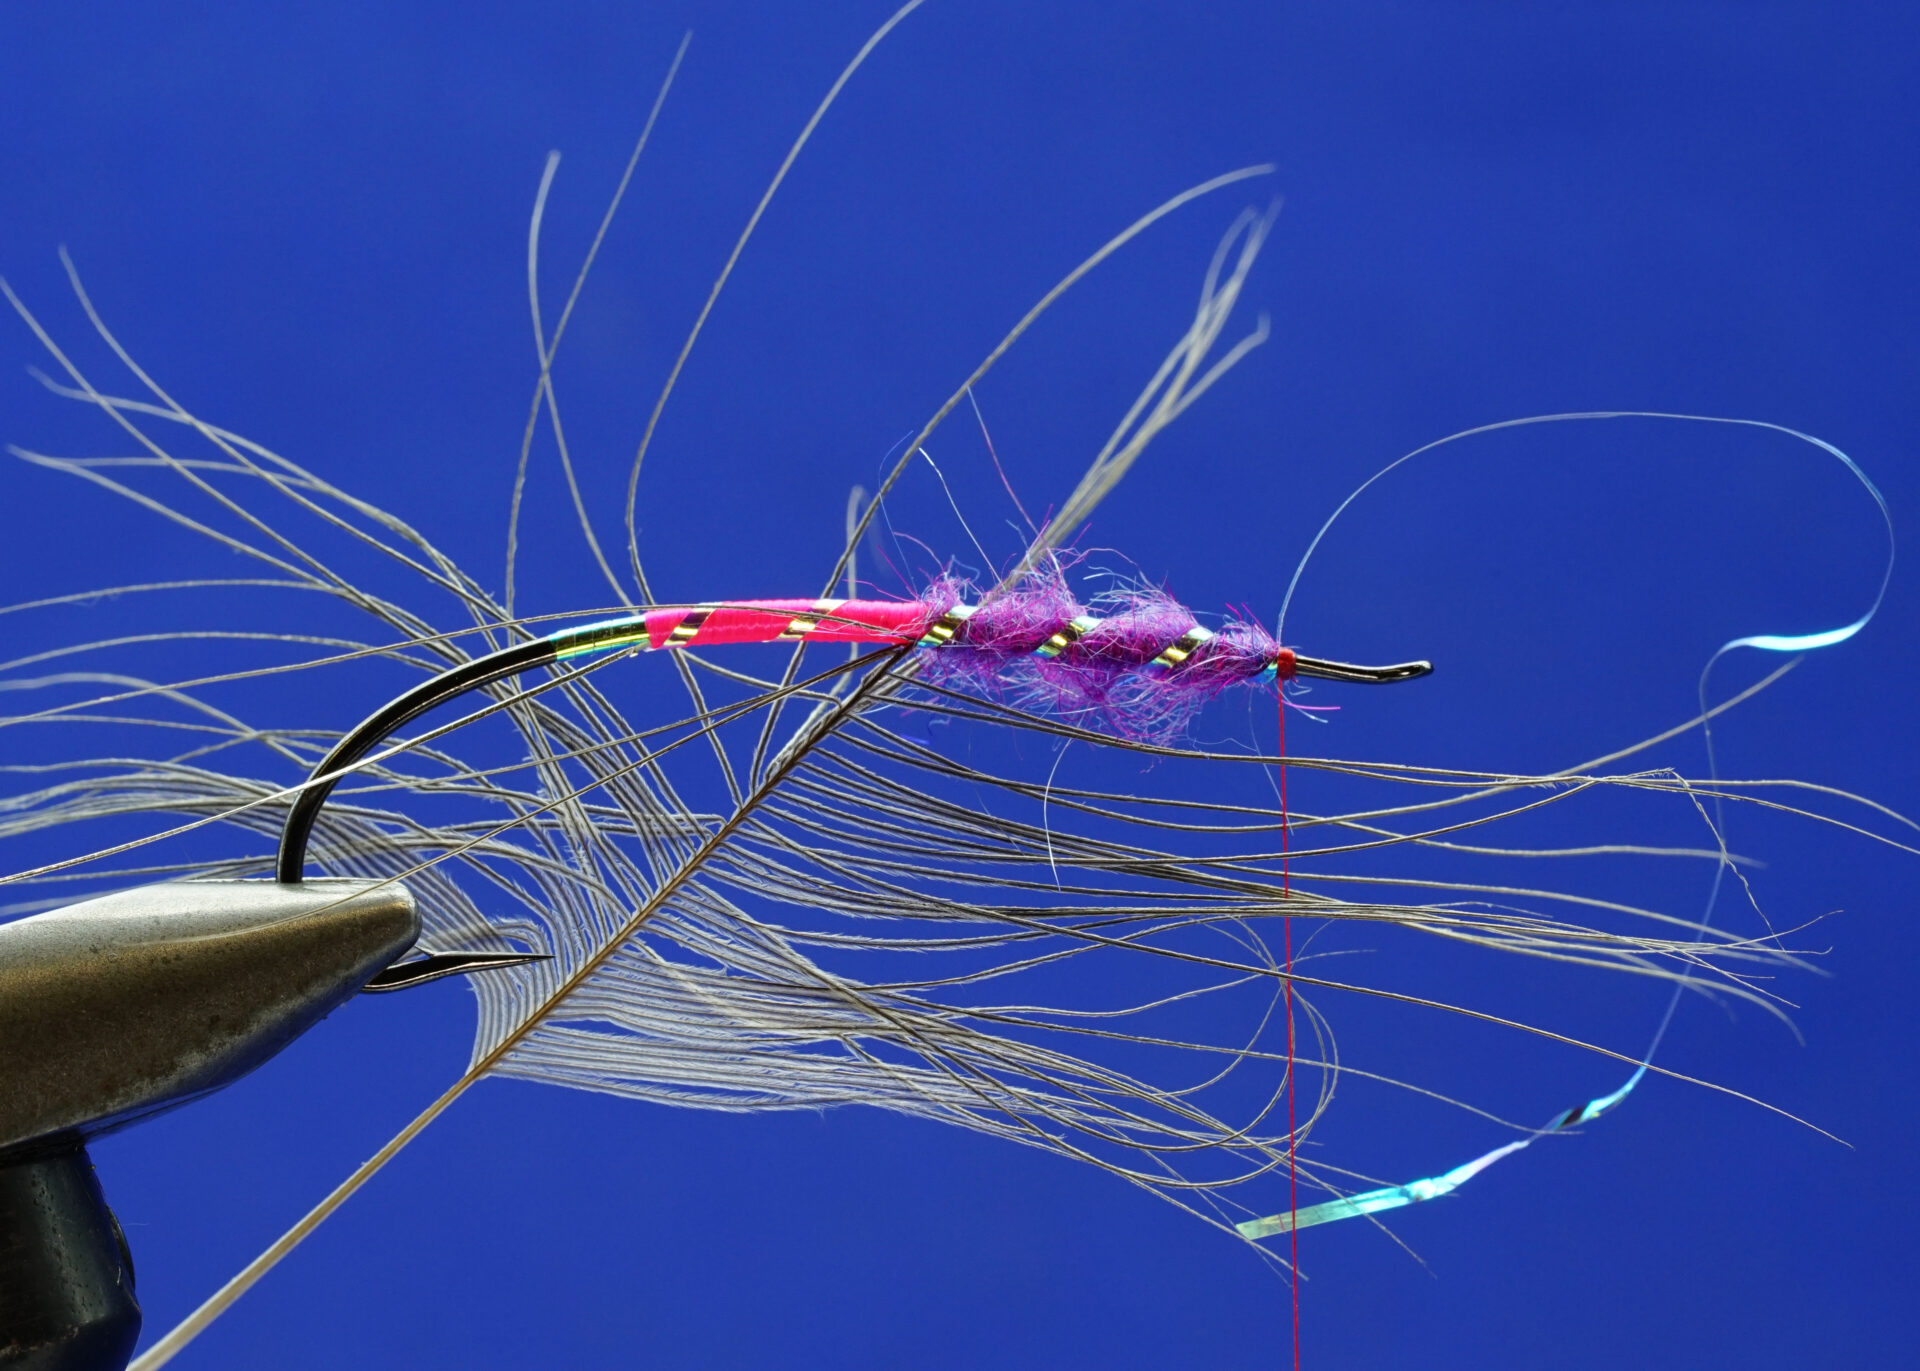 The Winter Spey: Step 4.
 - Wind the oval tinsel forward over both body sections so it butts up against the rear edge of the Mirage tinsel. When wrapping the ribs, you must maneuver the oval tinsel rib around the hackle. With both ribs in place, palmer the hackle over the front body section. Try to stay as close to the tinsel ribbing as close as possible. If the hackle feather is long enough, place one full wrap on the bare hook. Tie off and remove the excess hackle. Tie in the guinea hackle collar by the tip on the far side of the hook. Wind the guinea hackle directly in front of the body hackle one-and-one-half times to form a neat, sparse collar.
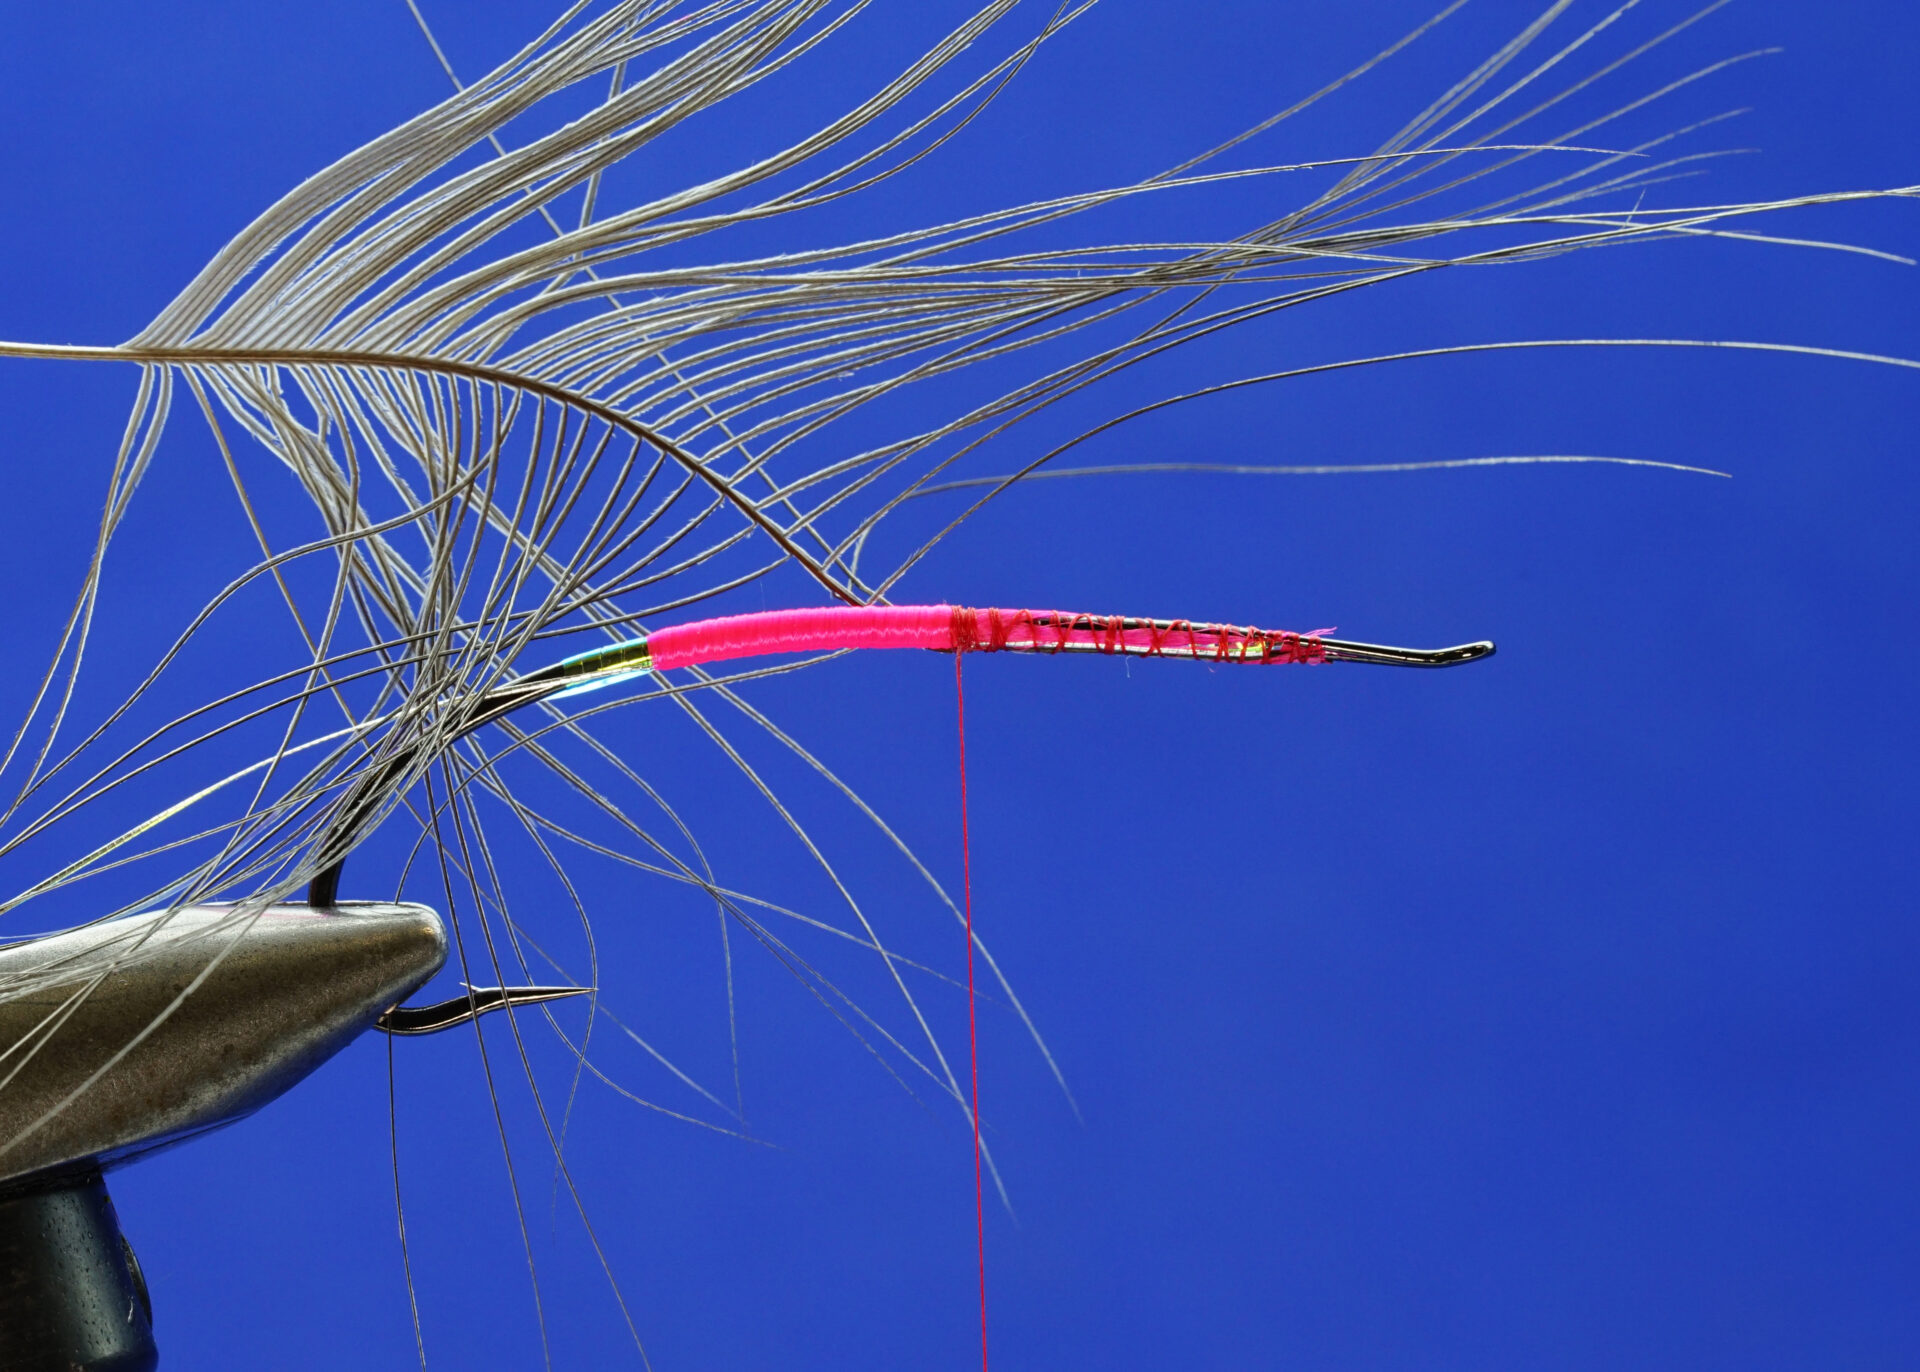
 The Winter Spey: Step 5.
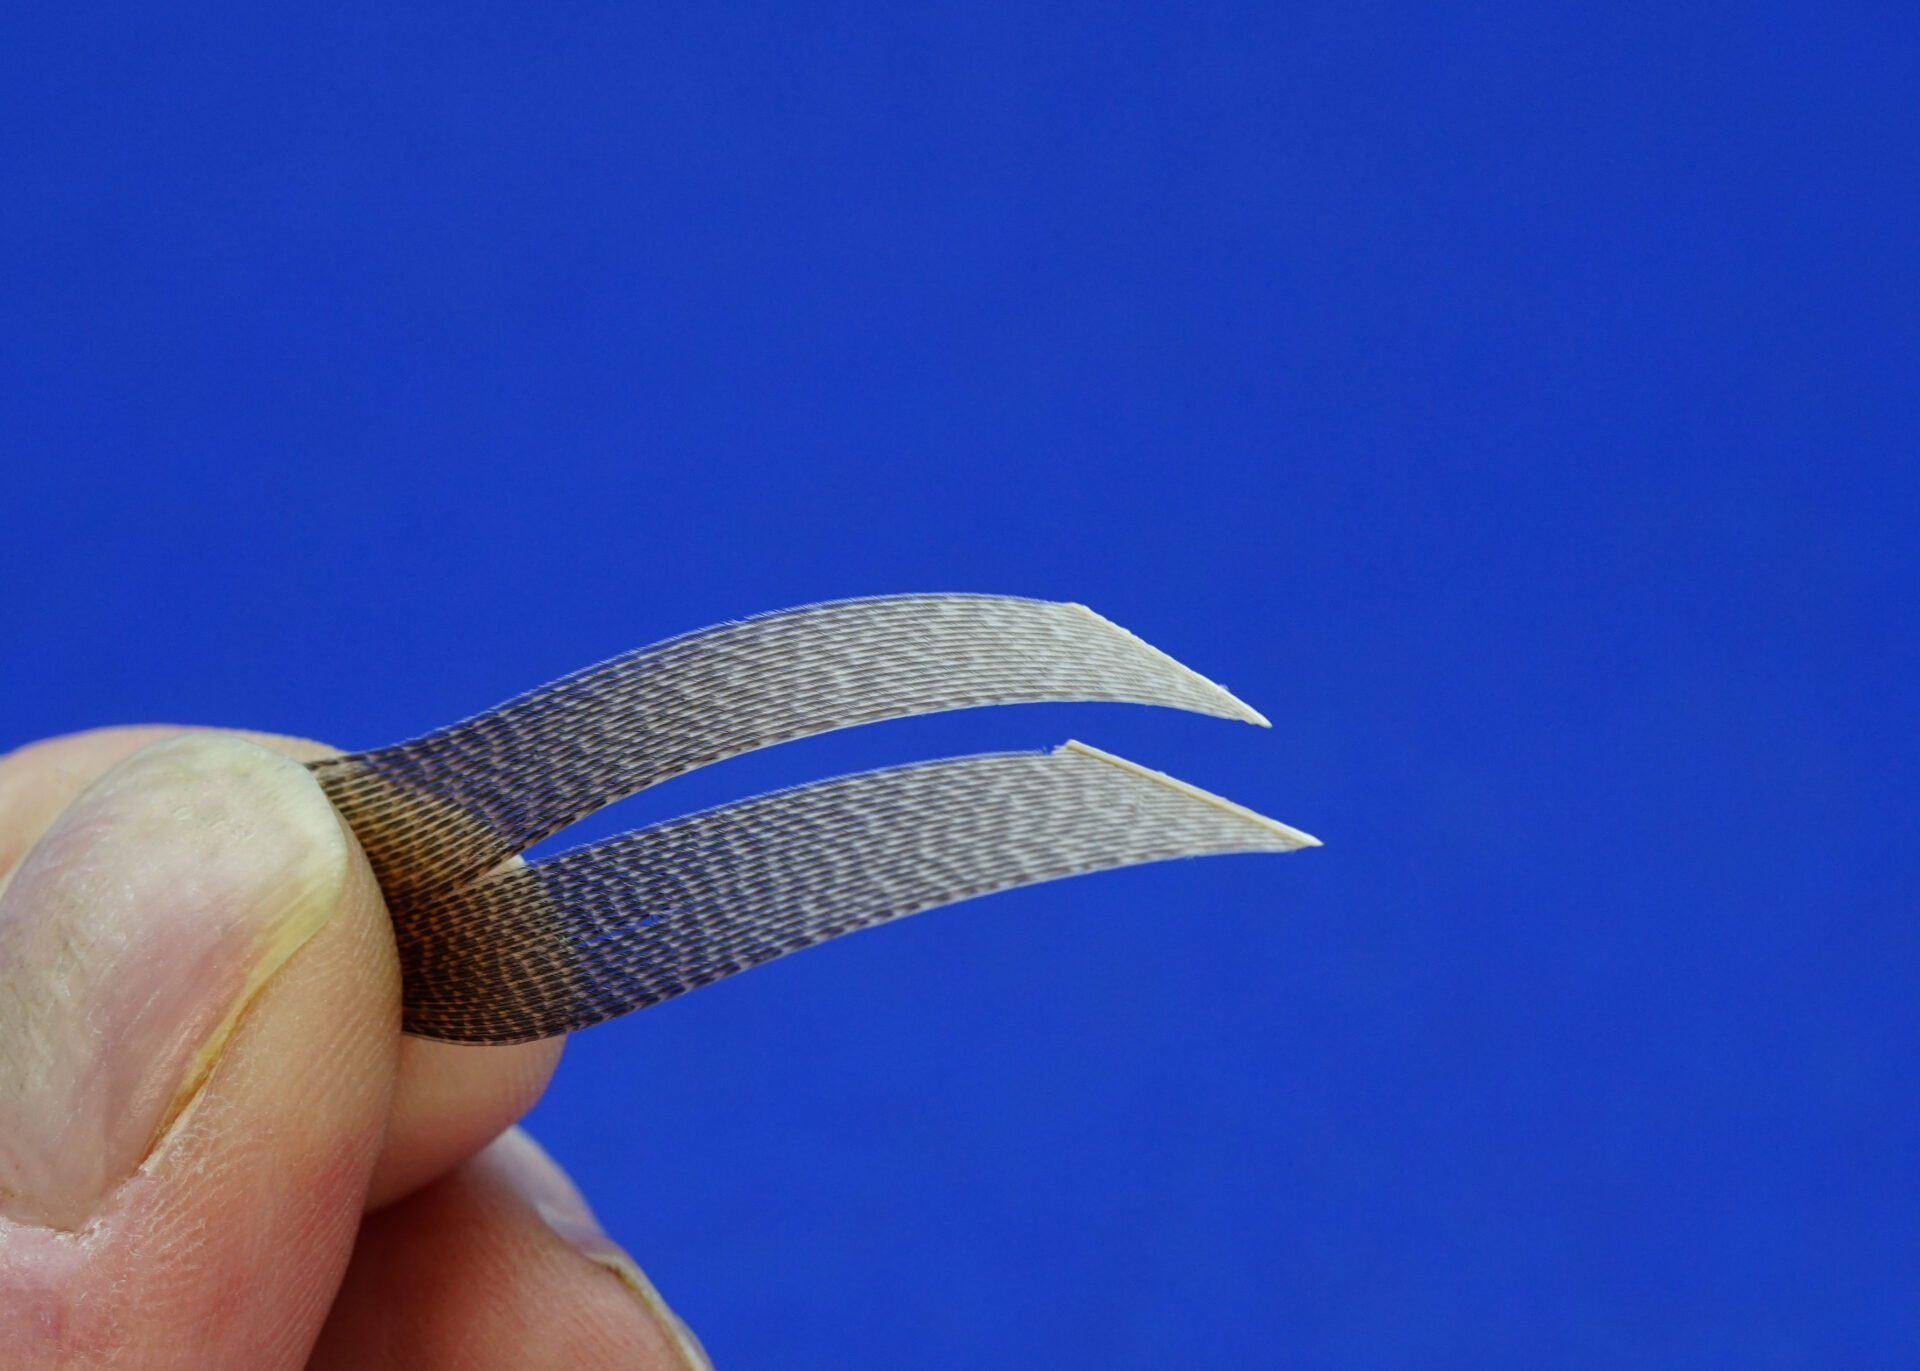
 - Select a left and right bronze mallard feather with matching colours and with fibres long enough for the size of the fly. Carefully isolate and trim two separate slips from the middle section of each feather. It is helpful to leave the fibres of each section attached to the stem. You should have four separate slips, two slips from the right feather and two slips from the left feather. Each slip should be about 3/16-of-an-inch wide.
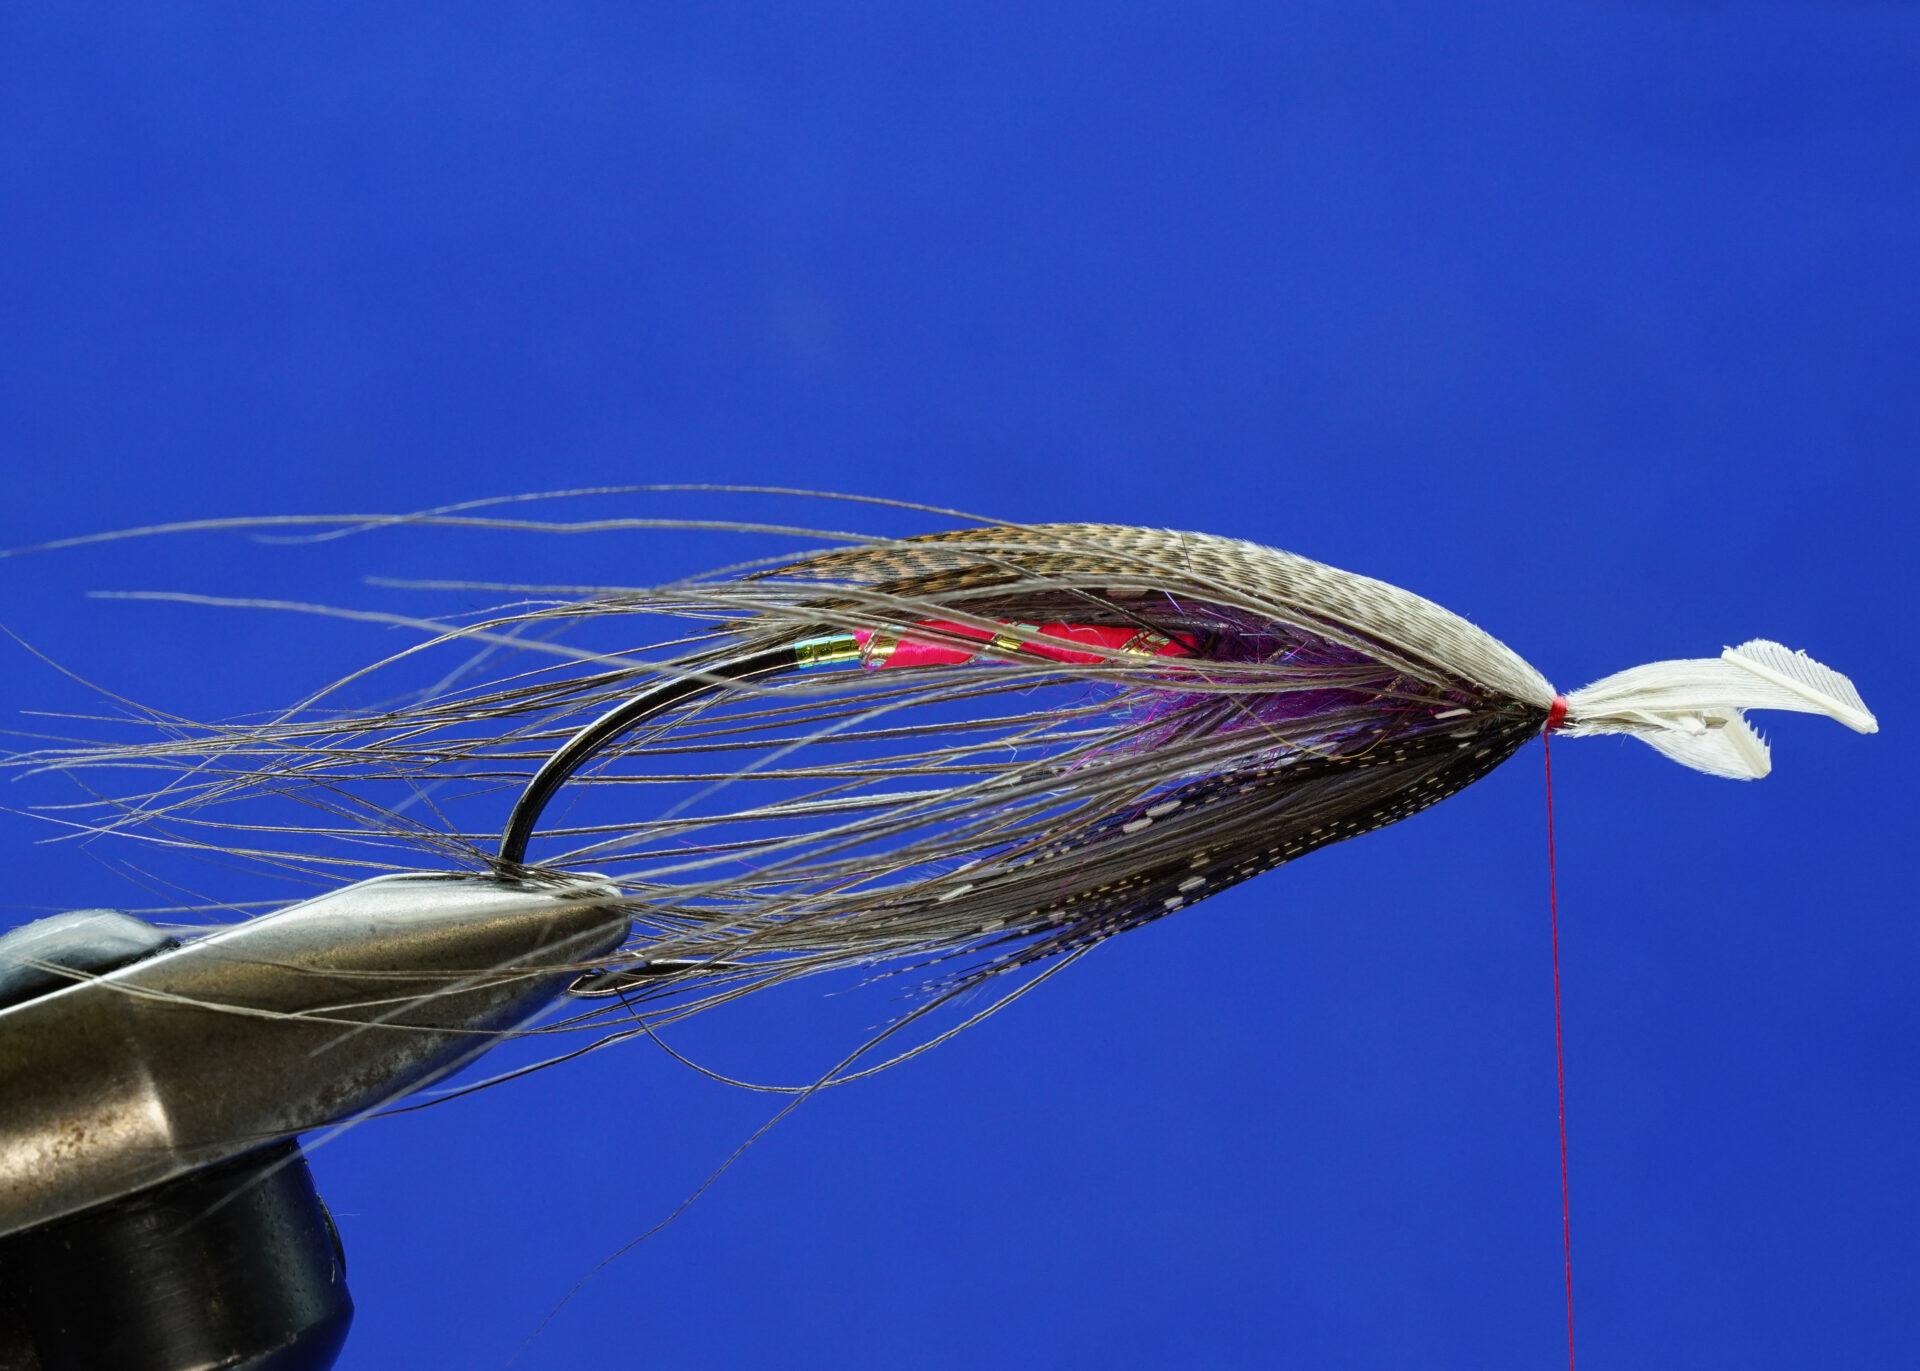
 The Winter Spey: Step 6.
 - With the thread hanging at the base of the guinea collar, take a left and right slip of the bronze mallard feather. Place them together, side by side, with the natural curve of the feather against each other and their tips even. Aligning them together in this fashion creates a roof once they are tied in. If you are a right-handed tyer, take the paired slips in your right hand and place them on top of the hook directly in front of the guinea hackle, so the tips reach back just past the hook barb. Pinch and hold the paired slips in place using your left thumb and forefinger. Secure them in place using a few tight thread wraps. Using the same process, tie in the second wing on top of the first wing making sure the tips are even. With both wing pairs tied in, secure them using no more than six firm wraps.
 The Winter Spey: Step 7.
 - Place a few temporary wraps under the wing butts. Trim the excess wing material using a nail clipper or a pair of ultra-sharp fine-point razor scissors. Unwind the thread wraps from under the wing butts. Placing the thread wraps under the wing butts helps ensure the wing doesn’t move during trimming. Using a minimum of wraps, build a neat, tiny, tapered head. Whip finish and remove the tying thread. Keep the finishing wraps to a minimum. Add two to three coats of good quality, high-gloss head cement to complete the fly.
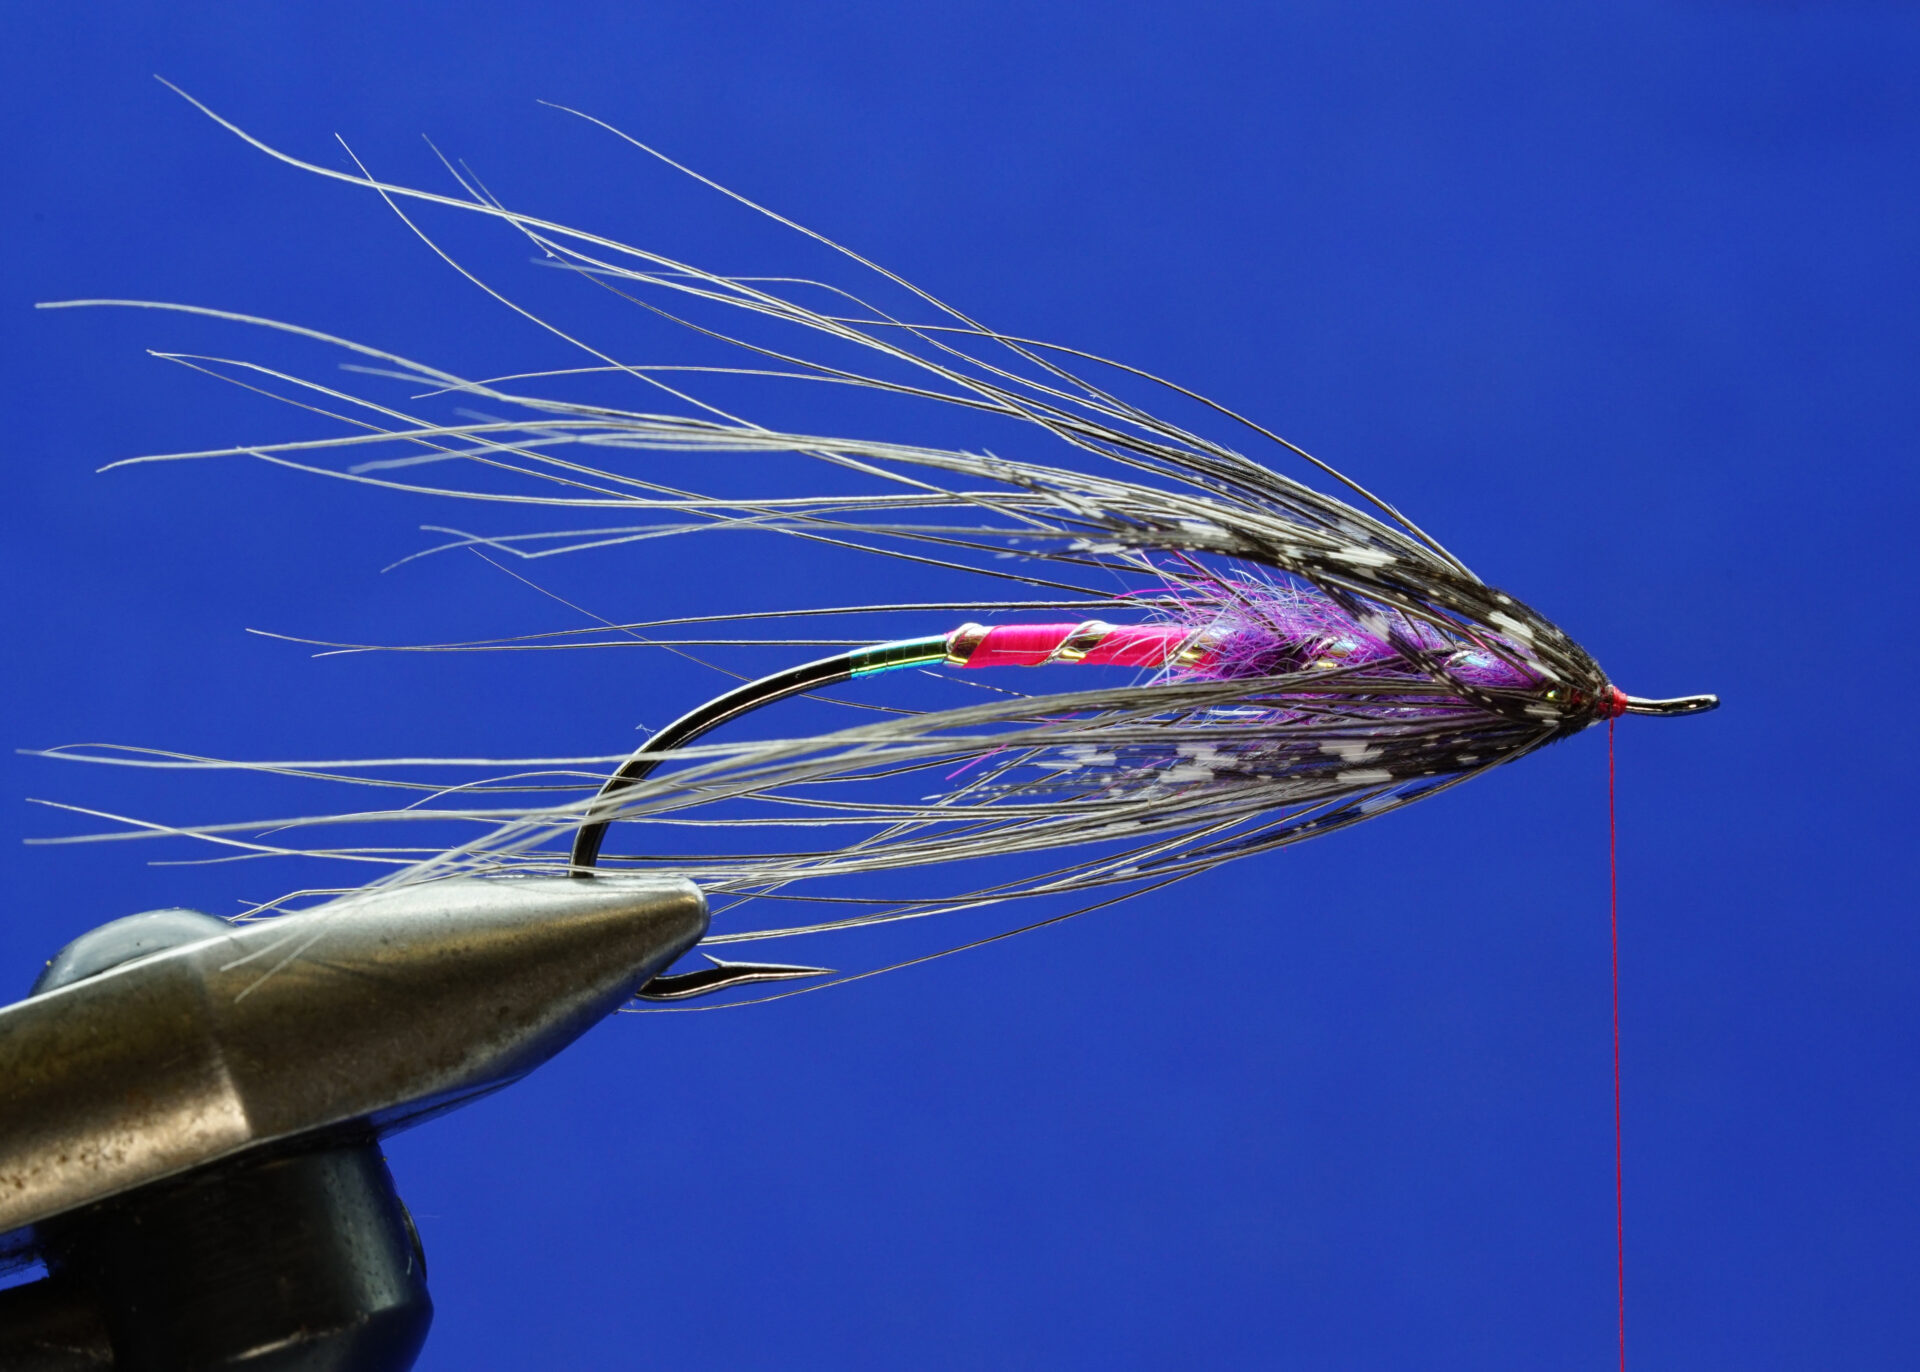
 The Winter Spey: Step 8.