The larger the food source we are trying to imitate, the more complex our fly patterns can become. For moving-water fly tyers, a stonefly nymph would be an excellent example. Dragonfly nymphs would be the stillwater parallel.
Advertisement
These large prey items offer many features to keep us busy at the vise for hours. Jointed legs, large heads, prominent eyes and distinct wing pads are just a few features to attract our attention. The temptation is to include all of these features and more into our designs. The danger, however, with complex patterns is the time they take to tie and, in our attempts to duplicate the naturals, patterns become stiff, lifeless offerings. These stiff, rigid, realistic flies look great at rest or in the palm of your hand, but, unfortunately, usually don’t present well. Trout, much to our frustration, often snub their noses at them. As it is often said, “There are flies for fish and flies for fly fishers.”
Advertisement
Many times, a simple, uncomplicated offering works best, since once a dragonfly nymph falls into the gunsights of a feeding trout, it often bolts for cover using its unique afterburner system. Startled dragon nymphs force water out of their gill chamber, located at the tip of their abdomens, as they scoot for safety using short, two to three-inch bursts. The time-proven Carey Special is an excellent example of a pattern that does an excellent job of suggesting a fleeing dragon nymph.
Trevor Tatarczuk’s Fly Foam Dragon utilizes a critical path approach to fly design. It is a simple pattern that can represent either a darner or sprawler nymph, depending on how you trim it. Once wet, the Fly Fur body springs to life, providing a convincing imitation that breathes and moves, which usually triggers aggressive, arm-jarring strikes.
Advertisement
Fly Fur is synthetic fur attached to a thin hide, similar in appearance to a Zonker cut rabbit fur strip. Synthetic fur strips are a popular choice with many streamer tyers for creating realistic heads or long, articulated Gamer Changer-style flies.
Taking advantage of his creative skills, Trevor realized that Fly Fur, in darker earth-toned colours such as brown and olive, makes an excellent material for a dragonfly nymph. Synthetic Fly Fur is easy to work with, simple to shape and sheds water, making it a trouble-free pattern to cast, regardless of size. Due to the buoyant properties common to most synthetics, Trevor’s Fly Fur Dragon sinks slowly, minimizing the risk of a hang-up, properties that allow you to work his Fly Fur Dragon in and around weed beds, rock piles, sunken logs and other dragonfly haunts.
Trevor’s dragon takes no time to tie. After covering the shank with tying thread, Trevor coats the wraps with brushable superglue. Next, he removes approximately half-an-inch of fur from the hide at one end of the Fly Fur strip. Once trimmed, he ties it in by the exposed hide at the rear of the hook, fur tips pointing down. With the fur strip in place, Trevor winds it forward, hide side against the shank. Tying in the prepared strip fur side down factors in the 180-degree rotation of the first wrap, so the hide wraps against the glue-covered shank, the synthetic fur radiating outward.
As he winds forward, Trevor places each wrap directly in front of the preceding wrap, while sweeping the fur back to avoid trapping any fibres. Once he has reached the three-quarters point on the hook, Trevor ties off and trims the excess fur strip. In less than a few seconds, the body on the Fly Fur Dragon is complete. All that’s left to do to finish it off is trim it to shape – long and slender to suggest a darner nymph or squat and spider-like profile of a sedentary sprawler nymph. No matter the body shape he is trying to suggest, Trevor trims the body flush top and bottom. How much or little he trims the sides determines the body profile.
When trimming the body to shape for a darner nymph, keep in mind that the widest point on the natural nymphs is their head and mid-portion of the abdomen. Don’t spend too much time trimming or remove too much material. Once saturated, Fly Fur compresses and breathes, further suggesting the look of a natural nymph.
With the body shaped, Trevor saves the fur trimmings as they make excellent dubbing. Trevor dubs them around the mono eyes, forming a distinct dragonfly nymph head that matches the body colour.
Trevor uses medium-sized red mono eyes on his dragon to provide a point of attraction that offers a buoyant alternative to lead dumbbell eyes or bead chain. The sinister red eyes also complement the aggressive nature of a dragon nymph.
Pre-made red mono eyes aren’t always easy to find, but you can easily colour a pair of lighter, olive eyes using red nail polish, UV resin or a permanent marker. Standard, black mono eyes also work.
Trevor’s Fly Fur Dragon is an excellent example of a less-is-more approach to pattern design that contains all of the key elements common to any successful dragon nymph pattern. I have already added several Fly Fur Dragons in both darner and sprawler configurations to my stillwater fly box.
How to Tie A Fly Fur Dragon
Designed By Trevor Tatarczuk
- Hook: darner: 3XL nymph hook (#6-#8); sprawler: 2XL nymph hook (#8-#10)
- Thread: 140 Denier, 6/0 or Gel Spun, colour to compliment Fly Fur
- Body: Fly Fur, brown or olive, clipped to shape
- Leg: Sili Legs, colour to compliment body
- Head: Fly Fur dubbing, brown or olive
- Eyes: Mono eyes, medium, red
Tying Instructions
- Tie in thread behind the hook eye. Wrap the tying thread down the hook shank, stopping short of the hook bend. Place an additional three to four wraps of thread on top of each other to build a small thread dam. Prepare a four-inch piece of Fly Fur by trimming a quarter inch of the fur away from the base. Tie in the prepared Fly Fur by the exposed base directly in front of the thread dam with a few loose wraps. Gradually bind the tag down with progressively tighter wraps to lock it in place. Advance the tying thread forward to hook eye. Tie in mono eyes on top of the hook with figure-eight wraps about one-eighth inch back from the hook eye. Coat the stem of eyes with brushable superglue for added security.
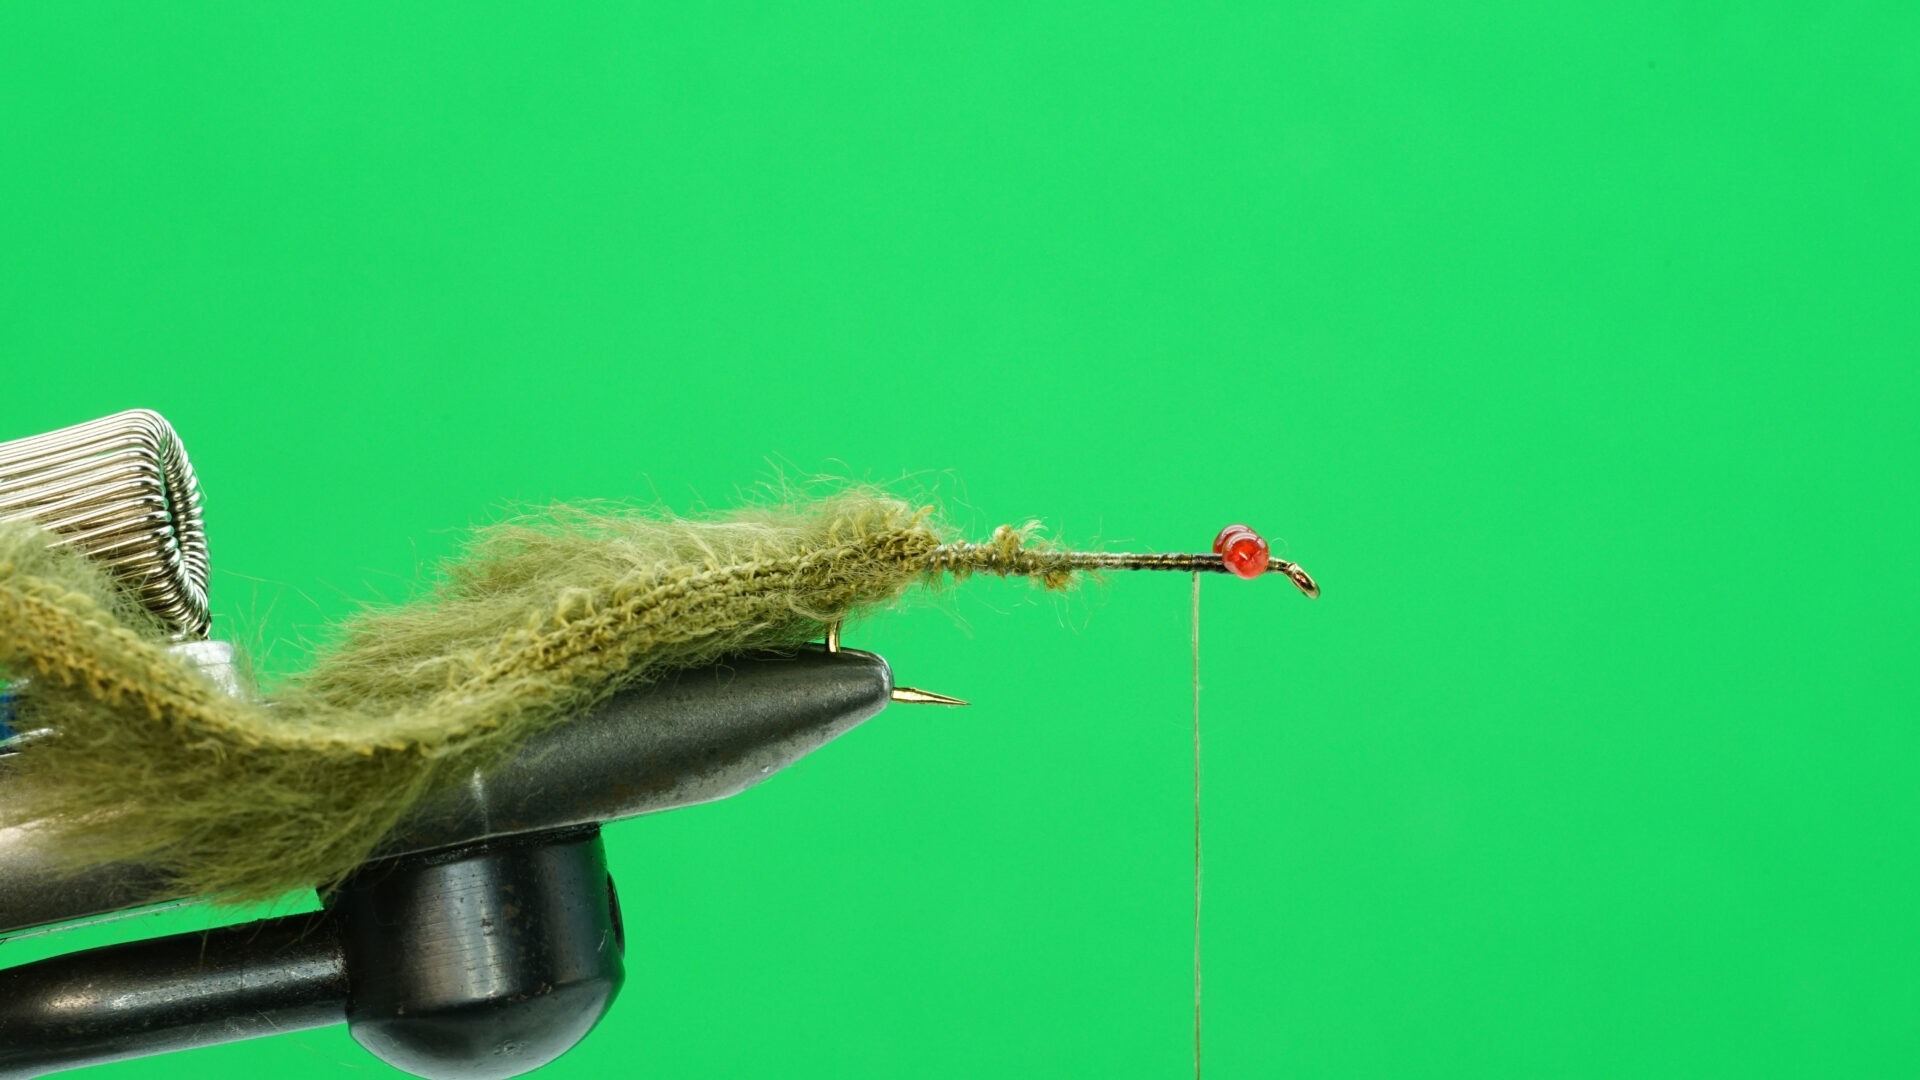 The Fly Fur Dragon: Step 1.
- Coat the thread base with brushable superglue. Before the glue dries, wrap the Fly Fur forward using tight-touching turns, hide side against the shank. Stroke the fibres back with each wrap to avoid trapping any errant fibres. Tie off the Fly Fur right behind the mono eyes and remove the excess. Stroke the fibres back at the tie-off area and secure in place with a few wraps of tying thread.
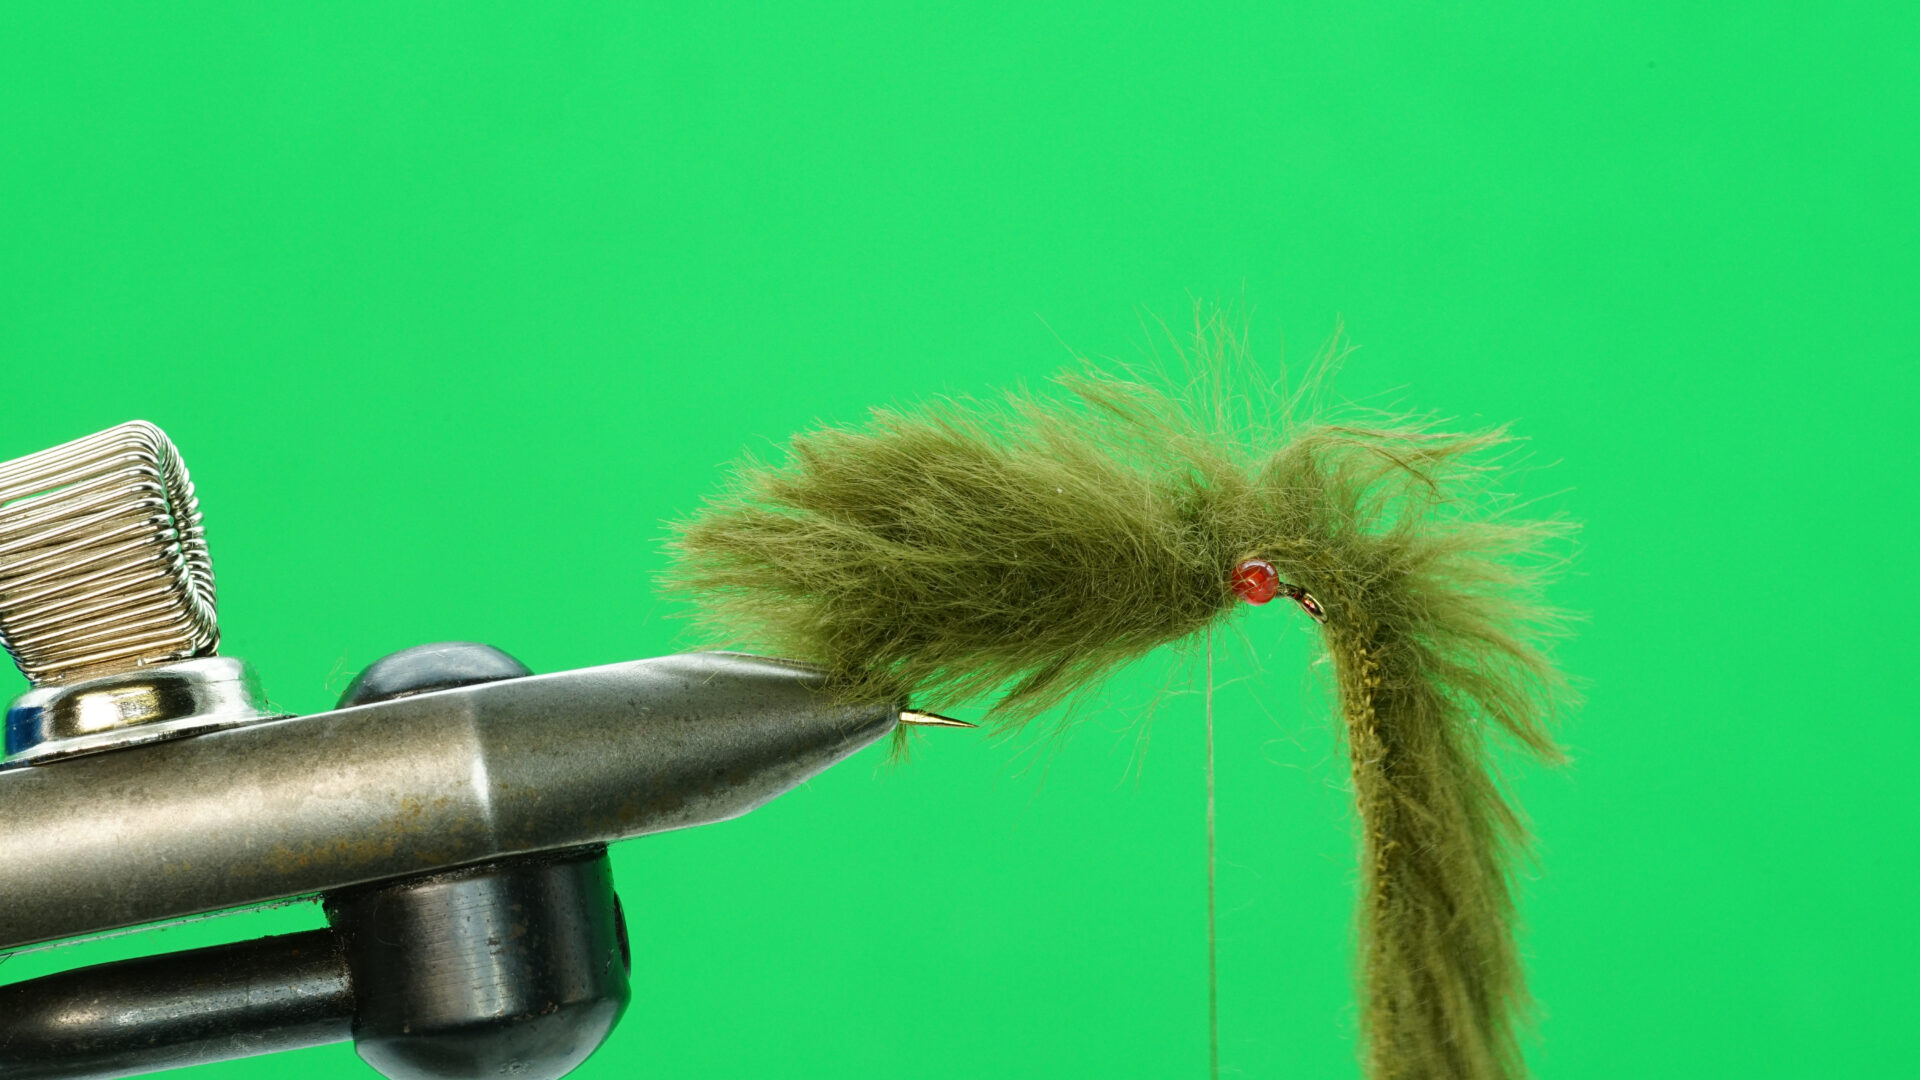 The Fly Fur Dragon: Step 2.
- Trim the Fly Fur body to shape. Begin by trimming the top and bottom of the fly flat, as close as possible to hook shank. Once the body has been trimmed flat top and bottom, begin cutting the sides of the fly to match the body profile of the dragon nymph you are trying to suggest. Hourglass-shaped for a Darner. Squat and spider-like for a Sprawler. If you are trying to suggest a Darner nymph, trim the body to a gradual taper, front to rear. A rotary vice is handy for the trimming as you can rotate the fly and better see what you’re cutting. Don’t over trim. Once the body is wet, the fibers meld together to suggest the body of a natural dragon nymph.
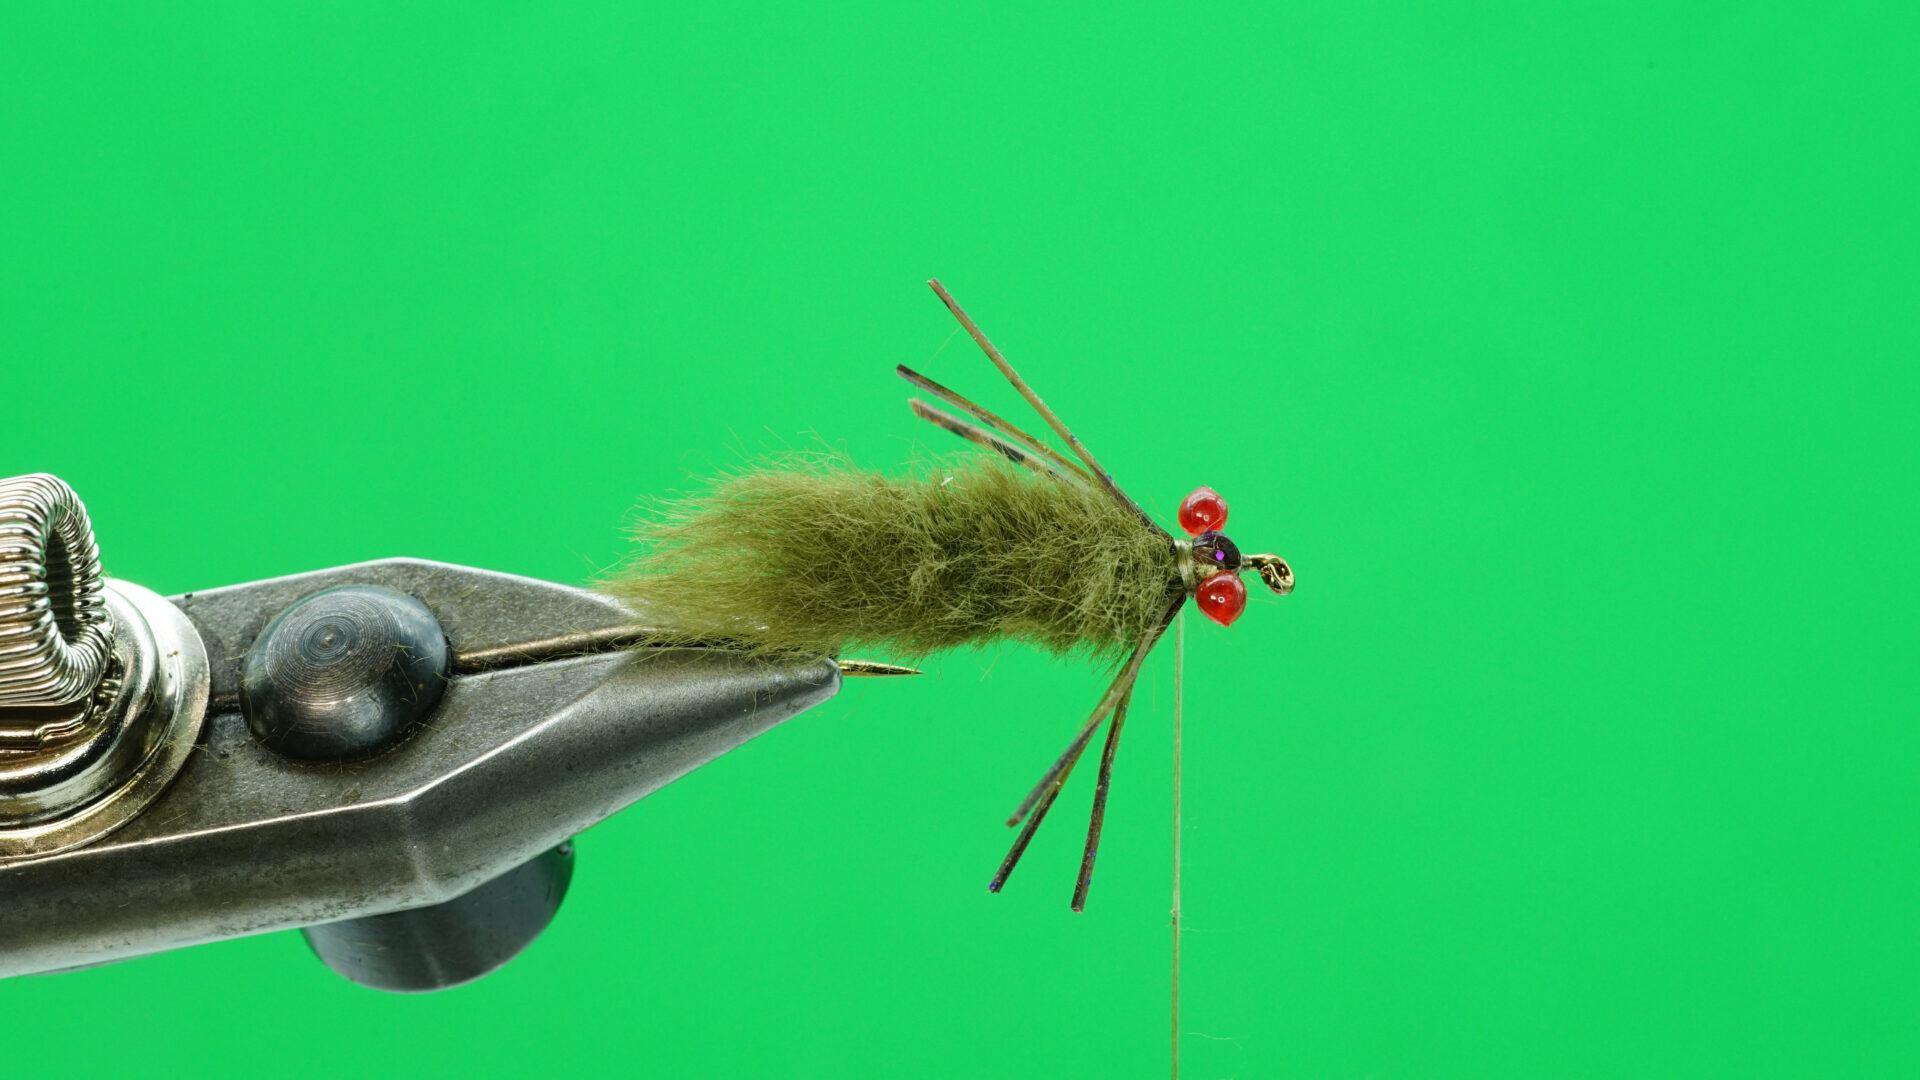
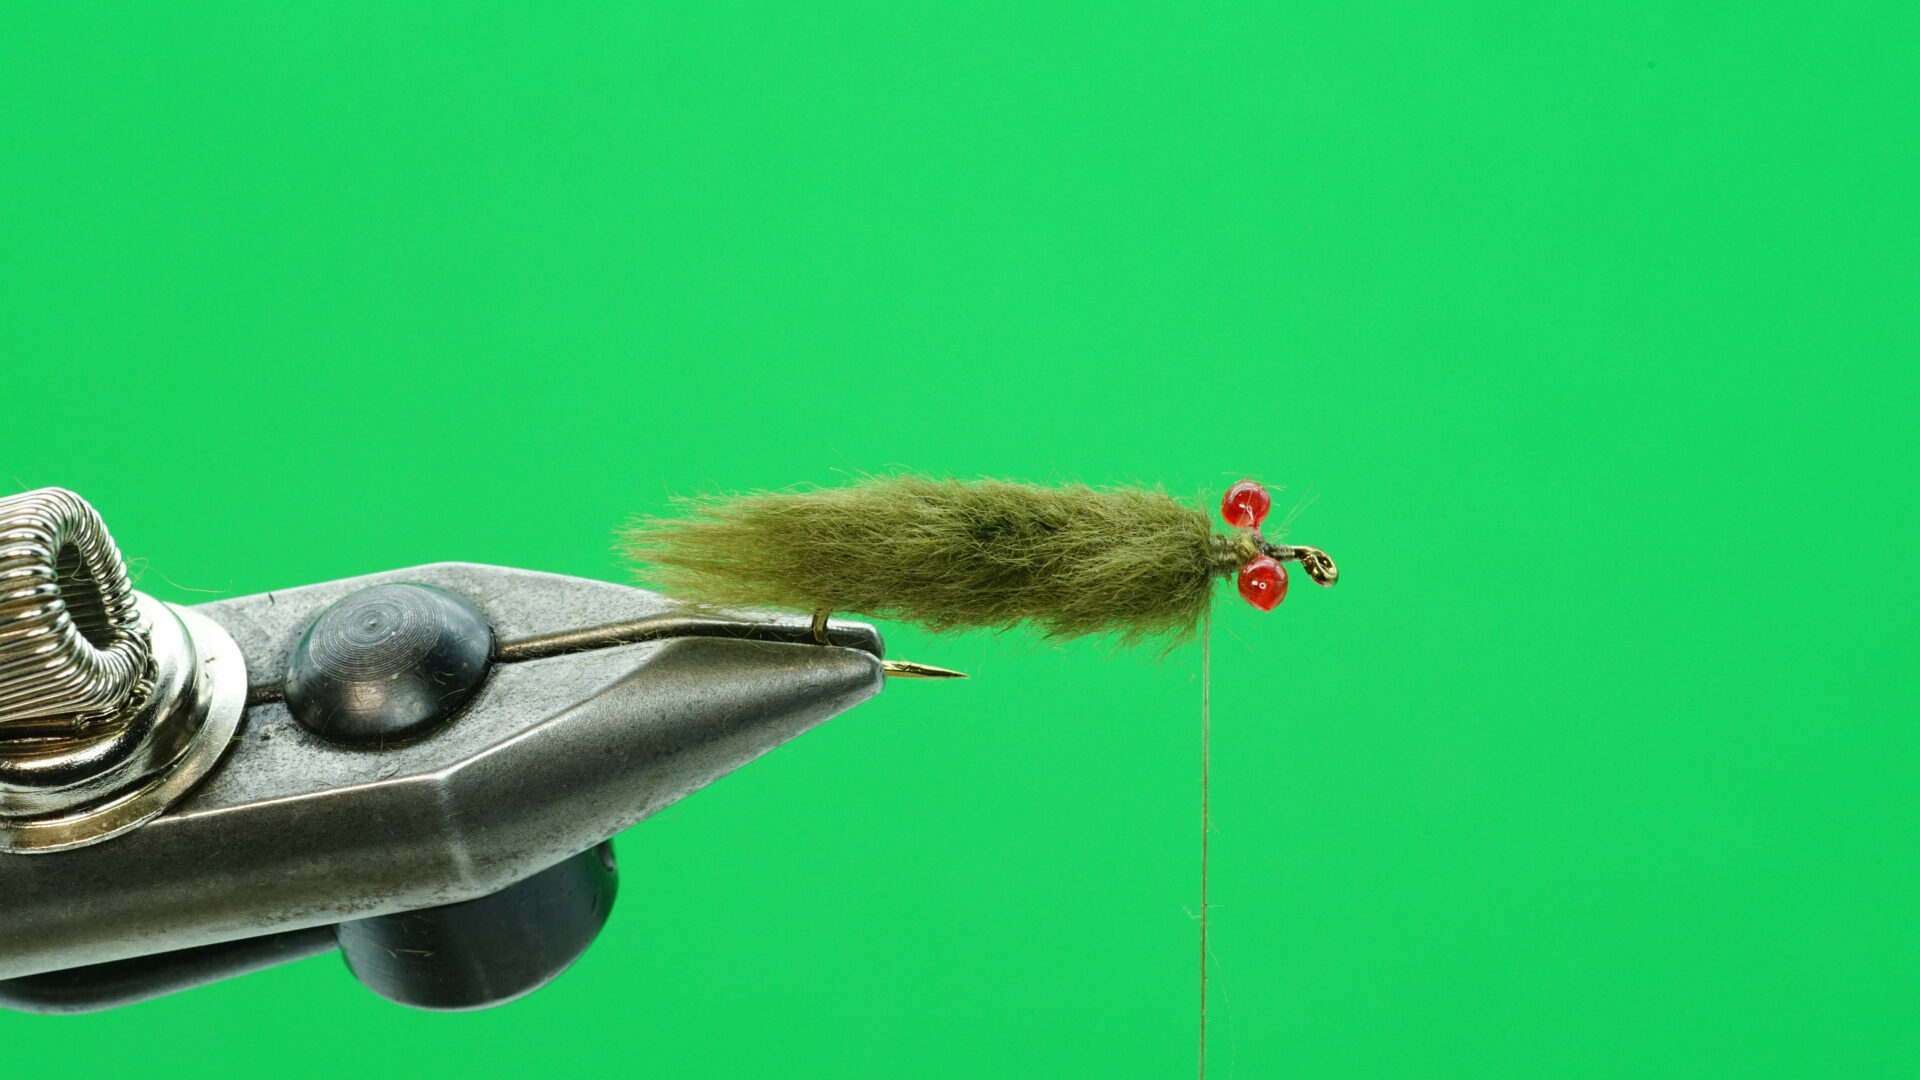 The Fly Fur Dragon: Step 3.
- With the body trimmed to the desired shape, tie in three strands of Sili Legs directly behind the eyes. Ensure there are equal amounts of leg material hanging on each side of the hook. Secure the legs in place, three legs per side, using tight, figure-eight wraps. Keep the initial leg length long. With the legs secured, gather them up, three on each side, perpendicular to the hook shank. Using a single cut, trim them, approximately two-thirds of the finished pattern’s overall length.
 The Fly Fur Dragon: Step 4.
- Take some of the remaining Fly Fur trimmings and twist them onto the thread, forming a slender dubbing noodle. Weave the dubbing noodle in and around the mono eyes using figure-eight wraps to build up a neat, proportional head.
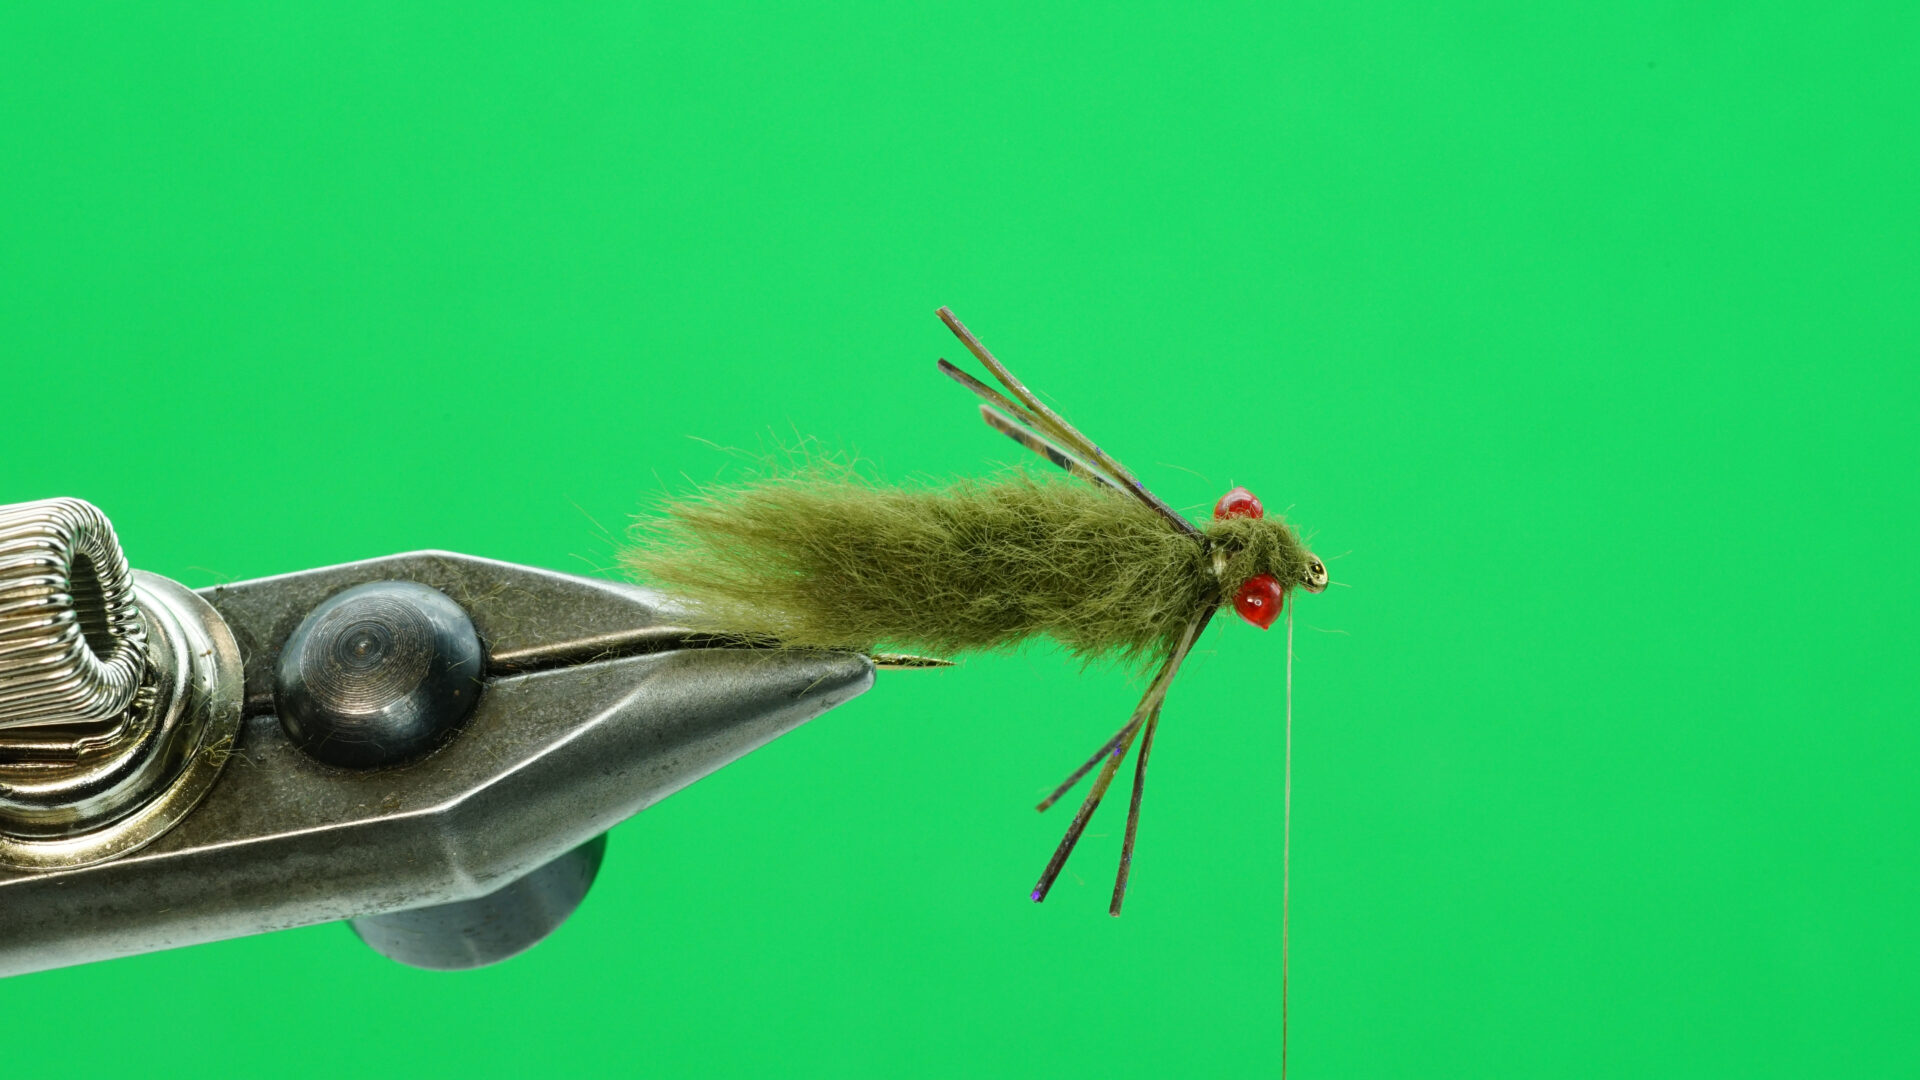 The Fly Fur Dragon: Step 5.
- Place a few additional wraps of dubbing behind the eyes to finish the head. Coat a short length of thread with brushable superglue. Wind the coated thread behind the head. Whip finish behind the head and remove the tying thread.
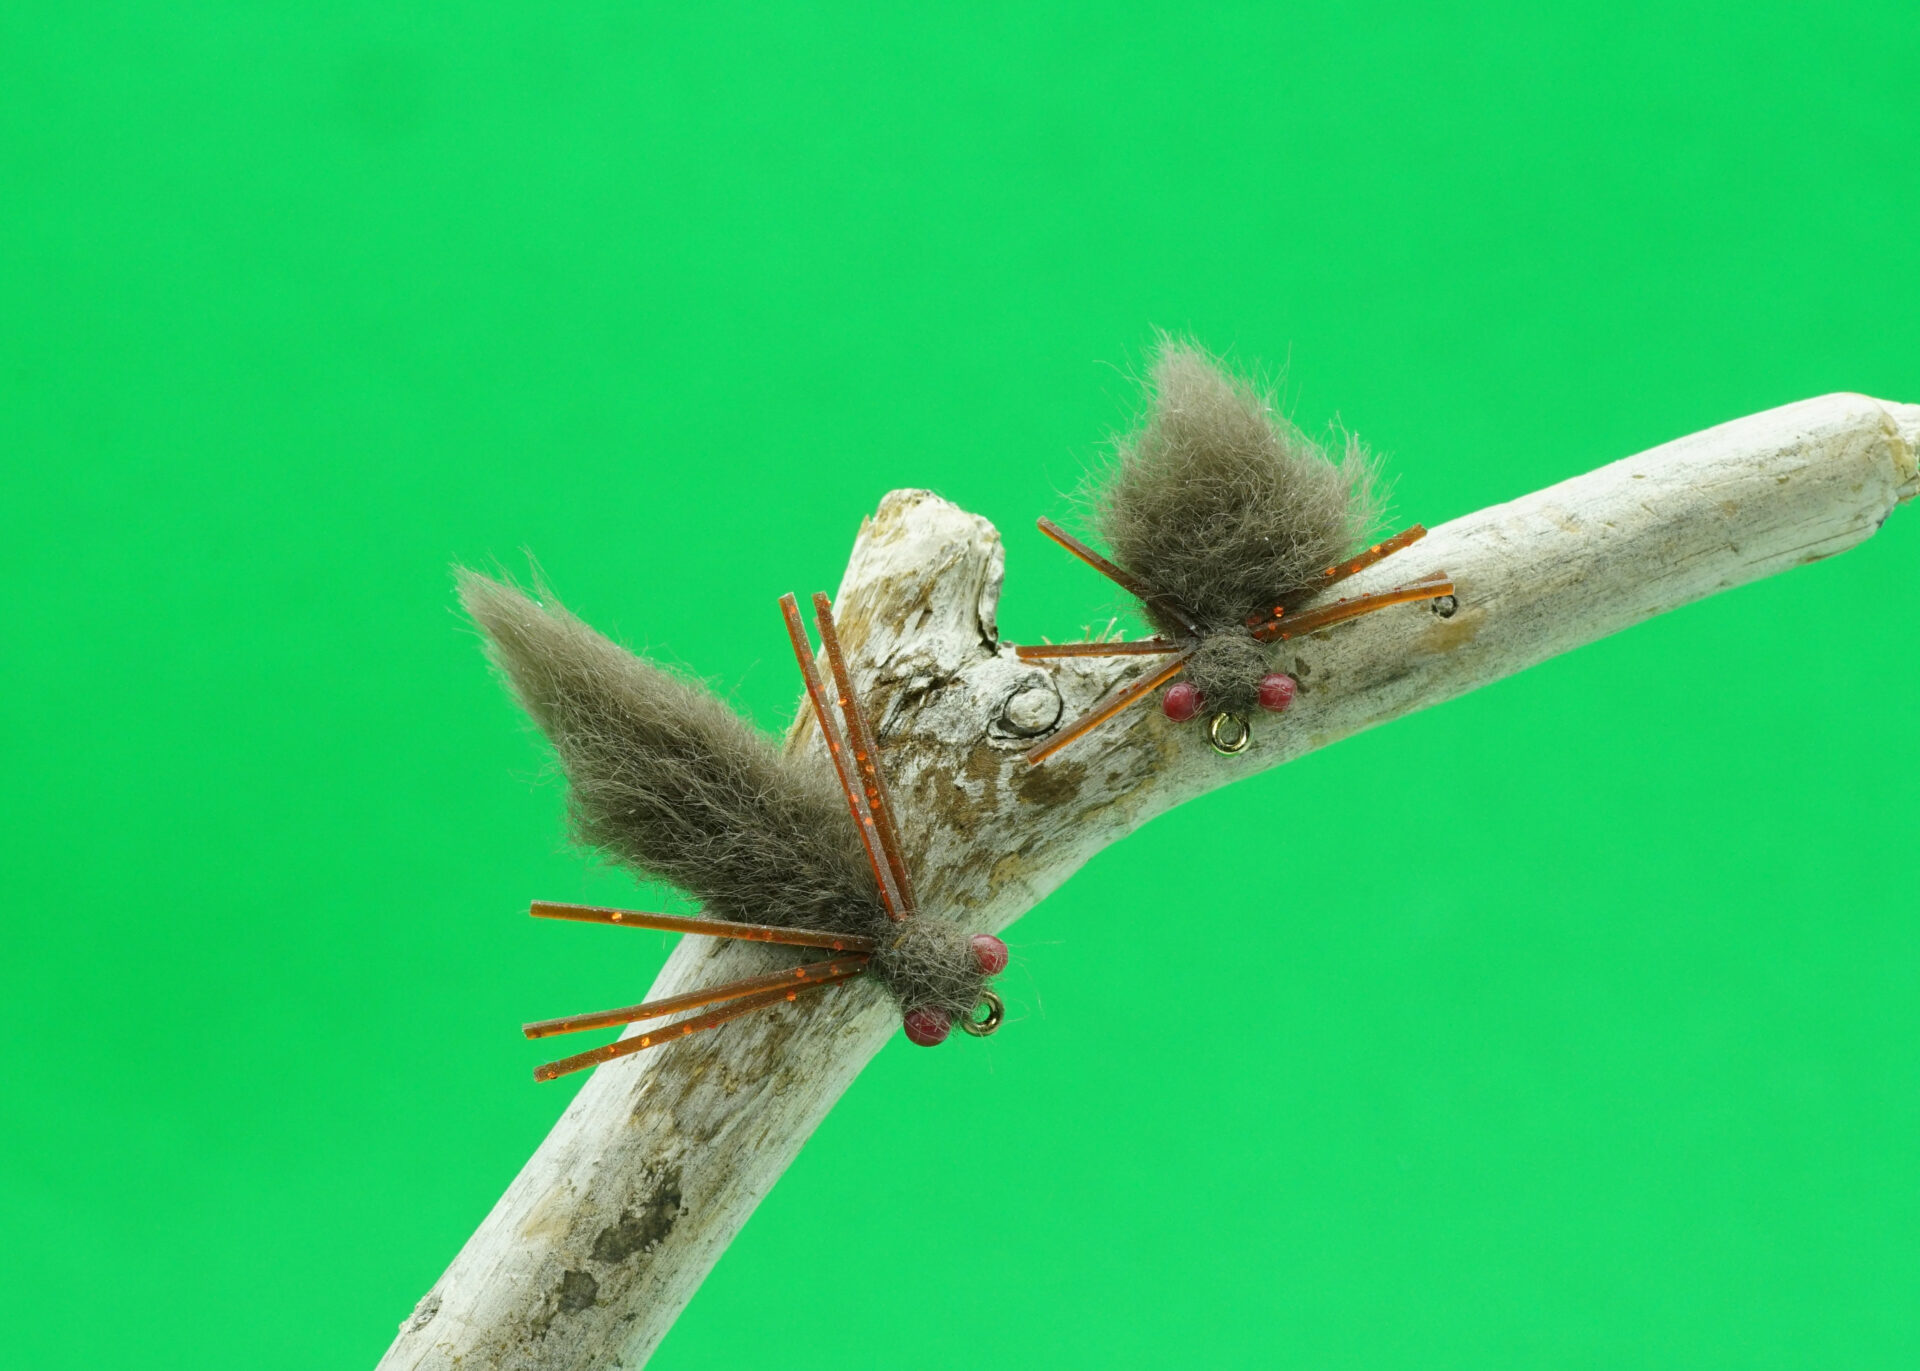
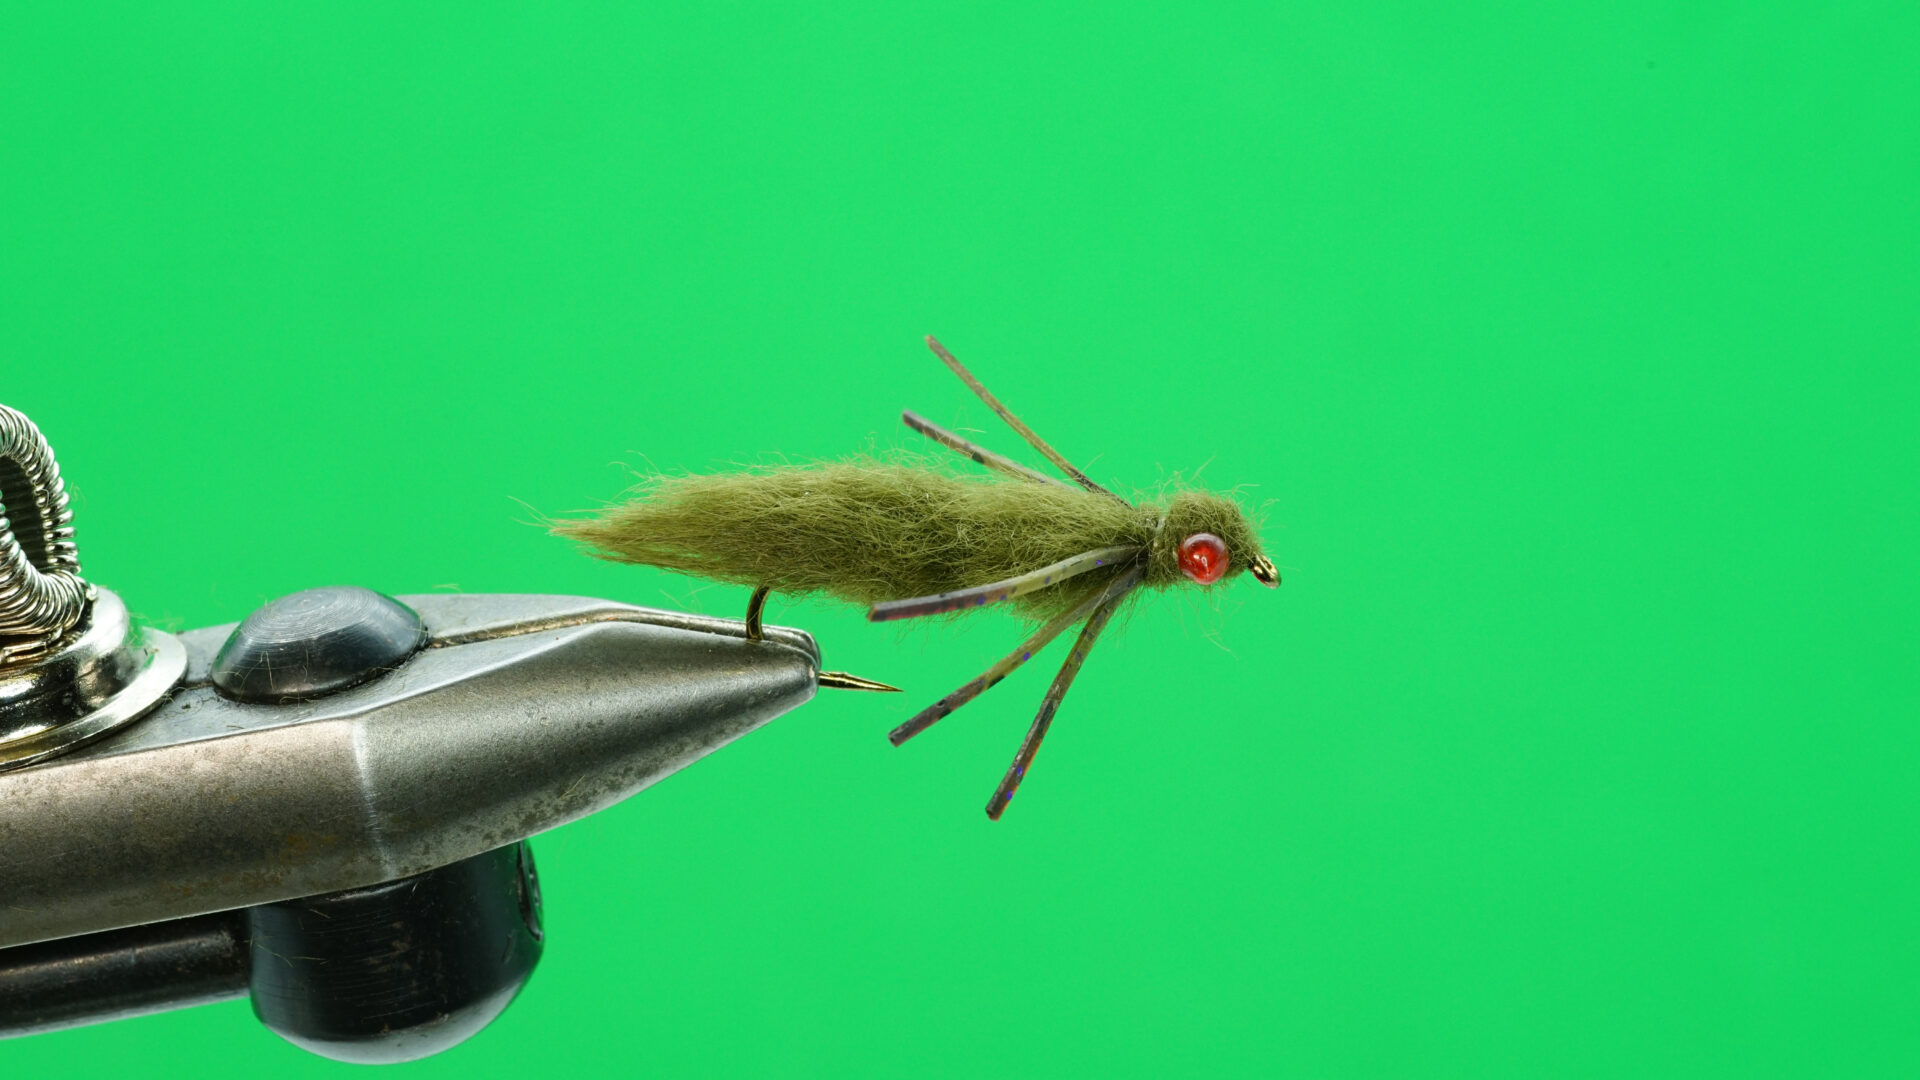 The Fly Fur Dragon: Step 6.