The willingness of smallmouth and largemouth bass to crush surface patterns with unbridled aggression attracts many anglers, including an increasing number of fly fishers. Large, surface-disturbing flies, such as poppers, target this specific trait. When stripped, the flat or concave face of a popper creates an audible, namesake, pop that displaces water and drives aggressive bass crazy.
Advertisement
Dennis Gamboa ties flies for a living and is probably best known for his high-quality saltwater and steelhead patterns. He also shares a passion for bass, designing flies and targeting some of the numerous, often world-class, bass fisheries British Columbia has to offer. Based in part to his many hours spent on the water, Dennis designed his Chorizo popper to suggest all manner of bass prey, including frogs, struggling baitfish, even mice.
Popper bodies can be constructed from a range of materials. Tap’s Bug, a classic bass popper, features a tightly spun, packed and trimmed deer hair body. Although time-consuming to construct, deer hair poppers remain popular today. Those gifted at tying deer hair create intricate poppers, complete with variegated colour schemes intended to match a variety of bass prey.
Advertisement
Wooden, balsa-based poppers are another option. Some balsa poppers are works of art, featuring high-gloss finishes and markings. It is almost a shame to toss them at a bass.
The one common trait to both deer hair and balsa poppers is the time and dedication they take to complete. Thankfully, for those of us looking for a shortcut, there is an option: pre-formed foam poppers. These ready-made poppers are easy to install. If desired, you can colour them using permanent markers, apply epoxy coatings, even bedazzle them with intricate airbrush finishes.
Advertisement
Prior to sliding the foam body onto a kinked shank popper hook or wide gape stinger hook, which Dennis prefers due to the improved hook sets it offers, a small amount of preparation is required. The horizontal hole that runs through the pre-formed body must be reamed out using a leather threading needle or a large-diameter dubbing needle. A firm twisting motion usually does the trick. If needed, you can heat up the needle to streamline the reaming process. Once bored, slide the body onto a threaded shank covered with a thin coat of superglue. Position the body quickly. It doesn’t take long for superglue to bond.
Mottled rubber legs are a common popper component. These legs suggest appendages and help create commotion and wake when stripping the finished fly. A path for the legs must also be bored through the popper body. If you are using a popper body featuring eye recesses, such as the ones Dennis prefers, bore a hole using the same needle used to ream the hook shank hole, about one-and-a-half hook-eye lengths back from the recess in the popper.
Install the legs by pushing a large-eye needle or bobbin threader through the hole. Feed a short section of the legs into the needle eye or between the wire strands of the bobbin threader. Pull and twist them back through the body. Once threaded, pull and trim the legs so they hang equally on both sides. If you envision tying a number of poppers, consider purchasing a specific leg puller tool.
Dennis recommends gluing the legs in place by inserting the nozzle tip of an applicator-style head cement container into the leg hole. Squeezing the container forces head cement into the leg hole for added durability.
In addition to the foam body, most poppers feature a bushy hackle and a mobile tail or tails. As with the body, the primary purpose of these components is to suggest prey and create a disturbance. A range of materials can be used for the tail or tails. Common choices include marabou, fur strips and hackle. Splayed hackle-tip tails are common and, when stripped, kick like a swimming frog. A large, bushy hackle typically bridges the space between the tail and the rear of the popper body.
Bass are known for living in weedy, non-fly-friendly places and stiff mono weed guards are recommended. A mono weed guard helps prevent weeds and other debris from fouling the hook, as well as deflecting the popper around potential snags such as lily pads and wood. If your favourite bass haunts aren’t too weedy, then consider the weed guard optional.
If you haven’t tried bass on the fly, you should, especially during warm summer months when bass are active and are willing to explode on a popper. Simple disturbance patterns such as Dennis’s Green Chorizo popper are a must for these addictive, visual, sometimes heart-stopping scenarios.
Materials
By Dennis Gamboa
Hook: Bass stinger deer hook or popper hook, #2
Thread: 70 or 140 denier, chartreuse
Weed guard (optional): 20 to 25-pound monofilament
Body: Flymen medium double-barrel popper, green or chartreuse
Tail: Four chartreuse grizzly saddles, mixed with four strands of DNA flash, red
Butt: Lagartun flatbraid, red
Collar: Chartreuse grizzly saddle
Legs: Three barred, chartreuse, round rubber legs
Eyes: 2-millimetre molded eyes
Instructions
- Using a leg puller, large leather needle or bodkin, ream the popper body lengthwise. Push and twist though the body until the tool clears the back guide hole. Continue twisting the popper body to ensure the hole is sufficient for the hook shank to pass through. Ream the leg hole through by inserting a needle about one-and-a-half hook eye lengths back from the eye recess in the popper through the side of the popper.
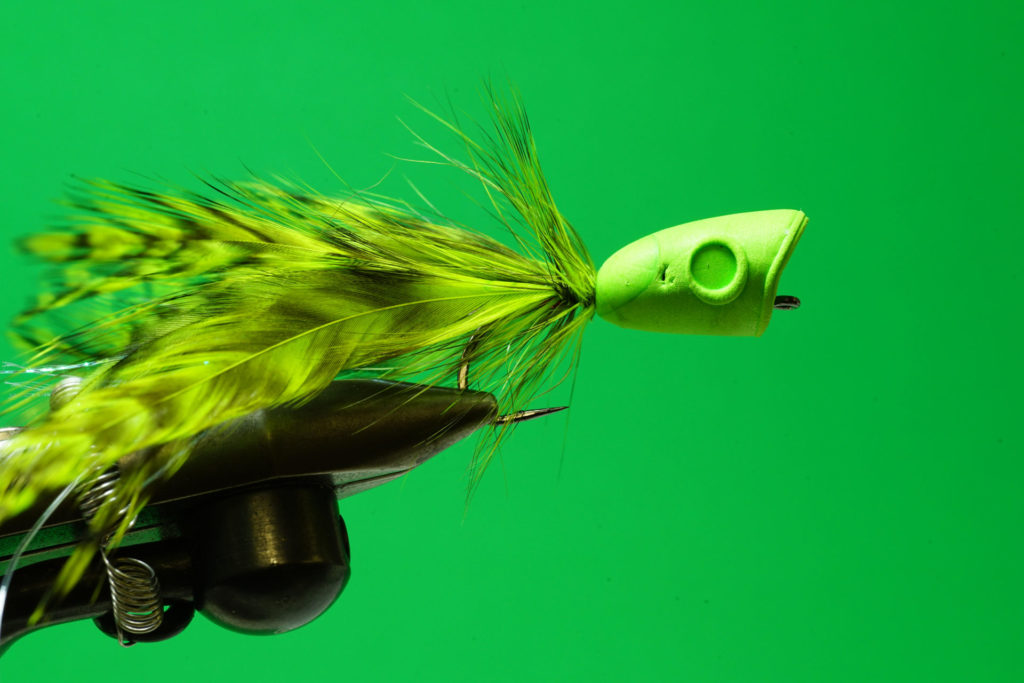
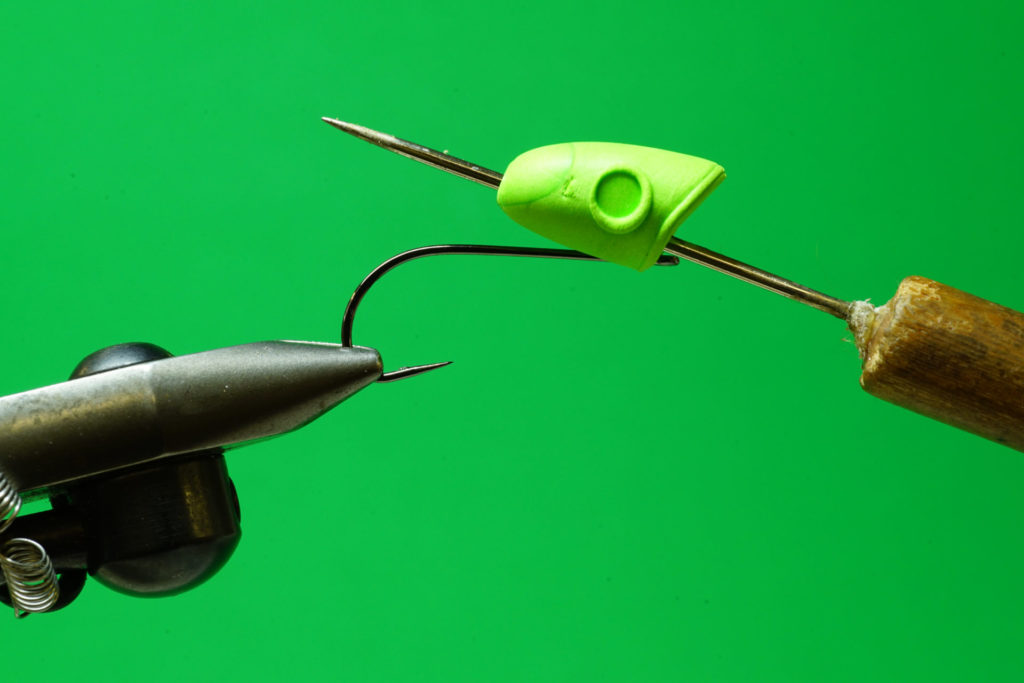 Green Chorizo: Step 1.
- To ensure adequate space to clear the popper head, start the tying thread an eye length back from the hook eye. Cover the hook back to the mid portion of the shank. Return the tying thread to the original tie-in point. Tie in the weed guard on top of the hook and secure it back down the shank to the mid point. To prevent the weed guard from kinking or getting in the way while tying, you can insert it between the vise jaws. Advance the tying thread forward so it hangs just in front of the hook point.
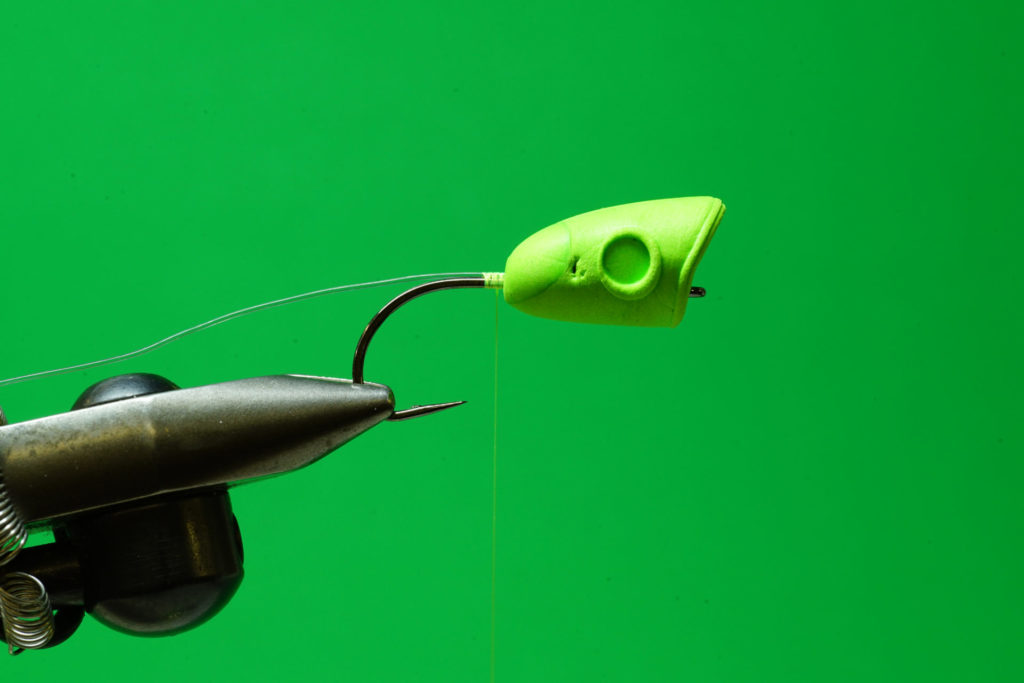
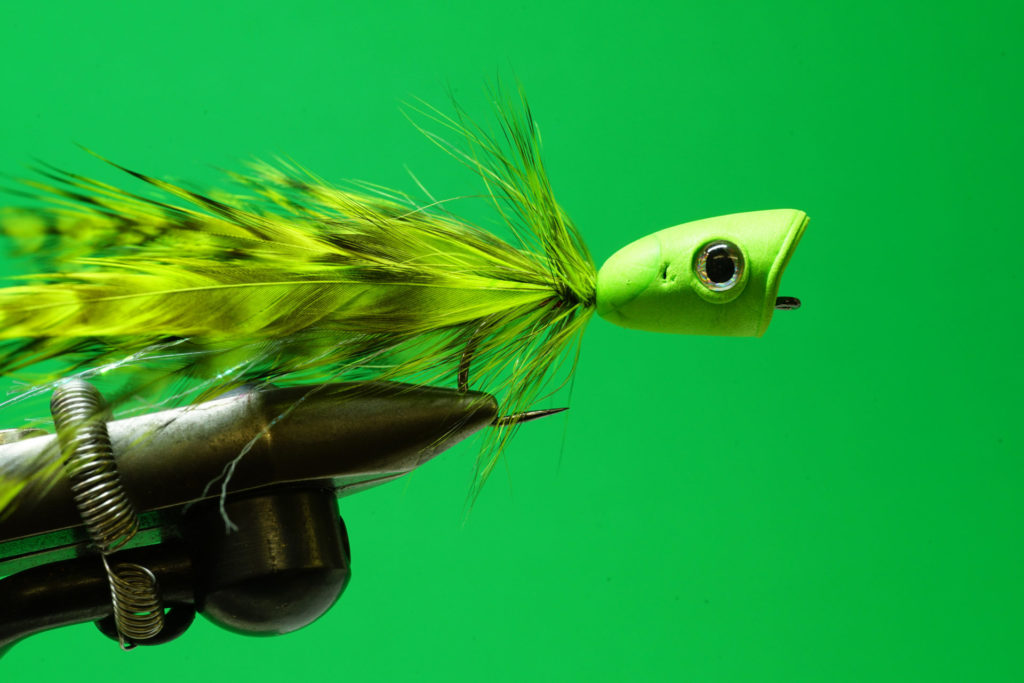
 Green Chorizo: Step 2.
- Push and slide the prepared popper onto the shank, tapered end toward the bend, so the hook eye extends one eye length past the bottom edge of the popper. Mark the back end of the hook with a permanent marker at the rear of the popper body. Remove the popper body from the hook. Using a brushable superglue, coat the hook from the mark forward. Push the popper body onto the coated thread base and into position back to the mark on the shank.
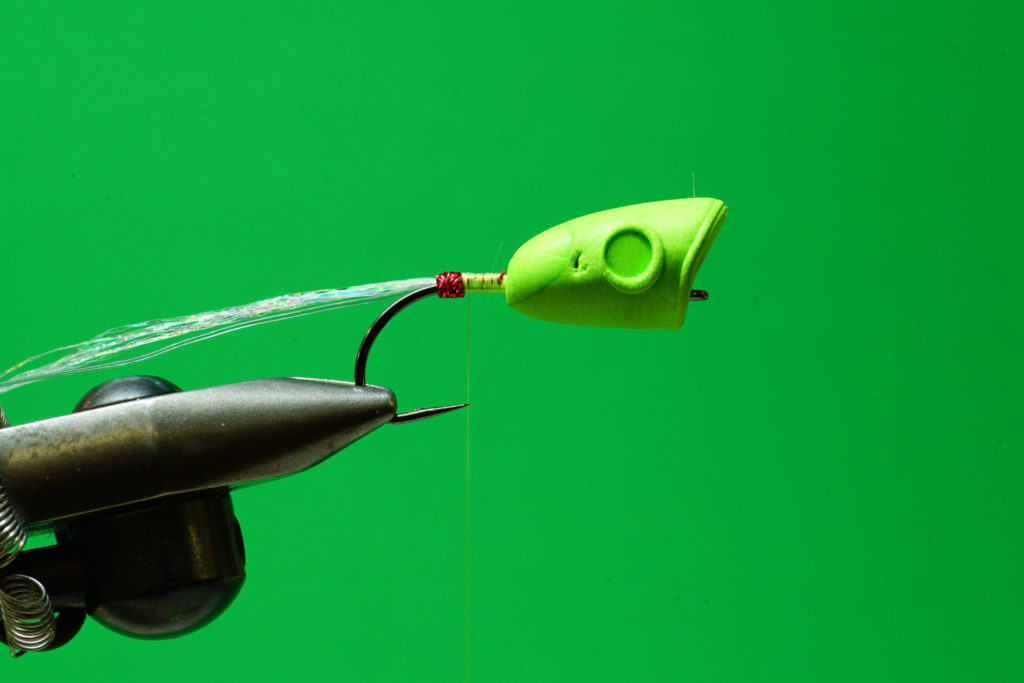
 Green Chorizo: Step 3.
- Fold three to four strands DNA flash around the thread. Secure the flash on top of the hook just behind the popper body and secure it back to the hook point. Trim the flash even three inches back from the hook point. Tie in the red flat braid at the base of the DNA tail. Using four to five wraps form a small red butt. Tie off and trim the excess flatbraid. Coat the tie off point with superglue.
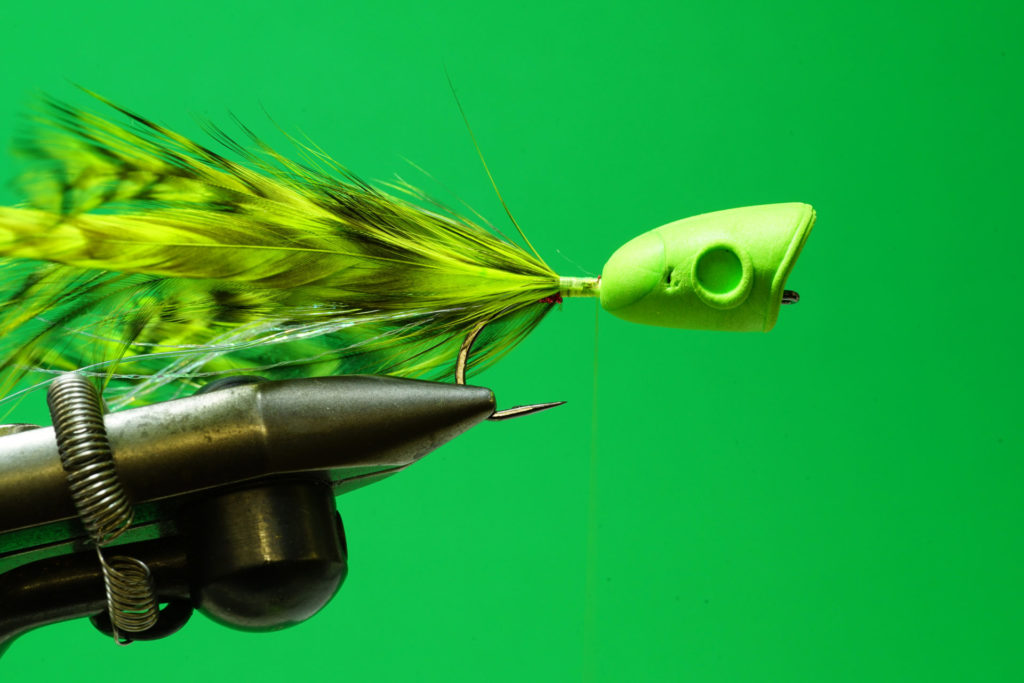
 Green Chorizo: Step 4.
- Tie in four grizzly saddles so the tips extend three inches from the rear of the popper body. Secure the hackle back against the flat braid to flare and splay the tips and improve overall material movement.
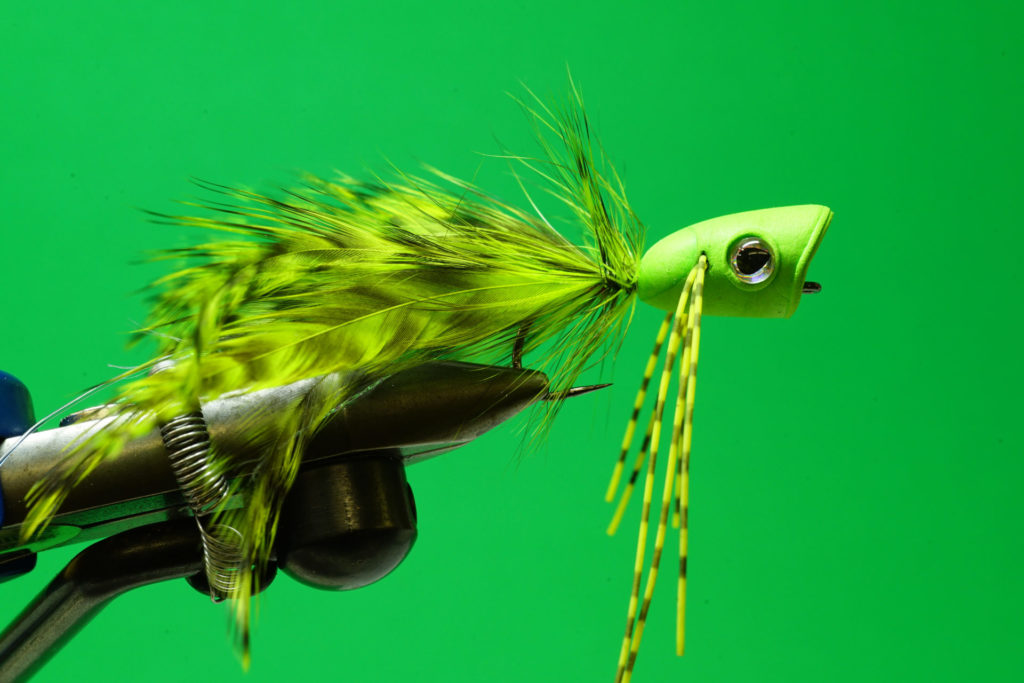
 Green Chorizo: Step 5.
- Secure the collar hackle, tip first, in front of the hackle tails. Wind the hackle forward to the rear of the popper body. Tie off, remove the excess hackle, whip finish and remove the tying thread. Place a dab of head cement into the base of the collar for added security.
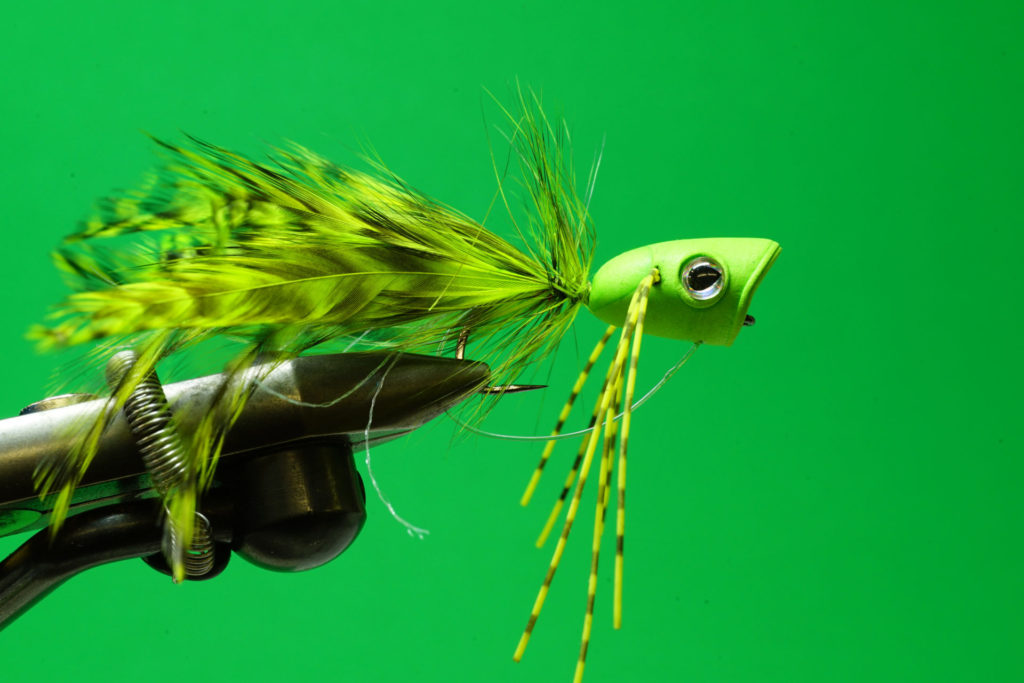
 Green Chorizo: Step 6.
- Place a small amount of super glue into the eye socket of the popper. Insert the molded eyes into each pocket. Using the back end of a half hitch tool, push the eye into place. To lock the eyes in place, coat and cure them with a thin coat of UV resin.
 Green Chorizo: Step 7.
- Push a leg puller, the eye of a large needle or bobbin threader through the leg hole created in step #1. Insert the legs into the leg puller, needle eye or bobbin thread. Carefully pull and twist the legs through the body. Adjust the legs so they are roughly equal on each side of the body. Trim the legs so they extend back no more than mid-point of the tail. Poke the nozzle of an applicator style head cement container into the leg hole of the body. Inject head cement into the body by squeezing the bottle to secure the legs in place.
 Green Chorizo: Step 8.
- Insert a dubbing needle on an acute angle, about one-and-a-half eye lengths back from the bottom edge of they popper body and poke a hole through the front of the body to the underside of the popper. Push the mono though the hole from the bottom through to the hook eye. Set the curve of the weed guard by pulling and adjusting the mono so it sits a minimum of three to four hook eye lengths below the hook point. Seal the bottom side of the weed guard with light coat of glue and UV resin. Trim the excess mono protruding forward of the hook eye and apply a light amount of superglue and UV resin.
 Green Chorizo: Step 9.