Soft plastic lures are a must-have lure within a conventional bass angler’s tackle box, especially a Senko worm. Depending on how you fish it, a Senko flutters, jiggles and generally looks tasty to any bass. Dennis Gamboa is an outstanding fly tyer, both in his talent and creativity. He loves to chase bass on the fly. Inspired by the success conventional bass anglers have with soft plastics such as the Senko, Dennis set about trying to design a fly that provided the same seductive action. Please welcome the Predator Worm.
Advertisement

Predator 9 is the core ingredient of Dennis’ Predator Worm. Bass can’t seem to resist the tantalizing action of the supple three to four-inch Predator 9 tail waving and wiggling at them. Dennis tried other materials to simulate the movement of a Senko, including pre-shaped suede, wire dubbing brushes and various types of chenille. These materials weren’t as easy to work with as the Predator 9, and they didn’t provide the action Dennis was looking for or the durability.
Advertisement
Predator 9 and its smaller siblings, Chewing Gum and Jumbo Chewing Gum, feature a thin, supple micro core and short, soft rubber fibres. Dennis found that the bass seemed to like the texture of the soft rubber fibres as they held onto his flies a fraction longer, giving him a bit more time to recognize and react to a take. When bass prefer natural colours, Dennis found black and brown work best. If bright attractor colours are in order, Hulk Green was tough to beat.
Most times, regular-sized Predator 9 worms worked fine. Dennis discovered that there are occasions, such as crystal-clear water, when bass shied away from larger flies. In these situations, Dennis learned a downsized ‘hatchling,’ using smaller-diametre Jumbo Chewing Gum for the body and tail, met this presentation challenge.
Advertisement
A Fish Skull provides the Predator Worm with the necessary weight to plunge into the snag-infested haunts where bass like to hang out. Fish Skulls are easy to install. Once the body and tail are complete, apply a dollop of gel superglue to the tie-off point just behind the hook eye. Push the Fish Skull over the hook eye and onto the shank, so it snugs up tight against the body. Make sure that the flat side of the Fish Skull faces the top side of the shank to induce the fly to ride hook point up. A small, contrasting thread head further secures the skull in place. Dennis likes the touch a contrasting thread head provides.
The flat bottom of the Fish Skull also allows you to work the fly over rocks and other bottom debris with a minimum of hang-ups. Fish Skulls also come with recessed eye sockets that enable you to install molded or decal eyes for an added touch of realism.
Bass, particularly largemouth bass, love the dense cover provided by weeds, rockpiles, lily pads, underwater wood and brush piles. They make great ambush spots but are less than friendly places to drop a fly. To be successful, you must target places bass like to hide to coax a bass to strike. A circular weed guard helps your flies cope with snag-filled environments. Dennis uses a stiff 30-pound monofilament line for his weed guards. Mono is stiff enough to deflect any weeds, logs, rocks or sticks away from the hook, yet it’s supple enough to move out of the way should a bass chomp your fly, allowing you to drive the fly into its hard mouth. Aggressive hook sets are a requirement when chasing bass. A subtle trout set won’t do. The bass seems insulted by such a pathetic hook set and spits out your fly. What’s unique about bass is they often take the same fly a second time. So, if you miss a strike, due to a weak hook set, you have a chance for redemption.
It is crucial to secure the weed guard firmly in place along the shank and down into the bend. A coating of superglue or UV resin provides additional security. Binding the mono down the bend ensures that when you bring the mono forward to the hook eye to form the weed guard, it clears both the hook bend and point. Squash the mono at the tie-off point, just behind the hook eye, so the weed guard doesn’t move once you have tied it off. If you try to tie off on round mono, there is a good chance it will shift. Once you have the weed guard initially tied, downsize the loop, ensuring there is a half gape space between the mono and the hook point. This space allows enough deflection in the mono loop, so when a bass grabs the fly, the weed guard doesn’t become a barrier to setting the hook.
Dennis’ Predator Worm has all the hallmarks of a great pattern: easy-to-obtain materials, simple construction techniques, and best of all, it catches fish. The bass hasn’t got a chance.
Predator Worm
Designed by Dennis Gamboa
- Hook: Mustad Stinger Deer hook C52S BLN #2 – #6
- Thread: Brown, 140 UTC, red UTC 70 (head).
- Weed guard (optional): 30 saltwater hard monofilament
- Body: Predator 9 worm, centipede
- Tail: Three to four inches of Predator 9 worm chenille
- Head: Flymen Sculpin head, medium brown
- Eye: Molded, or two-millimetre tape eyes
Tying Instructions
- Cover the hook shank with tying thread. Tie in the hard monofilament weed guard material on top of the hook shank approximately two hook eye lengths back from the hook eye. Secure the weed guard mono down the shank and down into the hook bend, using firm adjacent wraps. Cover the thread wraps with superglue or UV resin for added durability.
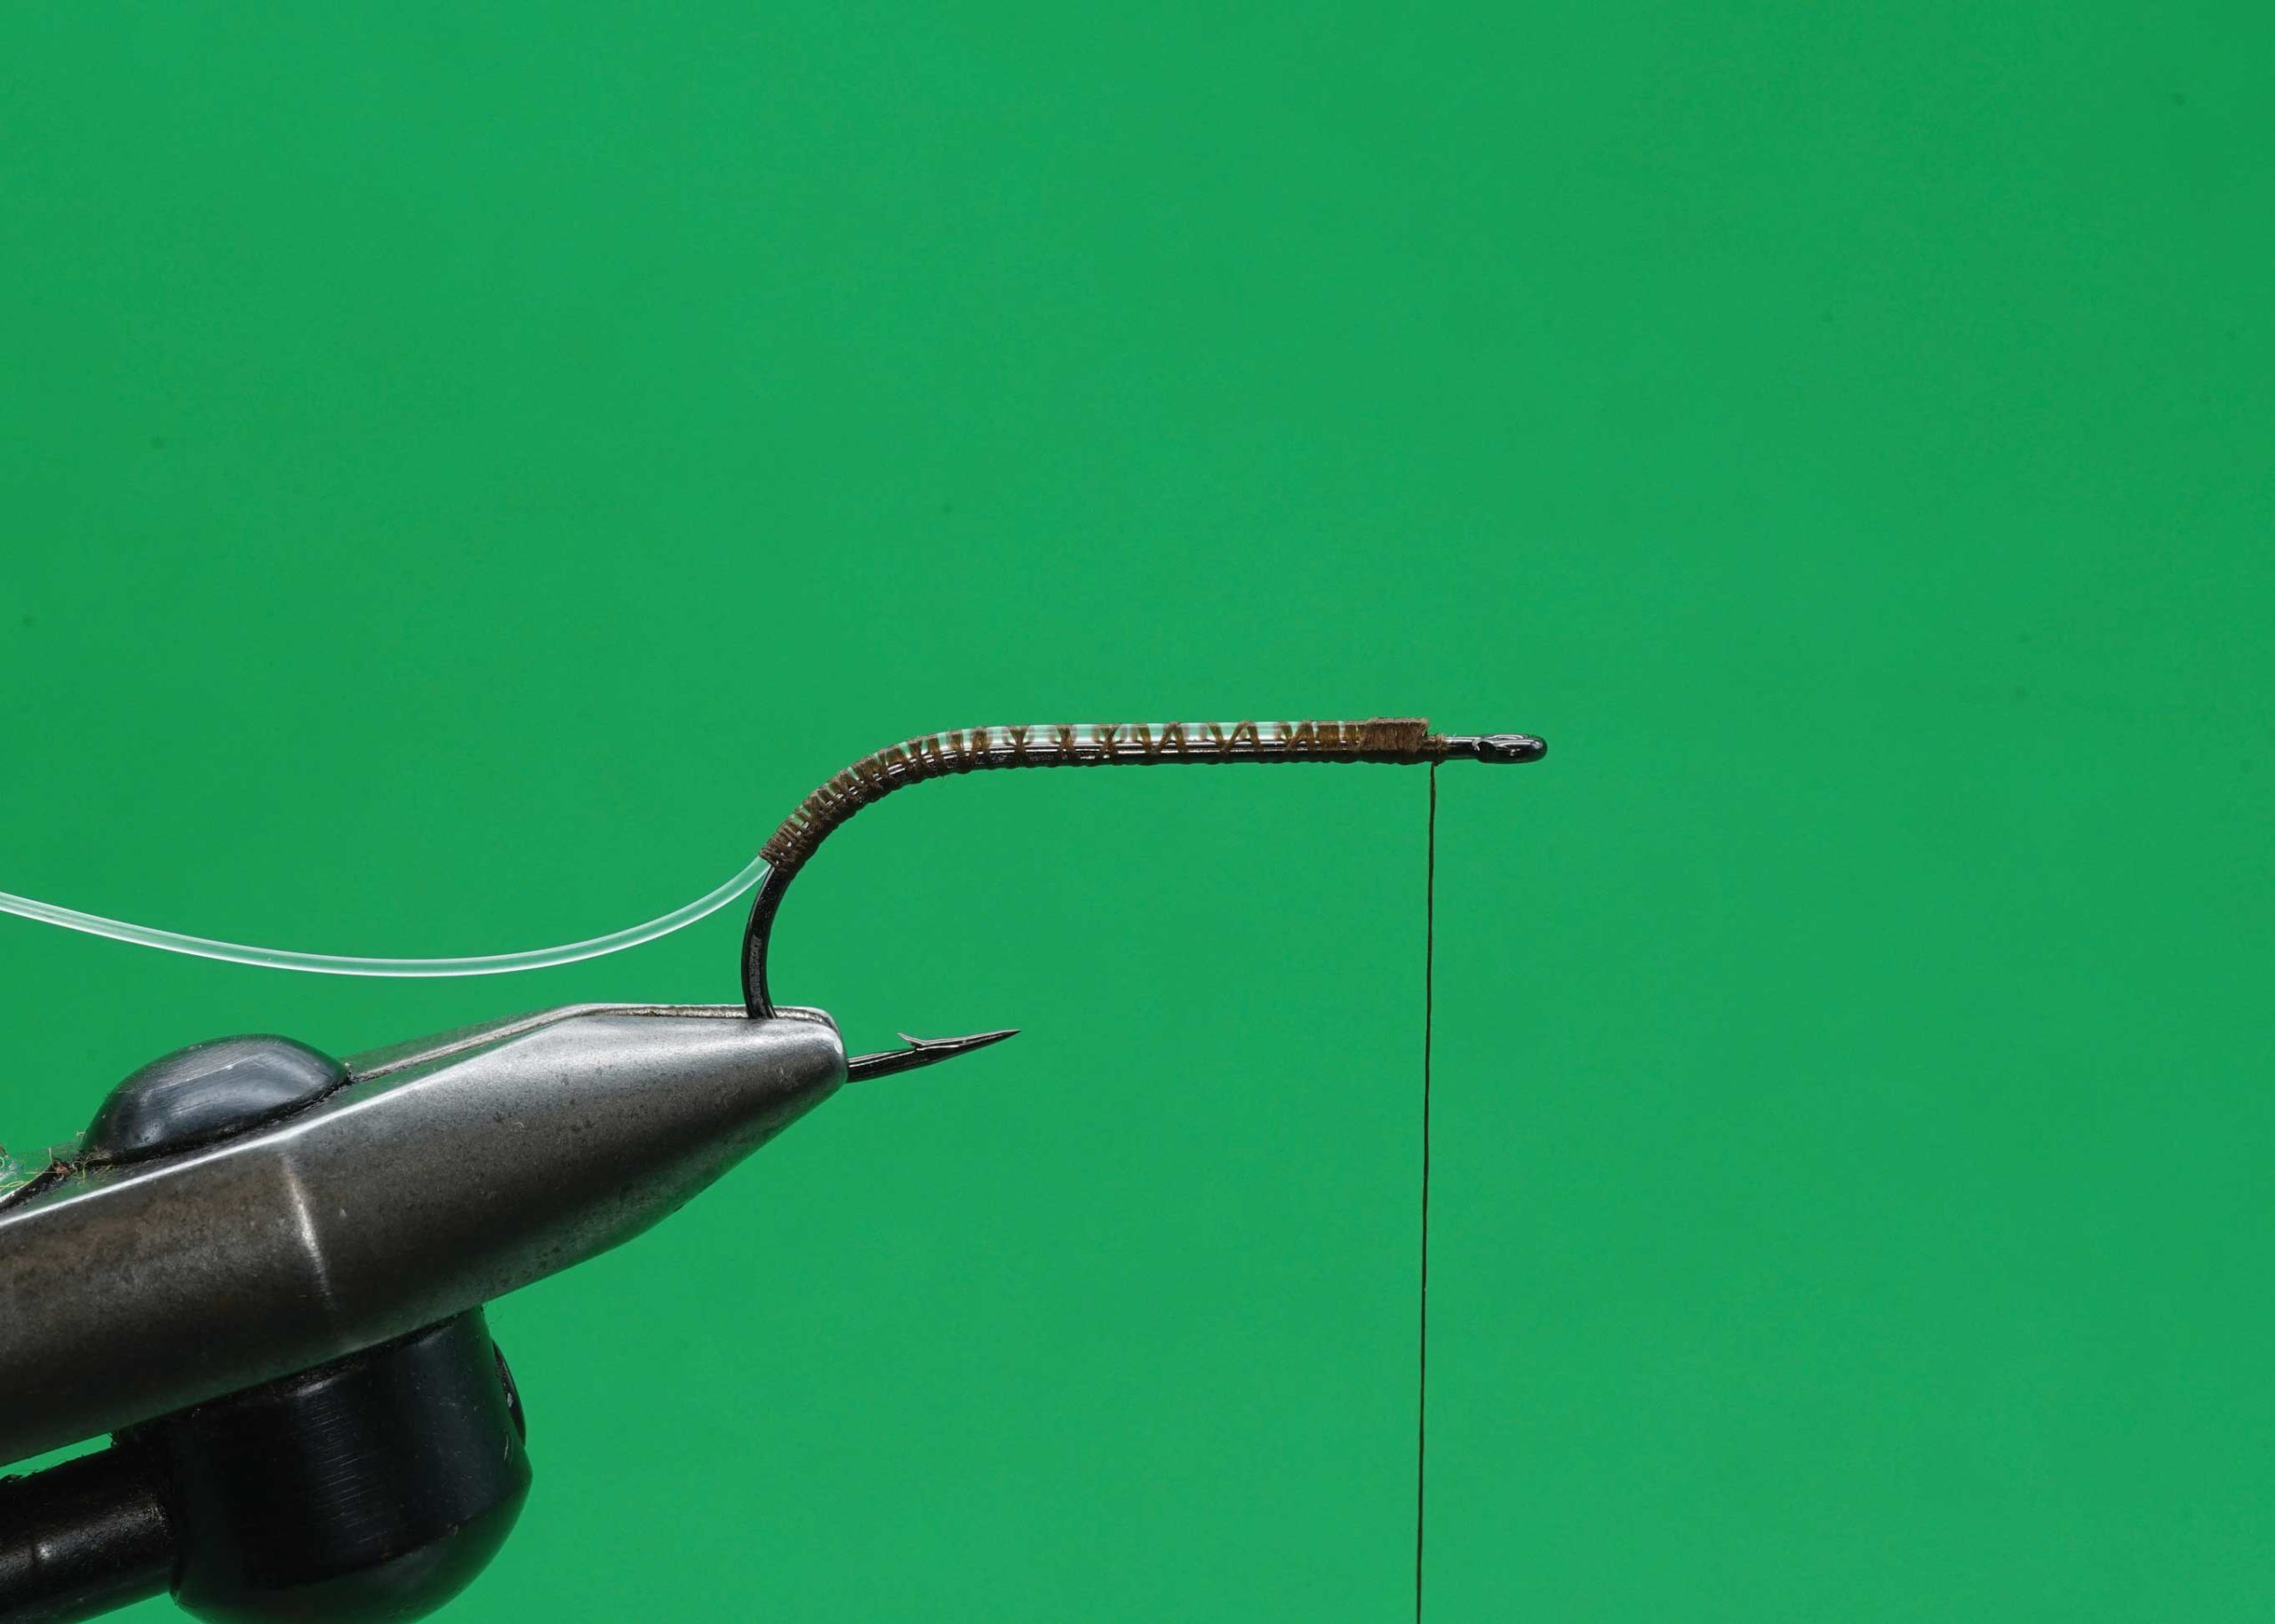 Predator Worm: Step 1.
- Secure a three to four-inch tail between the hook point and barb. Do not trim the excess. Using a lighter, singe the end of the tail.
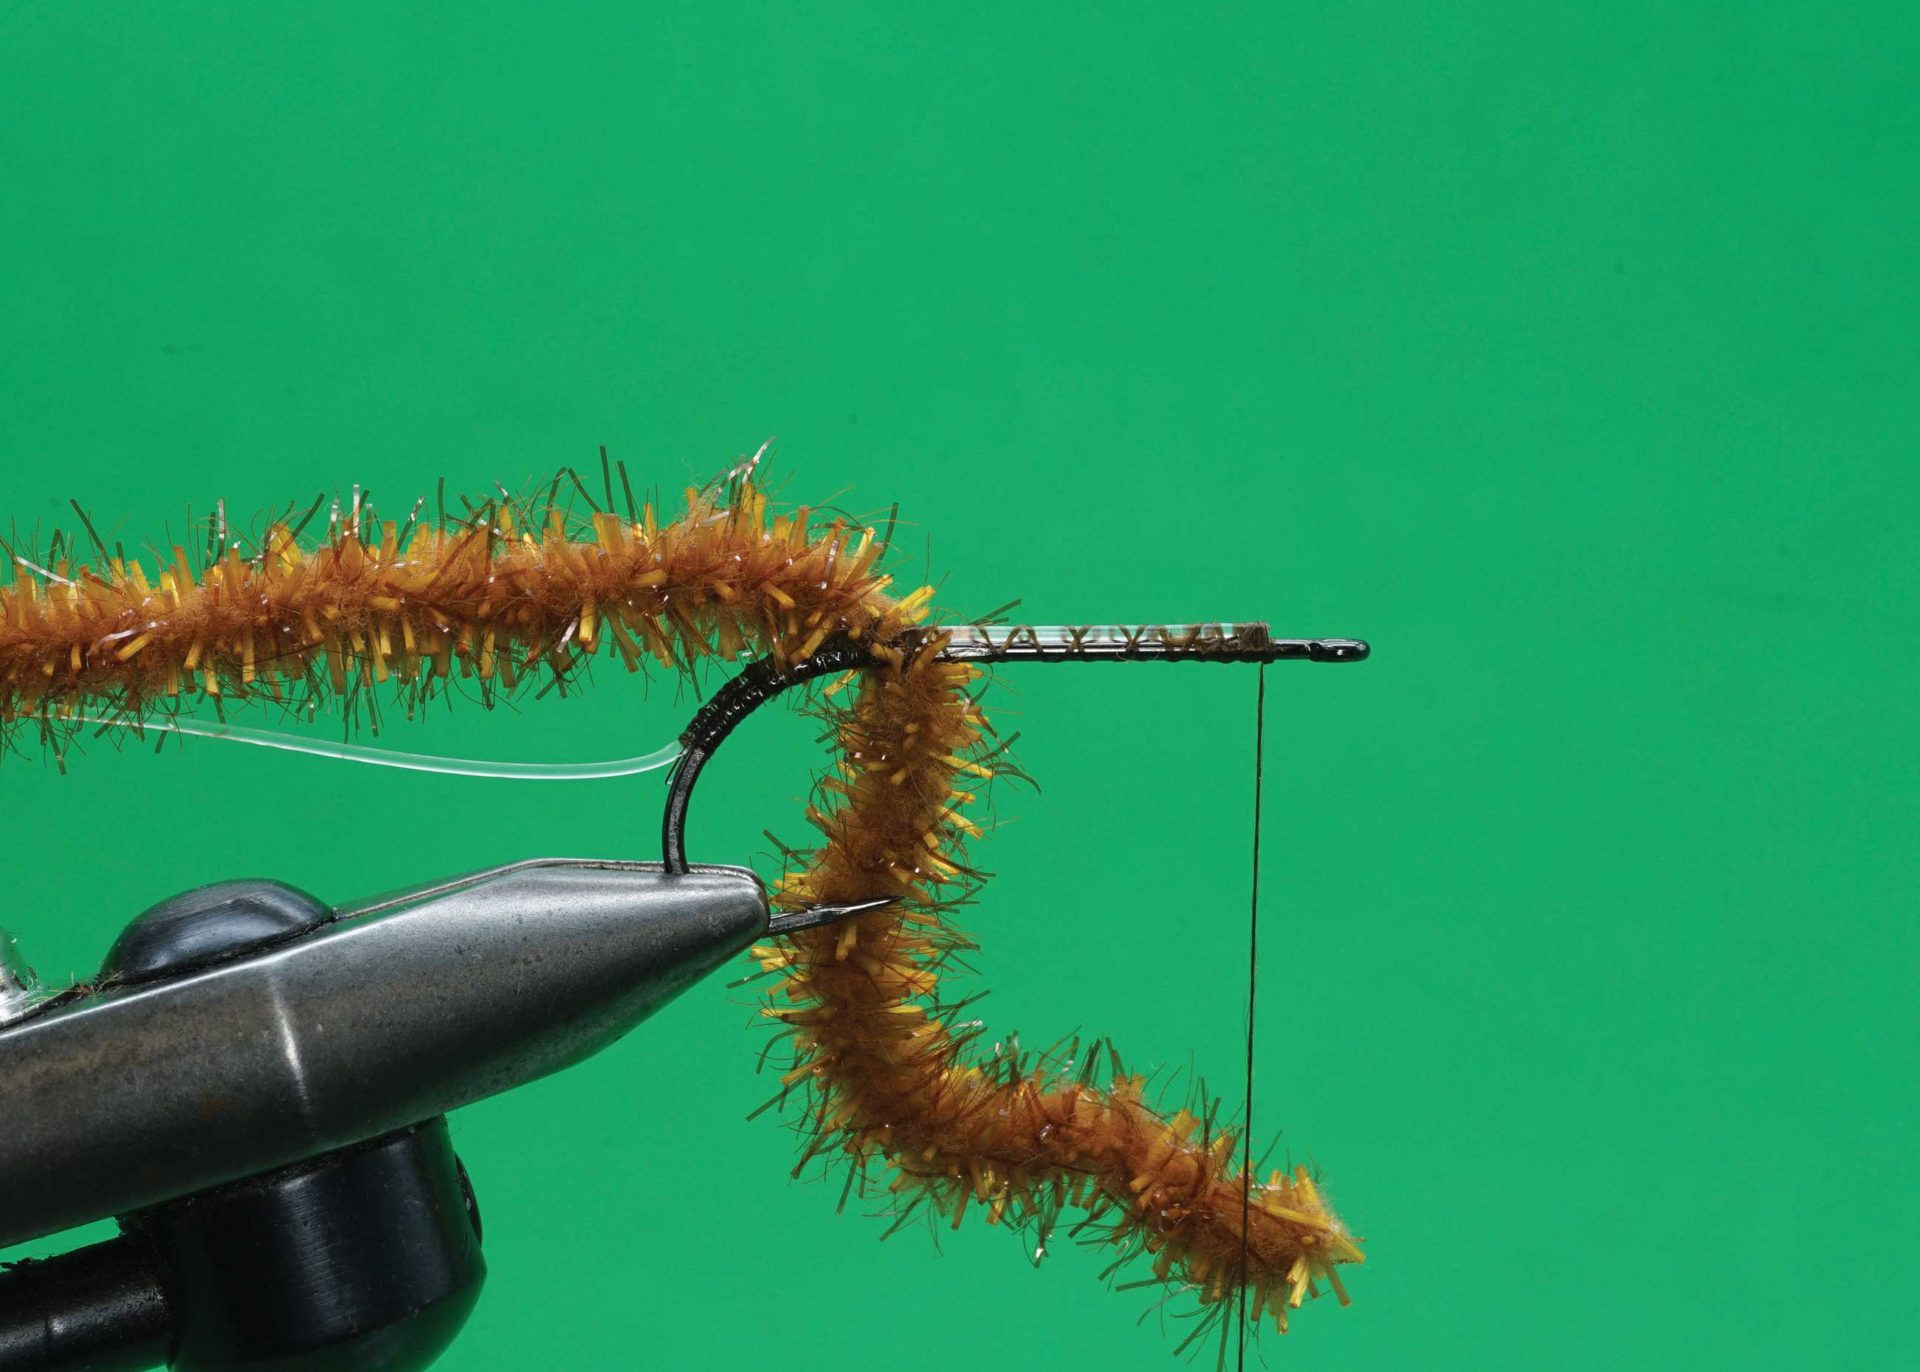 Predator Worm: Step 2.
- Form the body by winding the excess Predator 9 material forward of the tail tie-in point to the hook eye using close, touching wraps. To allow room for a hot spot head, tie off and trim the excess about two hook eye lengths back from the hook eye and whip finish.
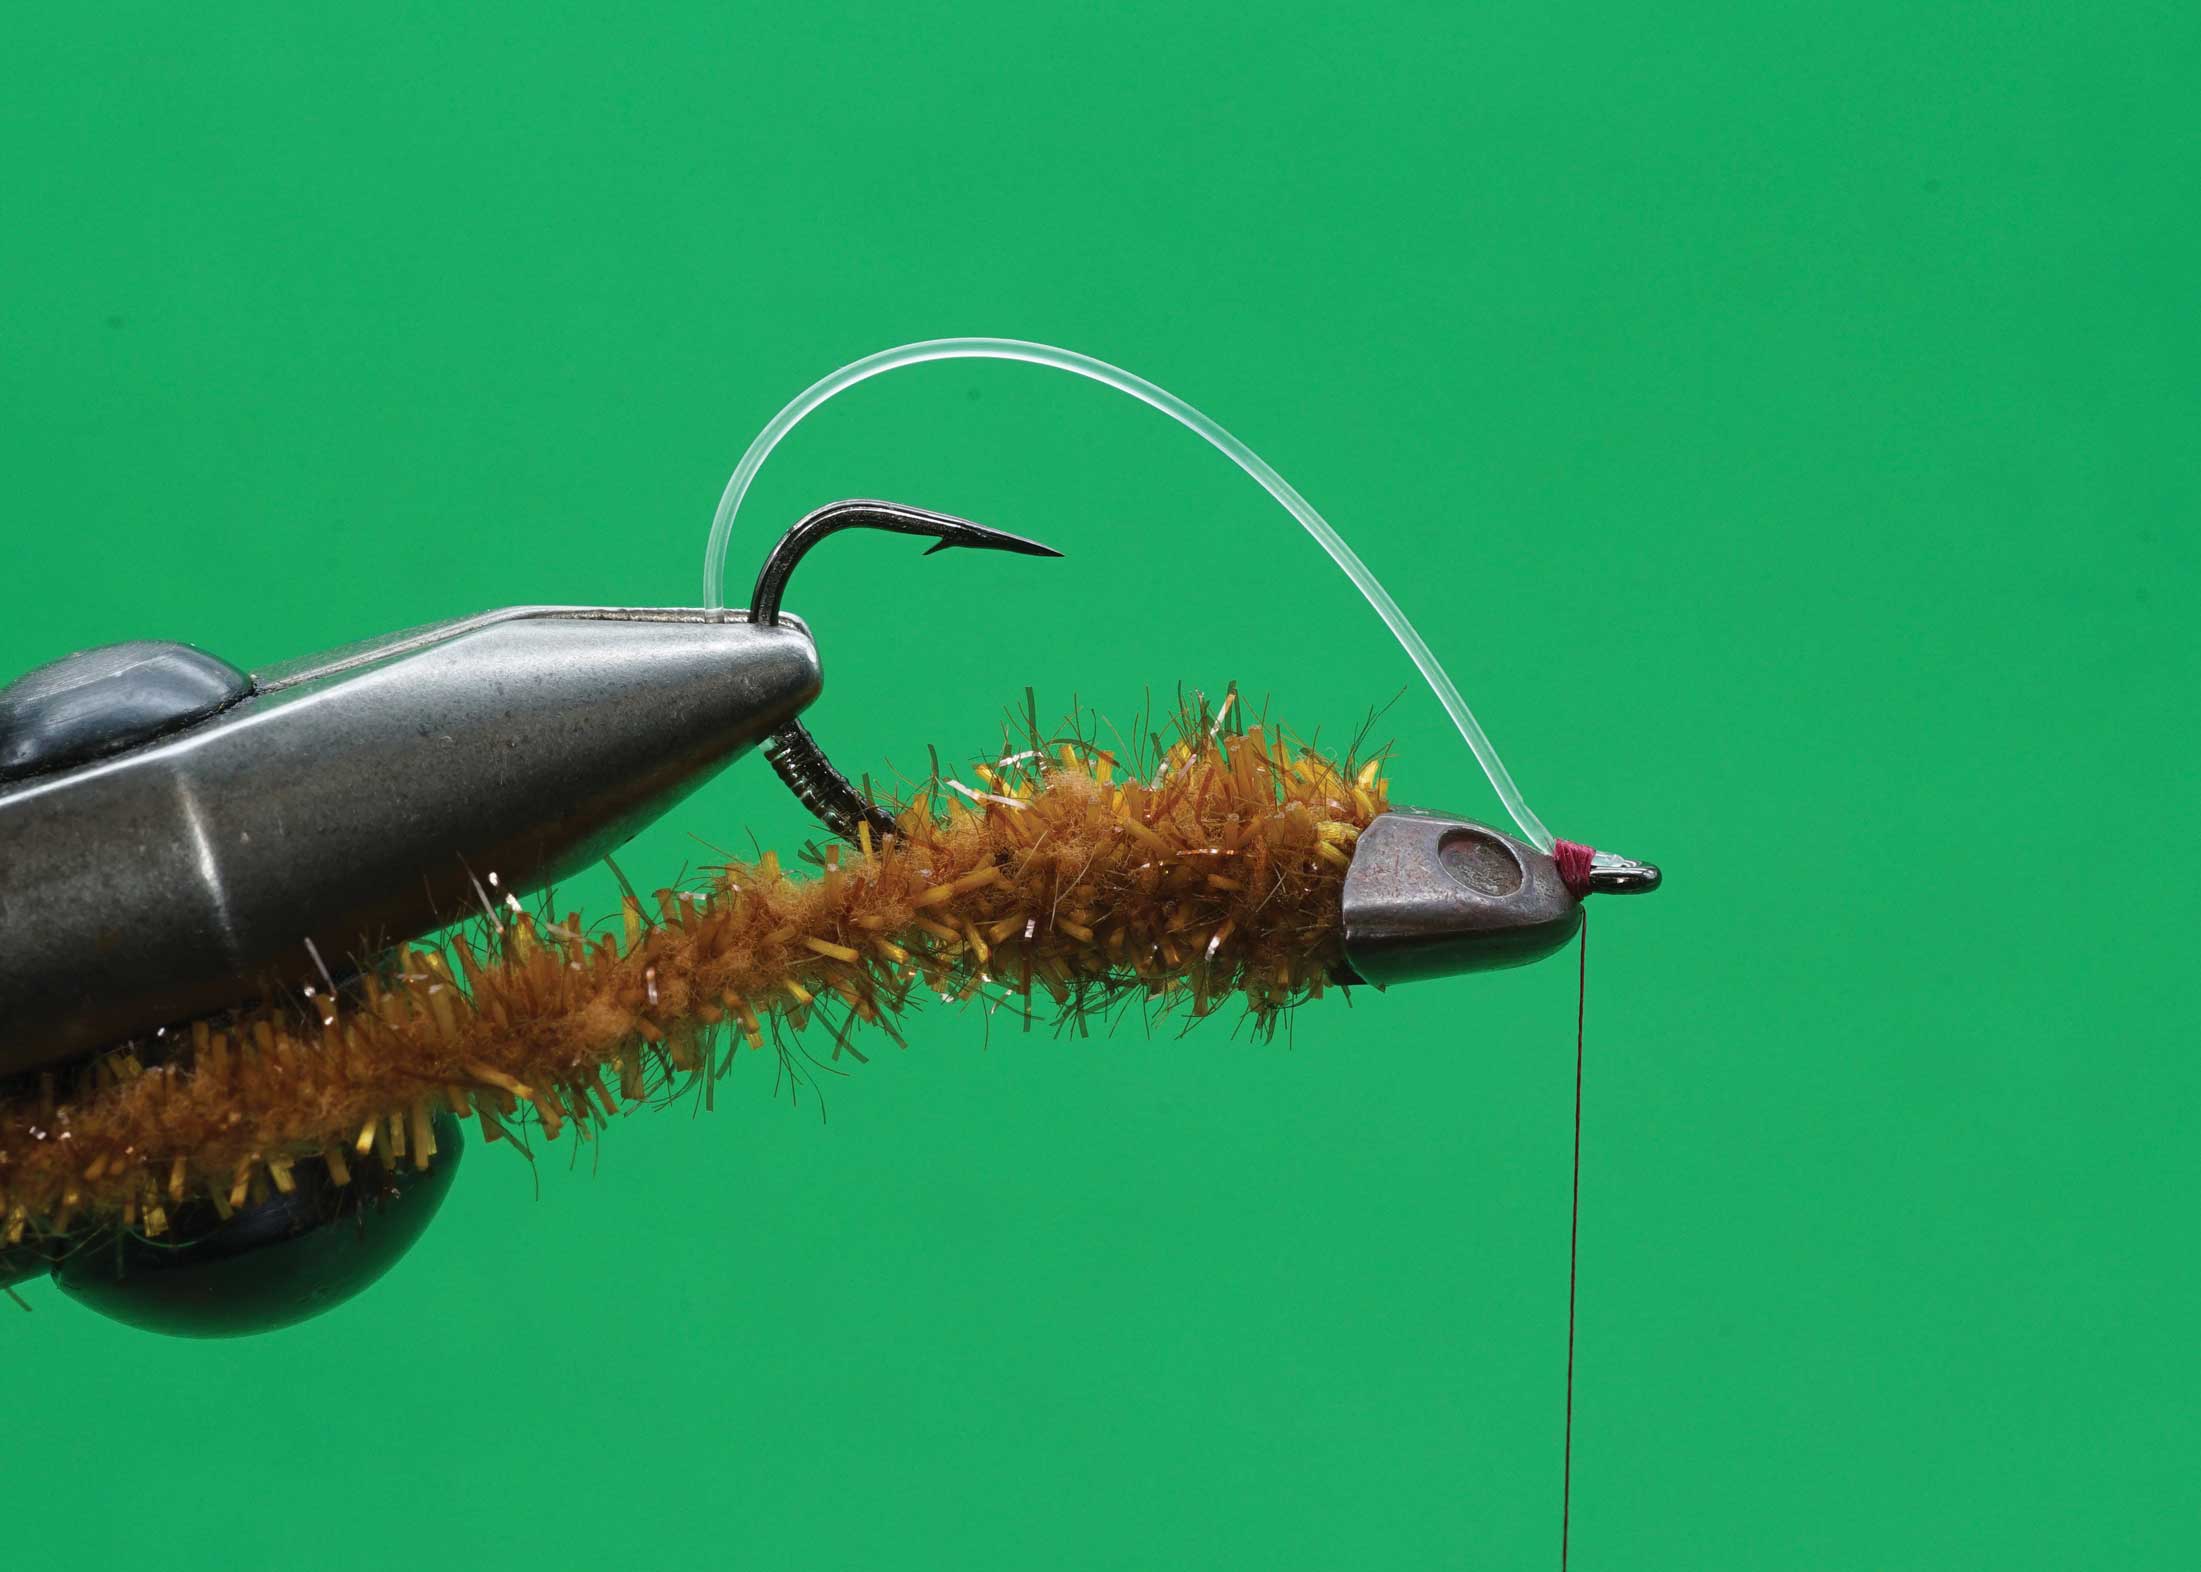
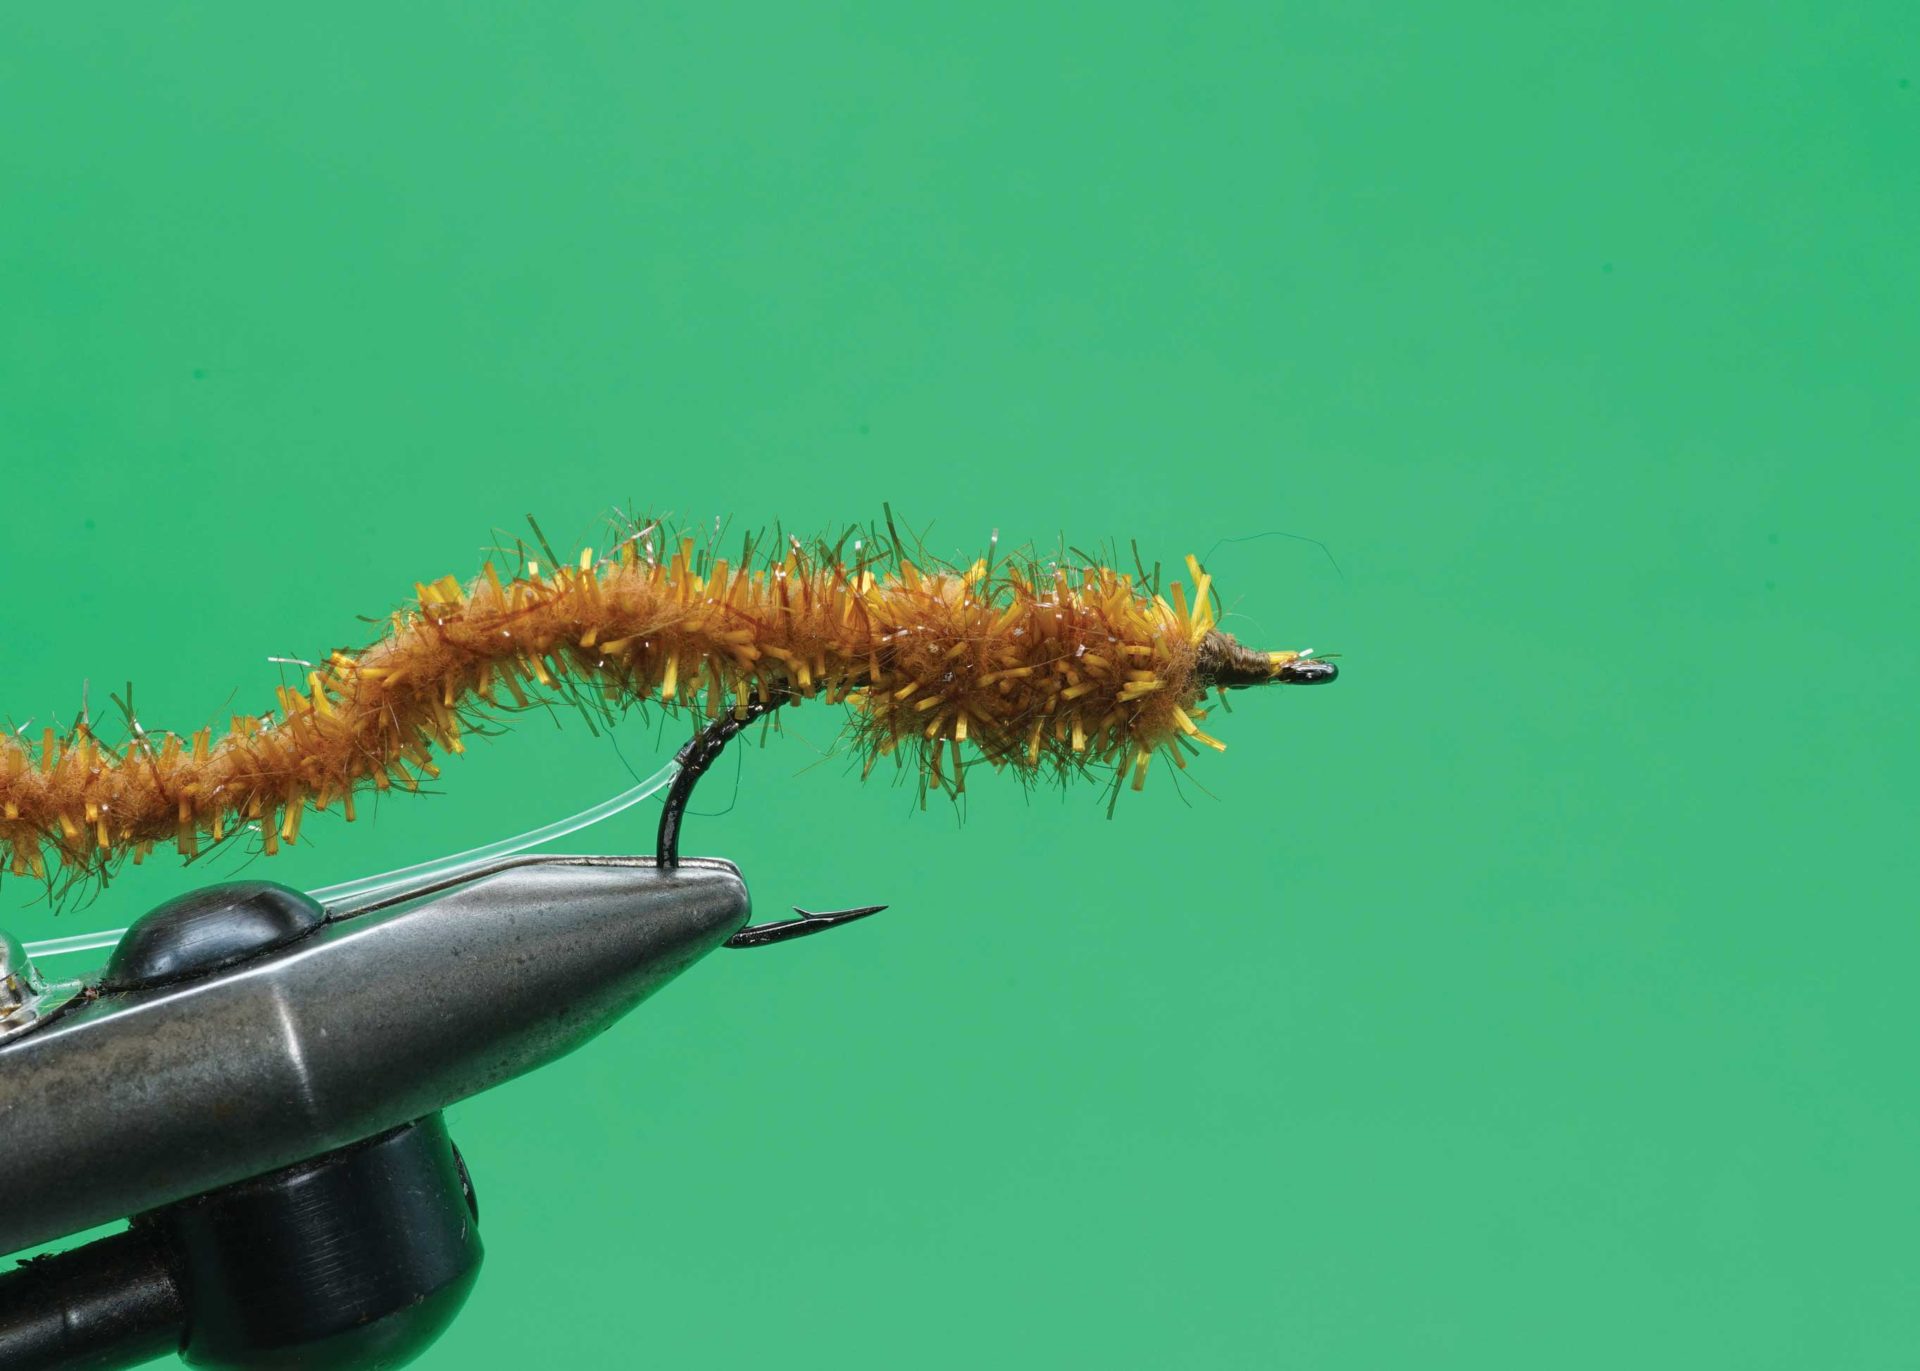 Predator Worm: Step 3.
- Apply gel superglue over the body tie off area. Slide on the Sculpin head, flat side up so the rounded half faces down, on the hook gape side of the hook. The position ensures the finished fly rides inverted, allowing the flat side of the Sculpin head to slide over any bottom debris.
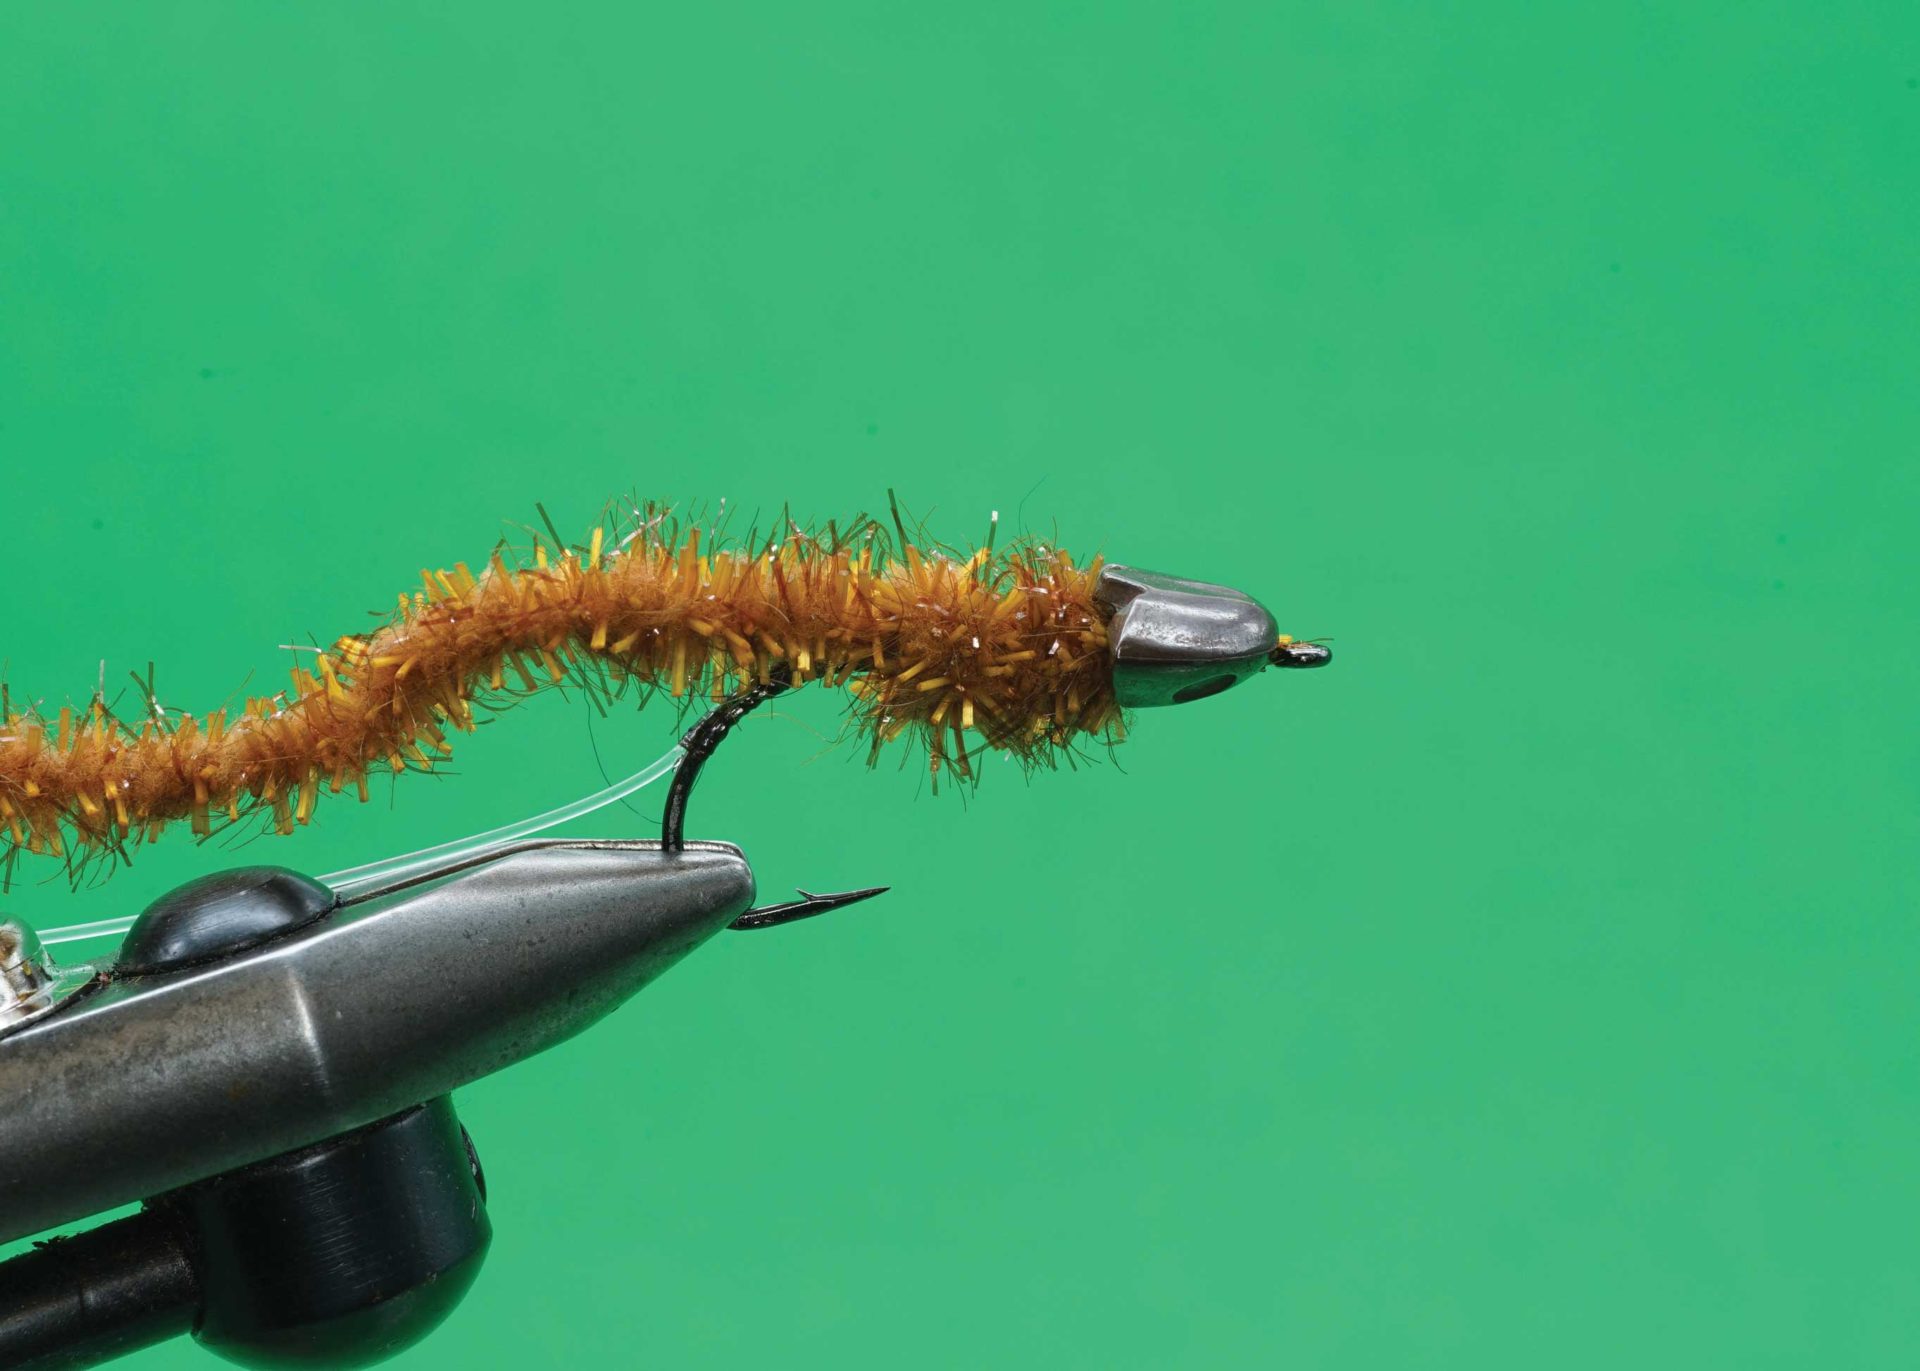 Predator Worm: Step 4.
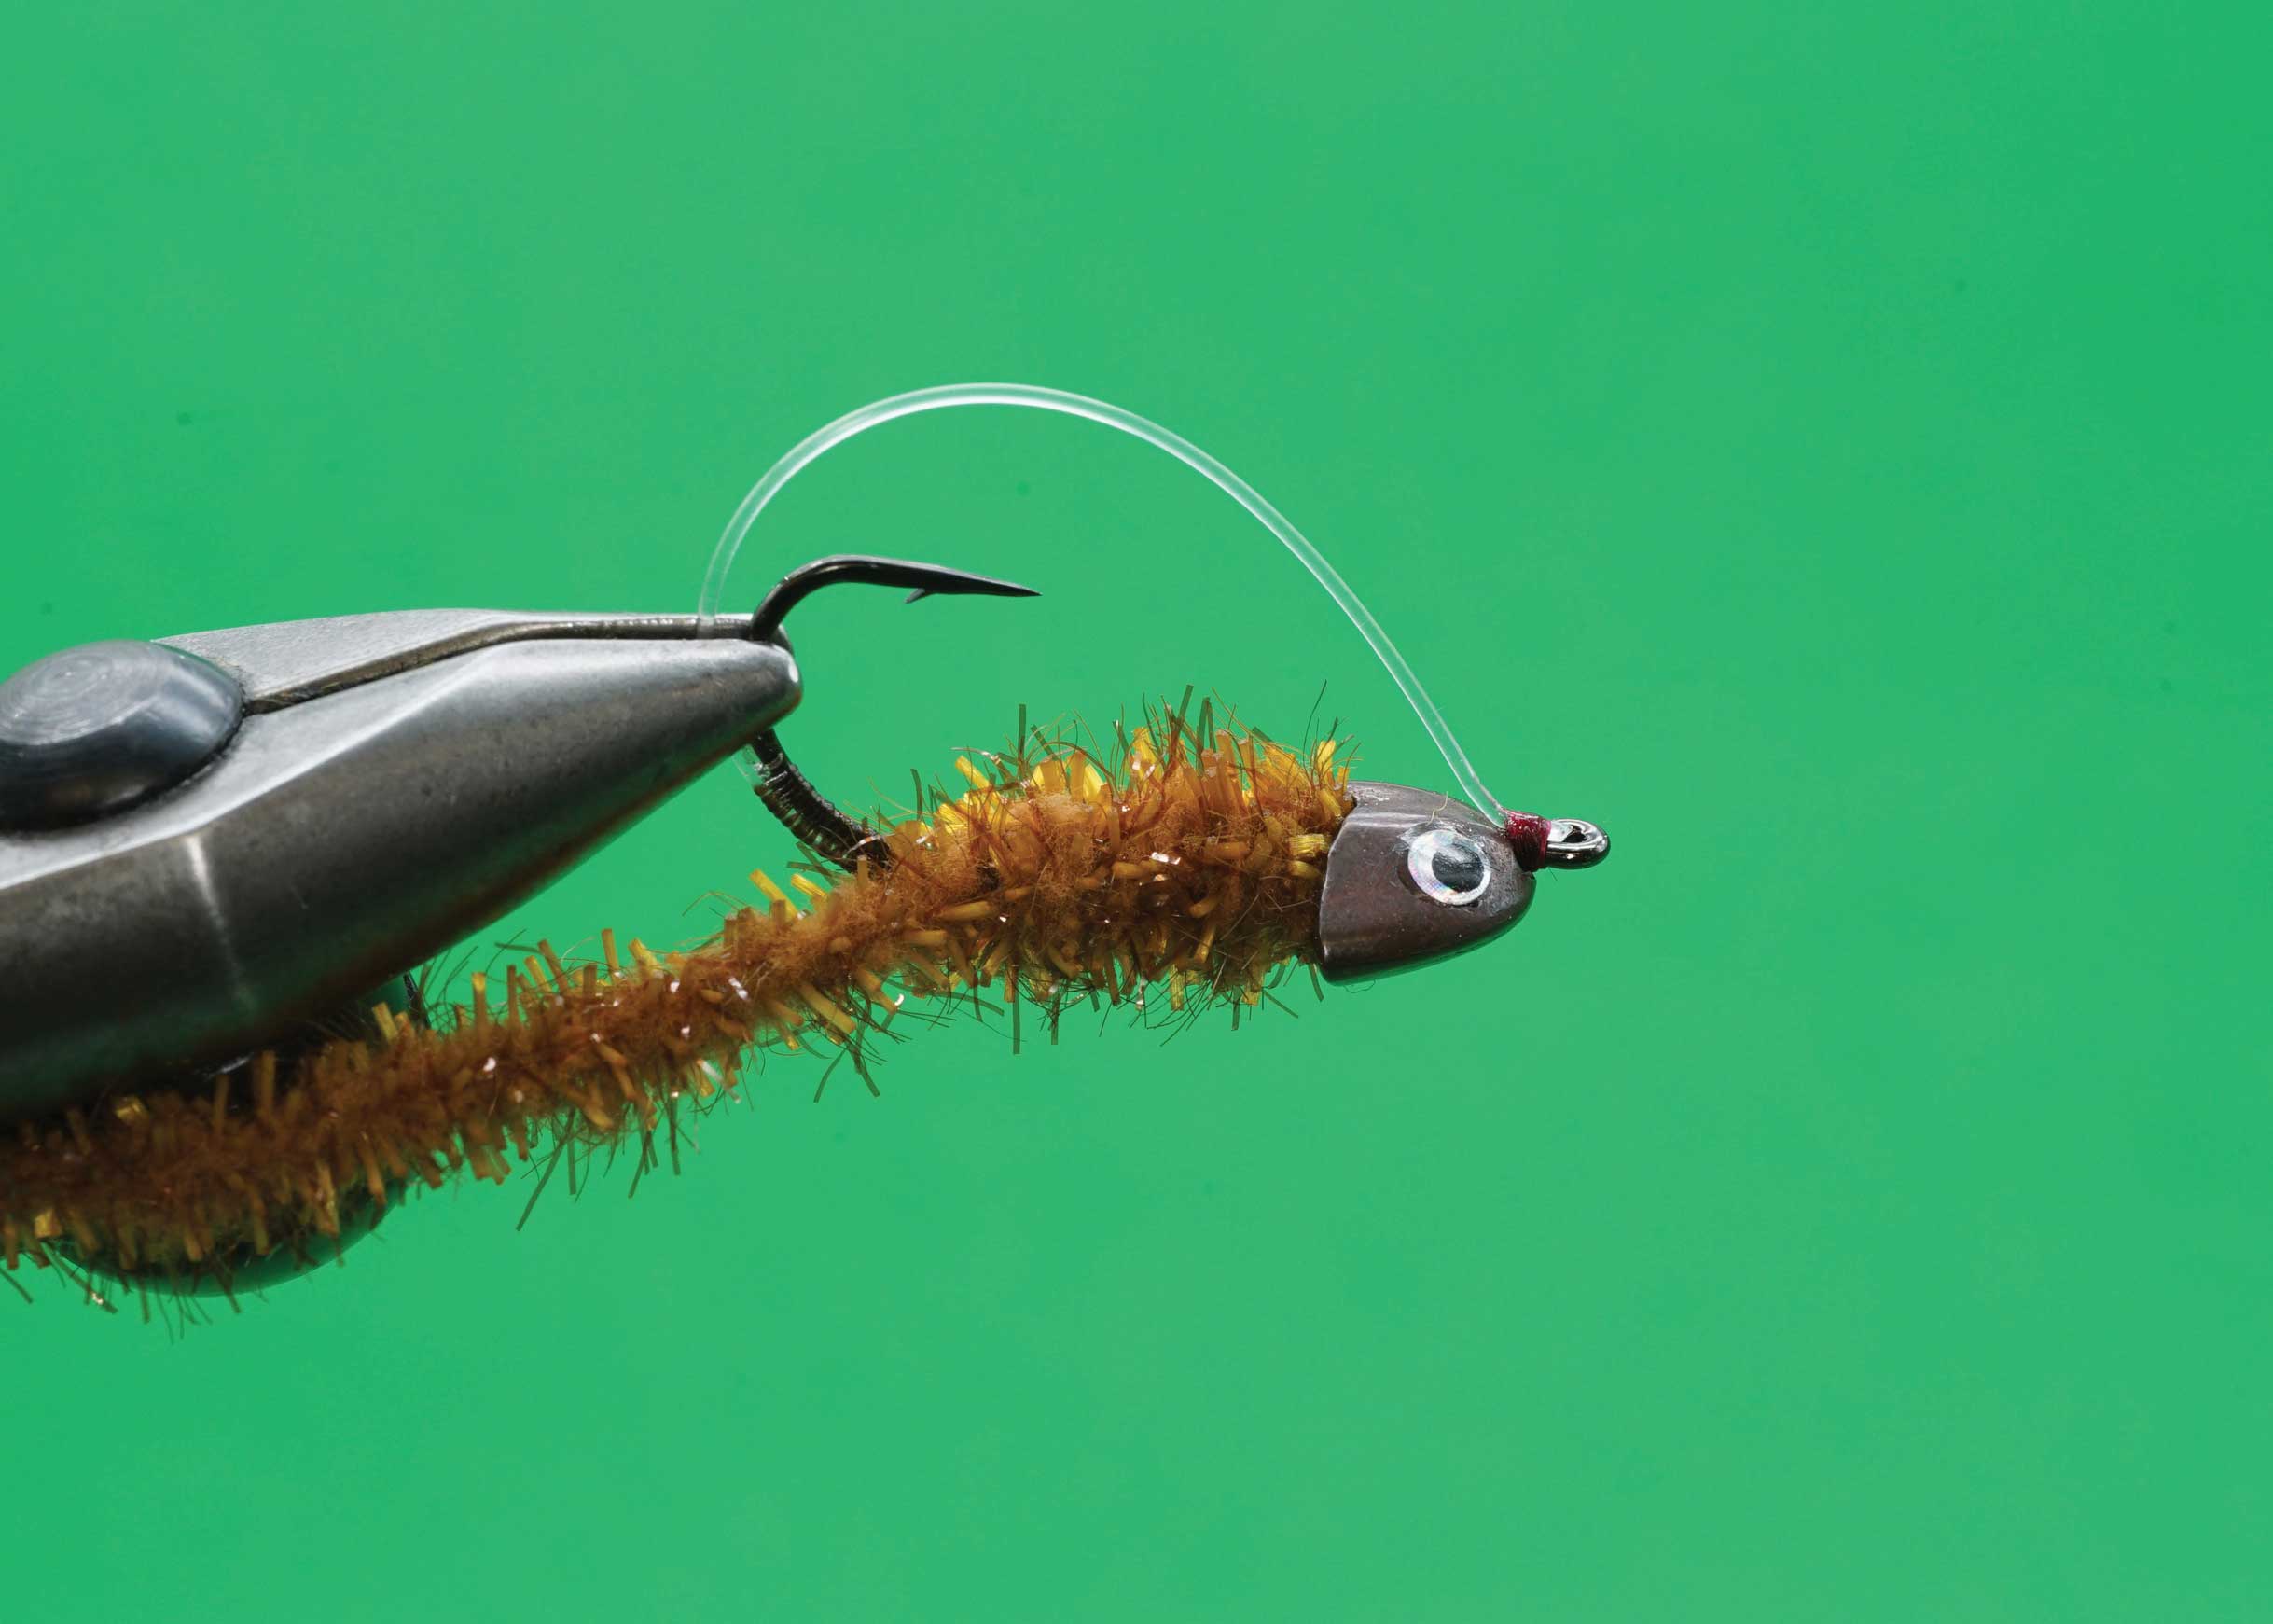
- Rotate your hook or vise so the fly rides hook point up. Fold the weed guard over the fly. Using a pair of flat-nose pliers, squash the mono flat. Attach contrasting-colour thread directly behind the hook eye but in front of the Sculpin head. Fold the mono guard over the body and secure it in place directly behind the hook eye and in front of the Sculpin head. Adjust the weed guard as necessary. There should be approximately half the hook gape of space between the weed guard and hook point.
 Predator Worm: Step 5.
- Build a neat head, whip finish and remove the tying thread. Place a pair of eyes into the recessed sockets of the Sculpin head. Cover the thread head and eyes with UV resin and cure with the appropriate light for added durability.
 Predator Worm: Step 6.