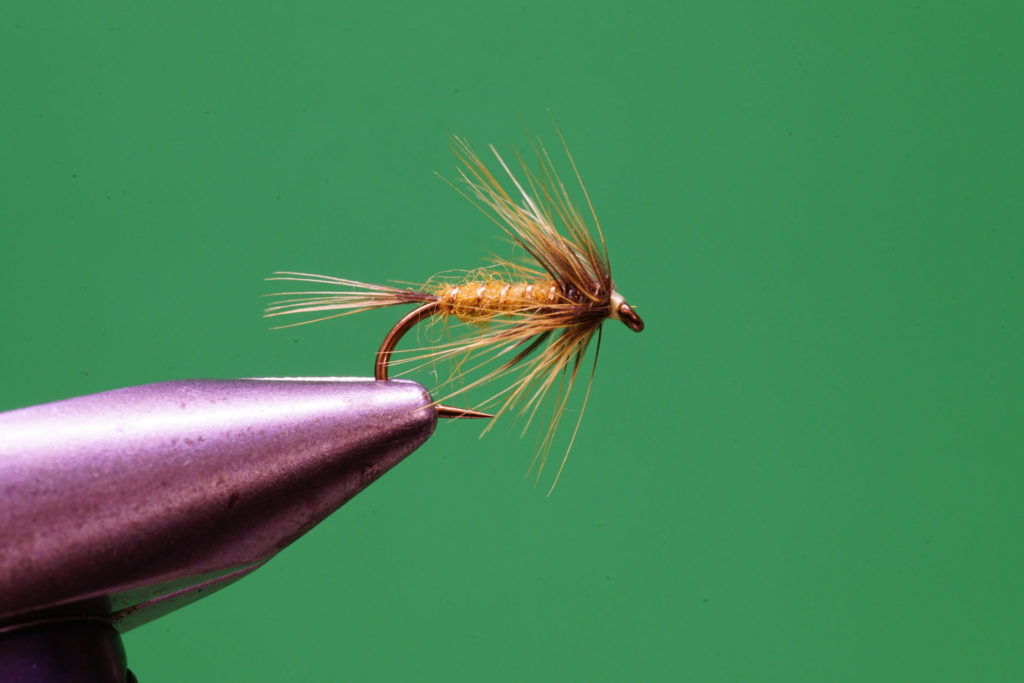
A flymph is a unique but deadly blend of wingless wet fly and nymph. Flymphs are nothing new. They are perhaps best described in the classic book The Art of Tying the Wet Fly and Fishing the Flymph by James Leisenring and Pete Hidy, first published in 1941. Although overshadowed by today’s more specific emerger patterns, flymphs remain an excellent choice for suggesting emerging mayflies, caddis, even swamped or drowned terrestrials. Originally intended for moving water, flymphs are excellent stillwater choices, too.
Advertisement
Advertisement
Flymphs are simple flies. The key ingredients are the dubbed body and hackle working in unison to suggest movement and gather air bubbles, a common feature of many emerging insects.
Advertisement
Natural fur and fur blends are the most common flymph body materials. Hare, rabbit, muskrat, mole and Australian opossum are preferred choices. Personal preference and the colour you are trying to duplicate are typical deciding factors. I favour rabbit/Antron blends for the majority of my flymphs, as Antron fibers reflect light.
Original flymphs featured pre-spun dubbing loop bodies that were built using spinning blocks. Dubbed bodies were built, tied in and wound forward to form the body. Contrasting colours of Persall’s Gossamer Silk threads in yellow, green, orange and red were the preferred body cores. Personally, I use more readily available thread types. Selecting a contrasting thread colour that bleeds through the body once it is wet is important.
Pre-spun bodies are not required to tie a flymph. Begin by pulling down on the bobbin, exposing a suitable length of tying thread to form a dubbing loop. Coat the thread with a sparse coat of dubbing wax. Take a pinch of dubbing and touch it to the tacky thread. Bring the tying thread back up to the hook to form a thread loop. Insert a dubbing spinner and twist the loop tight, creating a sparse but spikey dubbing noodle. A shaggy body is important for the individual fibers to gather and trap air.
Original flymphs were tied using cockerel hackle. Cockerel hackle comes from juvenile roosters harvested in their first year, before their feathers have had a chance to mature. Cockerel hackle is now tough to find. Genetic hackle from a hen cape is an excellent, more readily available, substitute. Today’s quality, domestically raised, genetic hen capes come in a range of colours.
I secure my hackle right after covering the shank with the thread. Tie a prepared hackle on the top of the shank, just back from the hook eye, wet-fly style with the convex or most prominently marked side of the feather facing forward. Securing the hackle in this manner ensures a firm tie-in so that the individual fibers flow and radiate back over the fly. Make a test wrap to make sure the hackle winds back without twisting. If the hackle twists, adjust the tie in or select another, more co-operative feather.
As insect legs don’t originate from a single point, but rather along the length of the thorax, flymph hackle is spread along the front portion of the fly. The first two wraps are placed one behind the other. Space out the remaining wraps so the hackle finishes roughly one-quarter to one-third of the shank back from the hook eye. Tie or snap off the remaining hackle. Using open wraps, wind the thread forward through the hackle to the hook eye for added reinforcement. Flymph hackle can be stripped from the right side to provide an additional level of sparseness, if needed.
To snap off a hackle, or any other easily broken material, pull down on the bobbin to apply thread tension. Grip the hackle by the tip and using a sharp, forward snap, break away the excess. Maintaining thread tension is important. Snapping forward on a hanging bobbin causes it to jump, introducing thread slack and causing the material to unravel. Once mastered, the snap off is a handy technique.
Flymphs require a touch of weight to penetrate the surface film so they don’t skate when swung or retrieved. Rib and hook choice come into play. Heavier ribbing materials, such as wire or oval tinsel, are common flymph components, along with 2X heavy hooks.
I am a huge fan of underrated wet flies and flymphs. In recent years, they seem to have been pushed to the back in favour of more contemporary, and often complex, patterns. Flymphs and wet flies work as well today as they did in the past. Dave Hughes’ book Wet Flies is an excellent resource for all things wet fly and flymph. I highly recommend it.
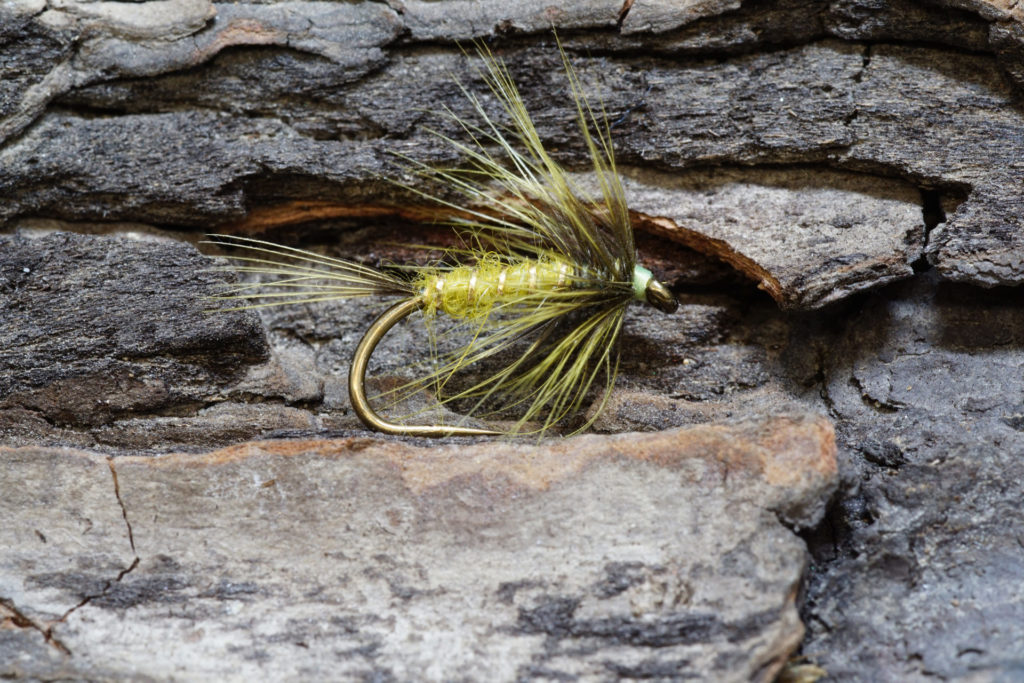
Flymph – Olive
- Hook: Standard wet fly, 2X heavy #10 – #16
- Thread: UTC 70, pale watery olive
- Tail: Whiting genetic hen cape fibers, olive
- Rib: Fine oval tinsel or small wire
- Body: Hare’s ear plus dubbing, olive
- Hackle: Whiting genetic hen cape, olive
Tying Instructions
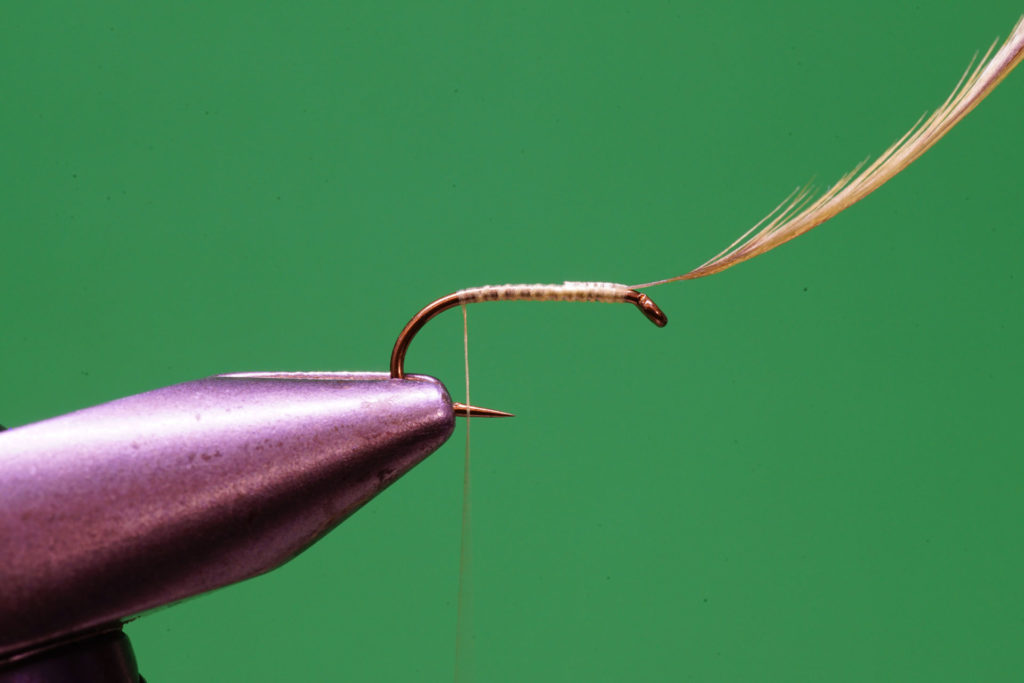
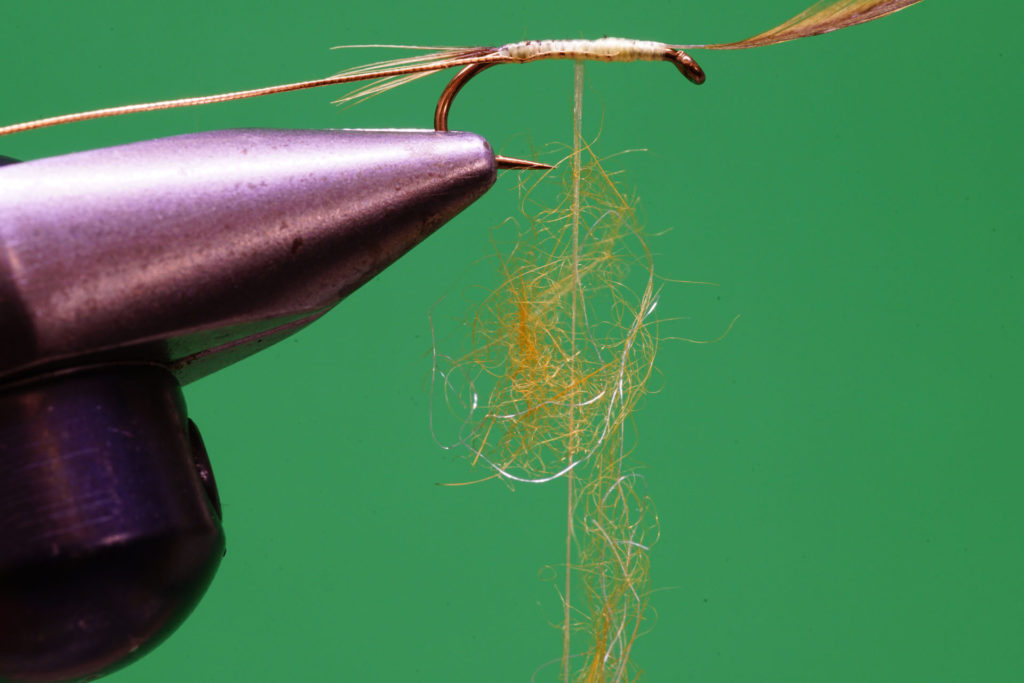
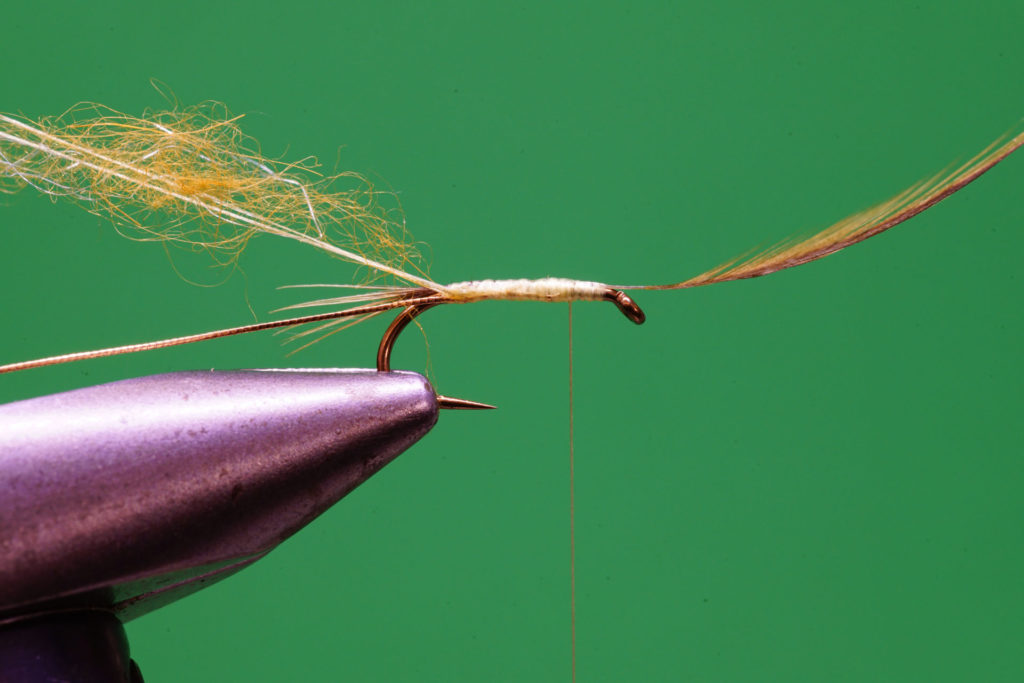
- Cover the hook shank with thread. Select a hen cape feather with fibers that are no longer than the hook shank. Remove the flue from the base of the feather. Tie in the prepared feather on top of the shank one hook eye width back from the hook eye. Make sure the feather is tied in wet-fly style, with the most prominently marked or convex side of the feather facing forward. Wind the feather back one turn to ensure it doesn’t twist and the fibers flow over the shank.
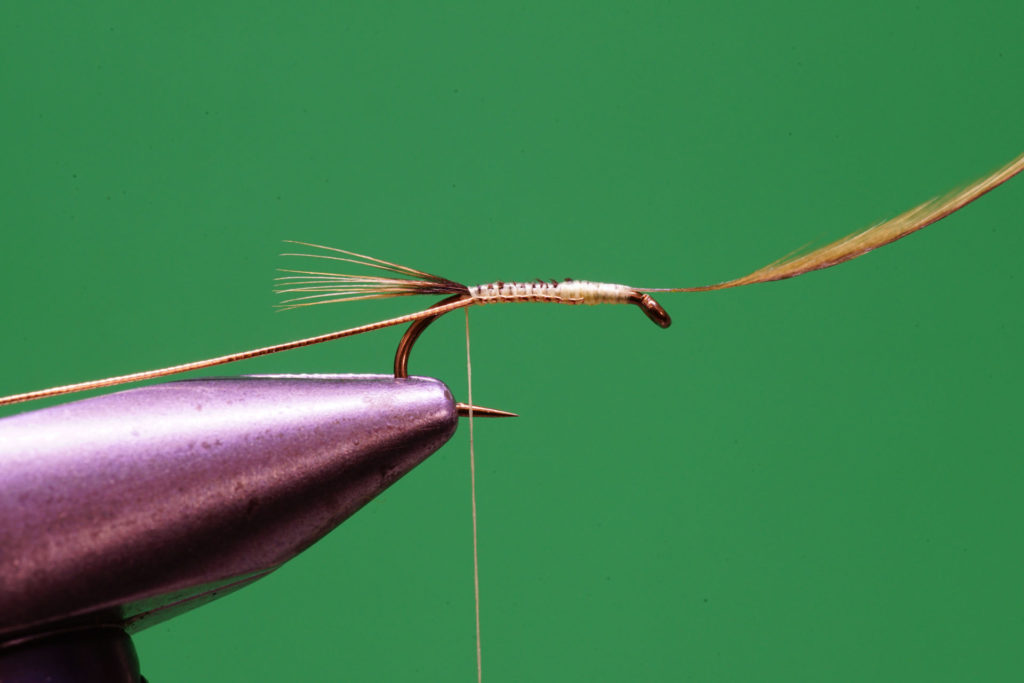
- Secure a shank-length tail in place at the rear of the shank. Place a few thread wraps directly under the tail to raise the tail. Tie in the ribbing material along the side of the hook.
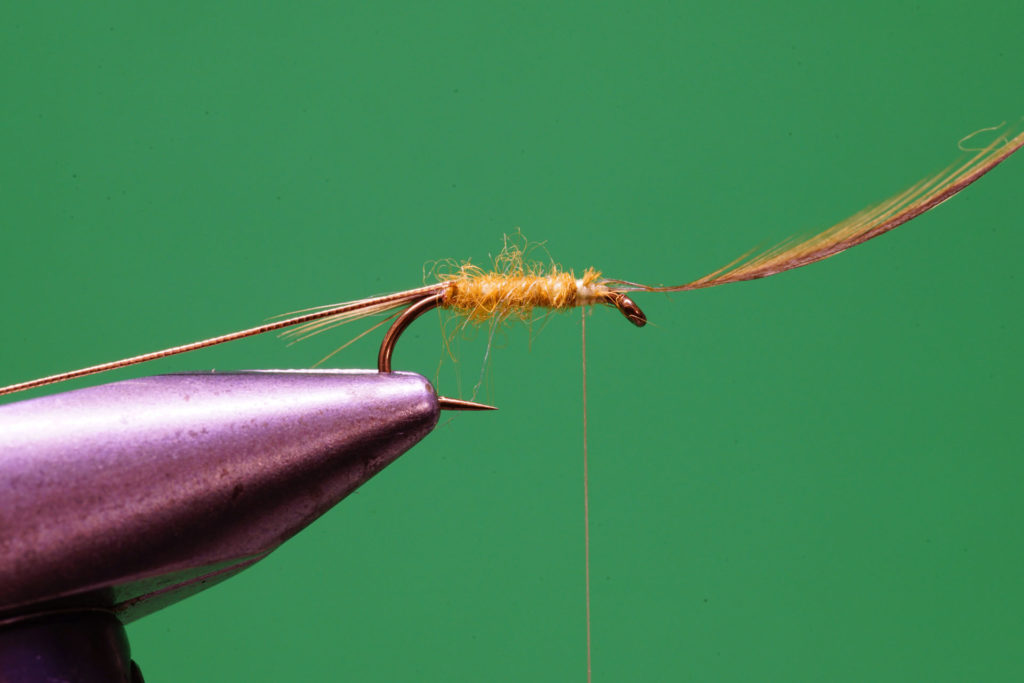
- Move the thread so it hangs just forward of the hook point. Pull down on the bobbin to expose roughly three inches of tying thread. Lightly coat the exposed thread with dubbing wax. Touch the dubbing mix to the tying thread. Keep the dubbing application sparse.
- Bring the tying thread back up around your forefinger to form a dubbing loop. While maintaining tension on the dubbing loop with your finger, close the thread loop by winding the tying thread back to the base of the tail, locking the dubbing in place.
- Insert a dubbing twister in place of your forefinger. Twist the dubbing spinner tight to form a sparse but spikey dubbing noodle. Using close-touching turns, wind the dubbing noodle forward to the three-quarters point on the shank to form the body. Tie off the excess dubbing noodle and trim the excess.
- Wind the ribbing forward over the body using open, even wraps. Tie off and remove the excess ribbing material.
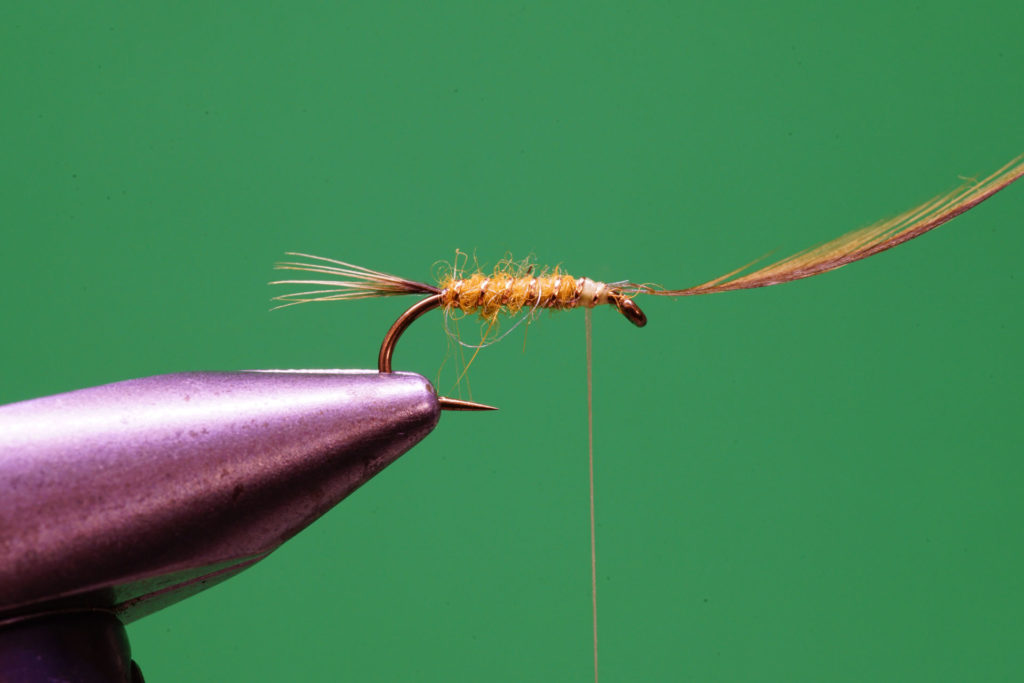
- Wind the hackle back down the shank, over the body slightly, to the one-third point. Tie off the hackle. Either trim or snap off the excess. Spiral wind the tying thread back through the hackle to the hook eye to reinforce it. Build a neat, tapered head, whip finish and apply cement.