Not everyone participates in or supports competitive fly-fishing. But no matter where you stand, gear, presentation techniques or flies; all have been influenced by competitions. Developments such as no-stretch lines, beadheads and Euro nymphing are just a few of the benefits that we, as fly fishers enjoy today as a result of competitions. In recent years, jig nymphs such as Andy Larkin’s CDC Red Tag have also become part of everyday fly tying and fishing.
Advertisement
Flies tied using slotted beads and up-eye jig hooks offer a number of advantages. From a practical perspective, jig nymphs ride hook point up, reducing the risk of snagging and fouling. A good characteristic for any nymph tumbling through snag-infested reaches of a river bottom where trout prefer to reside. Another benefit of a jig nymph is that the majority of your fish will be solidly hooked in the upper lip. Fish hooked in the upper lip have a hard time throwing the fly.
Jig flies, as their name implies, provide a subtle jigging action, helping to suggest life and convincing the fussiest of fish that they are worth at least a sample nibble. The vast majority of jig nymphs are simple flies tied in the round. Flies tied in the round offer fish the same view of the fly no matter its orientation in the current, as there are no wing cases or other features to suggest whether a fly is upright in the water or not.
Advertisement
Small, trout sized jig hooks are not created equal. Many longer shank 90-degree jig hooks that have become popular choices for balanced leeches are designed with soft-mouthed panfish such as sunfish or crappie in mind. These light wire hooks often bend under the stress of large trout, something to keep in mind when choosing traditional jig hooks. Short shank, trout specific, jig hooks feature a 60 degree angle up to the hook eye and wide gapes that hook and hold fish. The up eye of the hook, in combination with a slotted tungsten bead rolls a jig nymph upside down. If you aren’t using a tied in the round philosophy keep this feature in mind so you don’t end up with a series of jig nymphs that appear to drift in a predominantly upside down state.
Slotted beads are a must when tying jig nymphs. The slot allows the bead to navigate around the angled shank and slide tight against the hook eye. When loading a hook with a slotted bead the small hole faces the hook eye and the wide slot faces the rear of the hook. Besides size and color options slotted beads, as with regular beads, are available in both smooth and faceted finishes. Faceted beads feature small flat spots similar to a disco ball that reflect light in all directions. Some contend that slotted beads weigh more than regular beads as less material is removed when the beads are drilled and slotted.
Advertisement
Split shot is not used when Euro nymphing so the fly is the only weight source. As presentation often trumps pattern I have a simple selection of nymphs, both jig style and traditional, tied in different weight configurations. In addition to the weight of the slotted tungsten bead, jig nymph mass can be supplemented through the addition of a lead wire or lead wire substitute under body. You can of course vary the bead sizes to provide additional weight but don’t choose a bead so large that the fly’s profile appears unnatural. When I am tying a particular pattern I have a selection using only a tungsten bead, a selection with a tungsten bead and a .010” lead wire under body, and so on. Successful tyers match the weight of their specific flies to the conditions, the faster and deeper the water, the heavier the fly. Use a grain scale to weigh the hook, bead and any additional weight prior to tying to maintain weighting consistency. It is important not to make your flies too robust. Keep in mind, the slender bodies common to jig nymphs slice through the water also helping sink the fly. Many tiny micro jig nymphs are nothing more than a thread body, contrasting rib, bead, and a sparse dubbed thorax.
The direction you fish also has a bearing on fly weight. For example, French style nymphing utilizes slim lightweight patterns as the flies are presented upstream. As with all Euro nymphing methods you maintain contact with the nymph but as the fly drifts down toward you the current also helps sink your fly.
Although popular choices for Euro Nymphing, jig nymphs are not confined to this presentation technique. Jig nymphs also make excellent choices for traditional strike indicator nymphing techniques as they suspend in a quasi-balanced manner. For the stillwater angler, jig nymphs also deserve fly box space. I have an evolving collection of damsel and mayfly nymphs, chironomid larva, caddis pupa, scuds and boatman patterns all tied on jig hooks. Suspended under an indicator these flies can be deadly, often outperforming their traditional counterparts.
The CDC Red Tag Designed by Andy Larkin
Hook: Up Eye Jig Hook #12-#16
Thread: 8/0 or 70 Denier, Black
Tail: Daytum Globrite Floss #4 (Fire Orange)
Rib: Red Wire
Body: Bronze Peacock Spectra Dub #45 or Peacock Dyed Red
Collar: Natural CDC
Bead: Slotted Silver or Metallic Pink Tungsten
-

 Via Phil Rowley
Slide a slotted tungsten bead, small round opening toward the hook eye, onto the hook. Place the hook into the vise and slide the bead forward to the hook eye. Twist the bead as necessary so the slotted portion of the bead navigates around the angled shank so the bead pushes tight against the hook eye. Attach the tying thread behind the bead. Build a thread ramp directly behind the bead to lock it into place. Cover the balance of the shank with thread.
-
 Via Phil Rowley
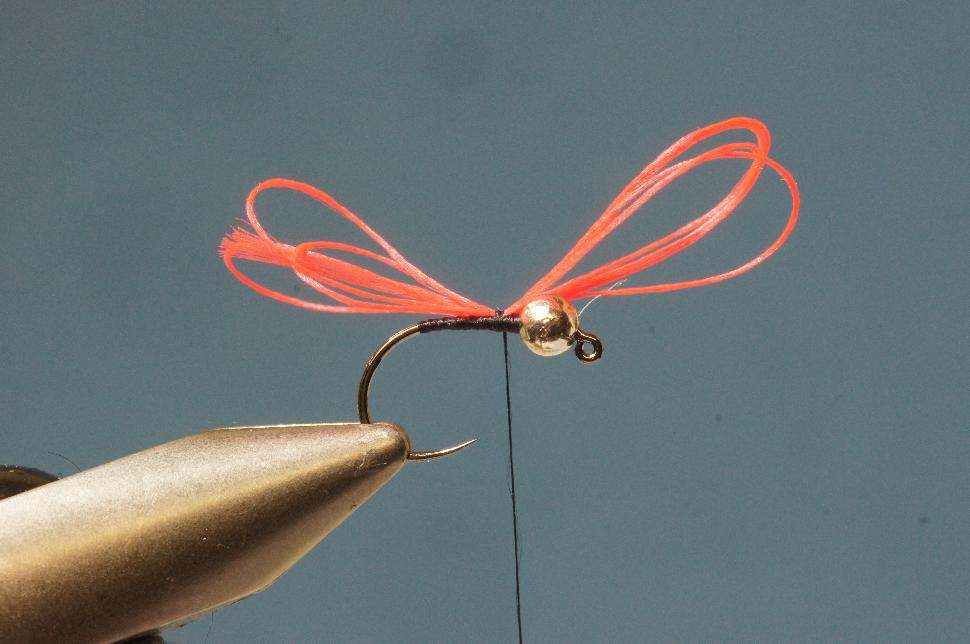
Trim an 8-10 inch length of Globrite Floss from the spool. Stroke the ends together. Double the floss over itself a number of times so it forms a small bow tie. Tie in the doubled floss just back from the bead so there are equal amounts of doubled floss on either side of the tie in point.
-
 Via Phil Rowley
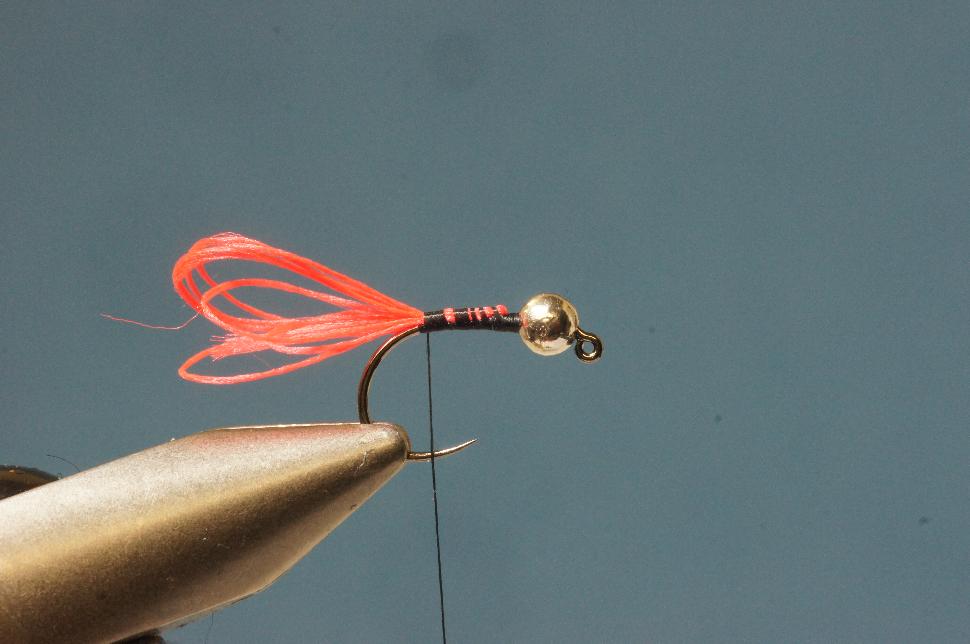
Fold the floss forward of the tie in point back over the floss trailing rearward. Secure the folded floss back down the shank to the bend of the hook. This process ensures a smooth even underbody. Trim the floss even with the hook bend to form a short stubby tail.
-
 Via Phil Rowley
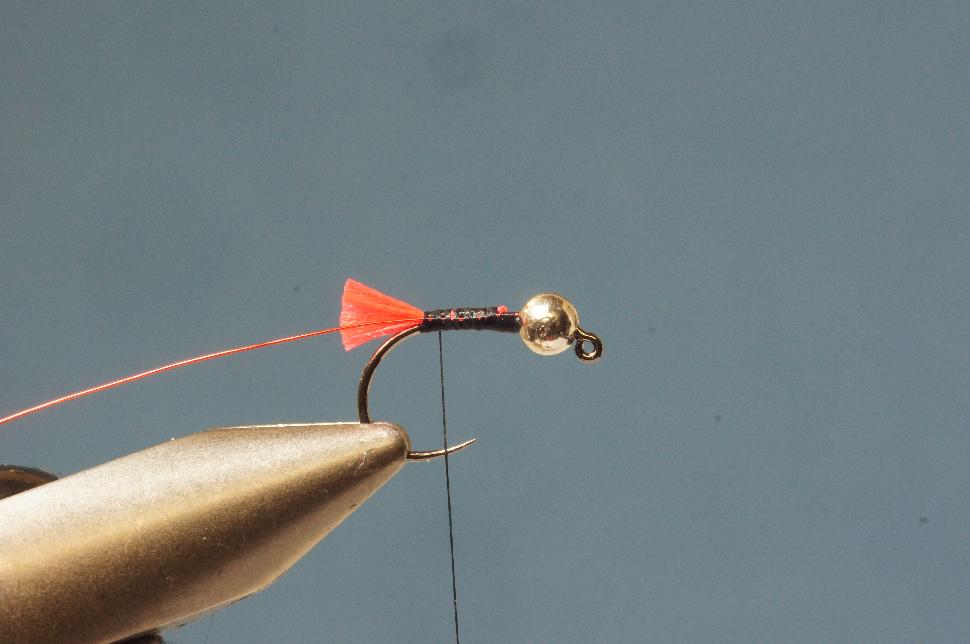
Tie in the wire rib just behind the bead and secure it back along the near side of the shank to the base of the tail.
-
 Via Phil Rowley
Form a neat slender tapered body from the base of the tail to the rear of the bead. Spiral wrap the rib forward over the body using even open turns. Tie off the wire at the rear of the bead. Using a pulling and twisting motion break away the excess wire.
-
 Via Phil Rowley
Using a Magic Tool fold a single CDC plume. Flatten the tying thread by twisting the tying thread counter clockwise when looking from above. Using a dubbing or sewing needle carefully split the tying thread. Insert your finger into the split thread loop to keep it open. Place the folded CDC plume into the split thread loop remove your finger to trap the CDC in the loop. Twist the thread tight by spinning the bobbin locking the CDC in place.
-
 Via Phil Rowley
Wind the dubbed CDC directly behind the bead. Stroke the CDC fibers back after each wrap. The finished CDC hackle should be sparse and flow back over the body. Pinch or trim any errant CDC fibers. Apply head cement or brushable superglue to roughly ½” of tying thread. Wind the coated thread directly behind the bead. Whip finish to complete the fly.