
When trout are fixated on chironomids, trying to replicate or match the emerging pupa through pattern choice and presentation technique is the standard course of action. But what happens when this “match the hatch” mantra isn’t working? Many fly fishers, myself included, try smaller imitative patterns, shuffle through colour variations or choose patterns with slender natural profiles with little to show for the effort. Trout are definitely feeding, so what’s the next option?
Advertisement
Although running through the changes to match the naturals is my usual approach to these situations, there are times that coming from the other end of the spectrum works unbelievably well. Exaggeration can be the key to success.
There are four main ways I exaggerate my chironomid pupa patterns: colour, size, pattern mobility and presentation. Other fly fishers and tyers, such as Brian Chan and John Kent, also subscribe to this ‘stand out in a crowd’ philosophy.
Advertisement
Colour exaggerations focus on loud, perhaps even obnoxious choices. John Kent’s flashy attractor-style chironomid pupa patterns such as his Blind Eye Charlie, Fire in the Sky and Rusty Nail take advantage of this form of exaggeration. John integrates holographic Mylar and Flashabou along with Mirage Opal Mylar or Flashabou into the bodies and ribbing on some of his best attractor patterns. These materials catch and reflect light attracting fish from a distance.
Fluorescent colours are another option. For example, the Left Field Pupa featured in my Stillwater Selections book utilizes a black holographic Mylar body coupled with a fluorescent orange bead. Fluorescent chartreuse and pink are other considerations. Glo Brite floss provides subtle fluorescence when used for thoraxes, wingpads or butts. I have also been blending in UV2 materials with good success. Flies incorporating fluorescent colours stand out in a crowd remaining visible at depth.
Advertisement
Exaggerating size is another worthwhile tactic. One day last season during one of my stillwater seminars, fishing was tough. Trout were concentrated on chironomids but we were experiencing limited success matching the pupa we had observed. One of my students started regularly hooking fish, landing some decent trout in the process, a pattern that continued for the better part of the afternoon. To the group’s surprise he told us he was using a large #10 3xl bomber pattern. A fly almost four times the size of the naturals we had observed. Despite this exaggeration the trout loved his bomber pattern, clobbering it with reckless abandon. Perhaps the perceived reward of such a large tasty pupa was too much for the foraging trout to pass up?
The main philosophy when using attractor patterns is having your fly stand out in a crowd so it triggers a response. Besides colour and size, pattern mobility is another consideration. Blending natural movement into the fly to suggest life also works at times. Slender marabou tails on chironomid pupa or long gangly Superfloss legs on bloodworm patterns are two of my favourite options. Mobile patterns suspended under an indicator come to life animated in part by the surface chop against the indicator. The indicator’s bouncing motion transfers to the fly via the leader and tippet providing a powerful trigger to otherwise close mouthed trout.
Presentation technique also factors into the exaggeration equation. Although not a tying technique, proper presentation is the key to any fly no matter the pattern style, size or type. When it comes to chironomids, the majority of presentation techniques are slow, matching the almost stagnant motion of the natural pupa. At times, an aggressive approach is more appropriate. When using strike indicators, rather than using the usual snail-paced hand twist or letting the fly hang static use a deliberate aggressive six to12-inch strip. The rapid rip raises the fly and the post strip pause allows the fly to flutter and settle back to its original position. This contrast of motion draws the attention of nearby trout, often triggering a response. Watch for confident takes as soon as the indicator stops and the fly starts to settle.
Although using attractor-style chironomid patterns and presentation techniques doesn’t always work, it is definitely an option worth trying when all other approaches have failed. The four methods of exaggeration I have listed above can be used individually, combined in part, or blended altogether. Experiment until you find a combination that works.
Blind-Eye Charlie Designed by John Kent
Hook: Curved Scud/Pupa #10-16
Thread: 8/0 or 70 Denier Rust Brown or Black
Underbody: Uni Stretch, White
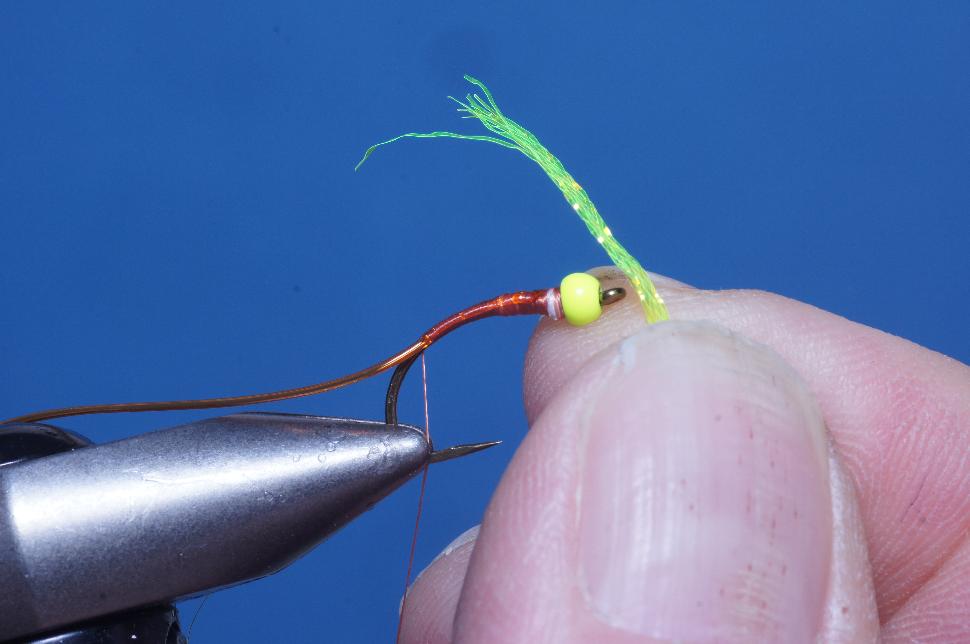
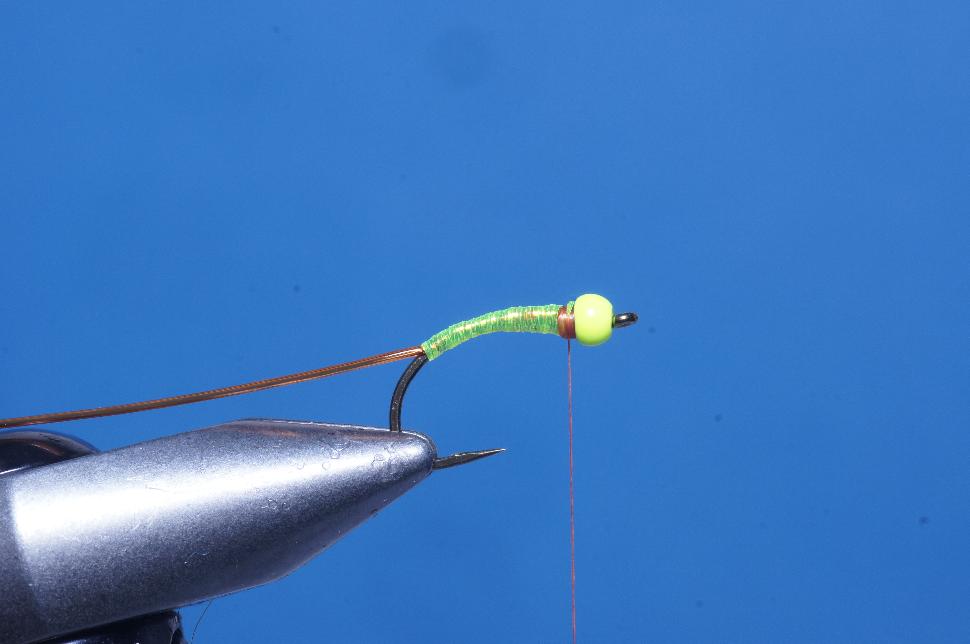
Body: Mini Flat Braid, or Flashabou Chartreuse
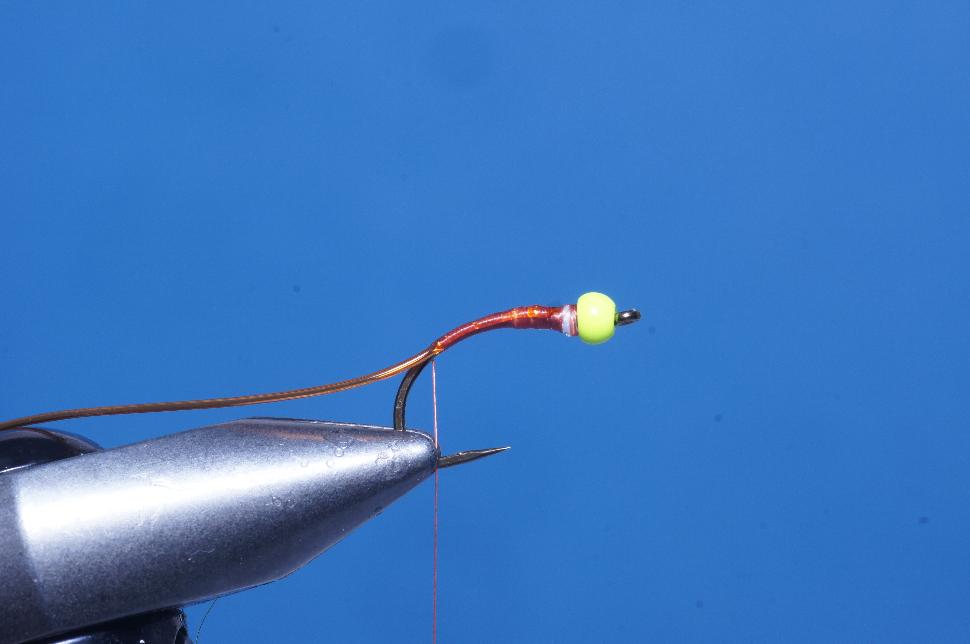
Rib: Stretch Tubing Micro, Rust Brown or Black
Gills: Fabric Paint, White
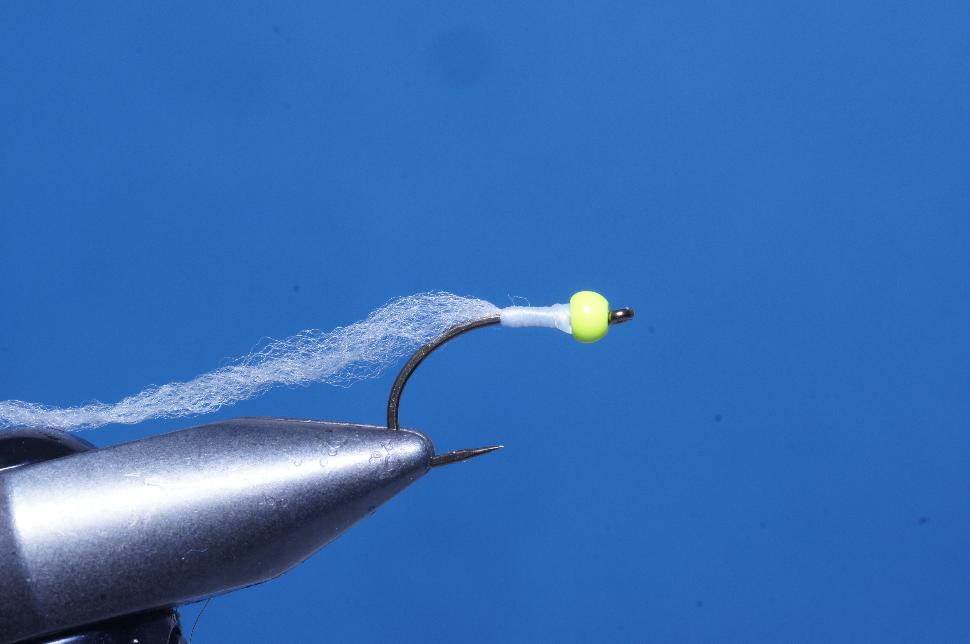
Bead: Chartreuse Tungsten
Tying Note: Match thread colour to rib. Traditional sparkle yarn or Uni Stretch can be used to suggest the gills as opposed to white fabric paint.
-

 Via Phil Rowley
Slide the bead onto the hook, narrow end towards the hook eye. Form a neat tapered underbody over the front half of the shank using white Uni Stretch. Leave the tag end of the Uni Stretch trailing along the top of the hook. Tie off the underbody material at the rear of the bead.
-
 Via Phil Rowley
Attach the tying thread just behind the bead. Cover the underbody and then remove the tag end of the thread and the remaining tag end of the Uni Stretch underbody. Cover the balance of the hook with tying thread. Bring the tying thread back up to the rear of the bead. Tie in the ribbing material along the near side of the hook and secure down into the bend. As you secure the ribbing back along the shank stretch it to reduce bulk.
-
 Via Phil Rowley
Fray the ends of the body material. To maintain a slim slender body, isolate and remove four strands of the flat braid by pulling one strand at a time, leaving you with five strands.
-
 Via Phil Rowley
Tie in the prepared body material at the rear of the hook. Wind the body material forward using adjacent wraps to create a neat slender chartreuse body. Tie off and trim the excess body material.
-
 Via Phil Rowley
Wind the ribbing forward over the body seven times creating nine distinct body segments. Tie off and remove the excess ribbing material.
-
 Via Phil Rowley
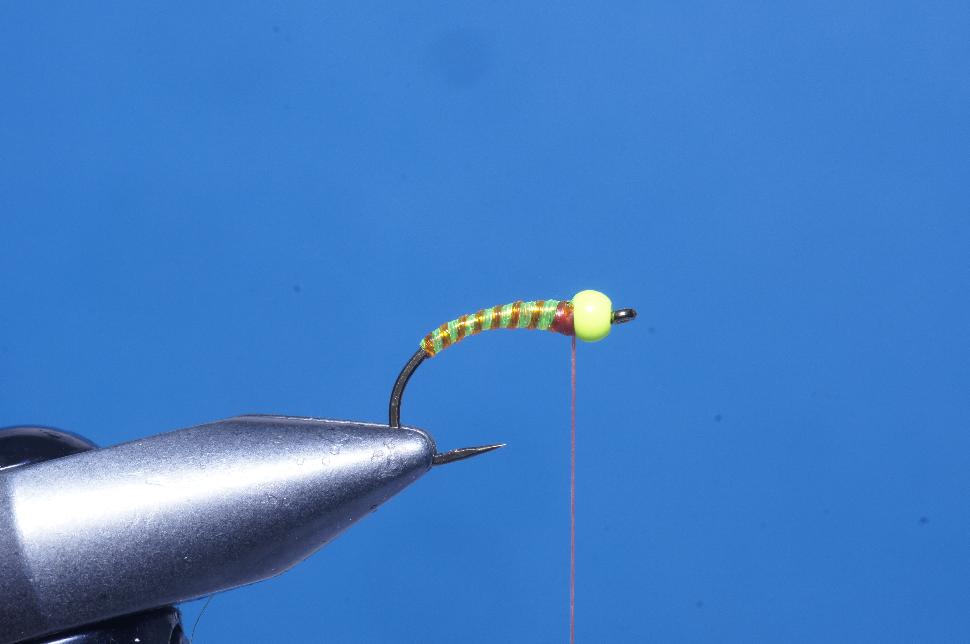
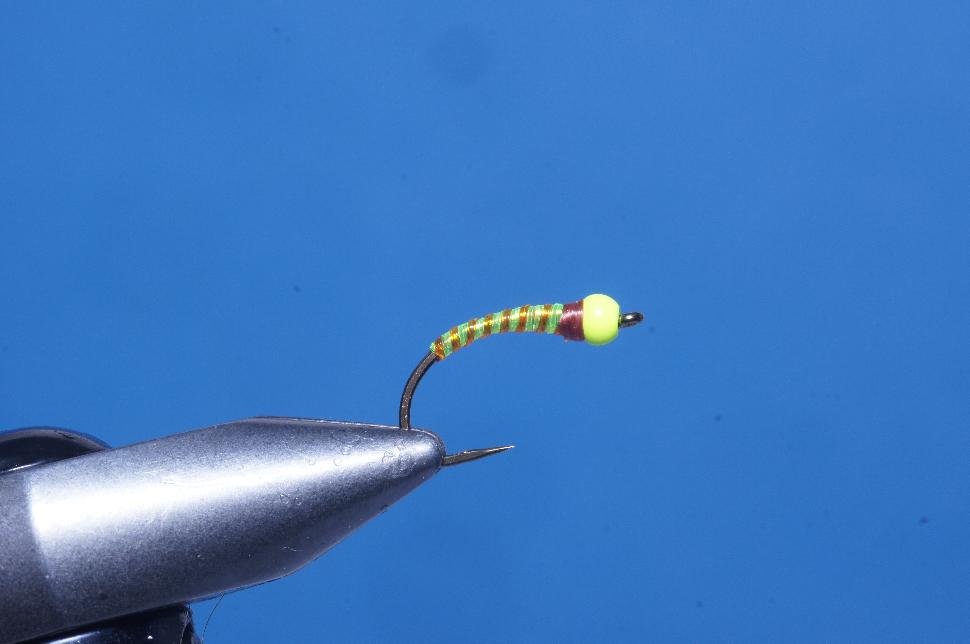
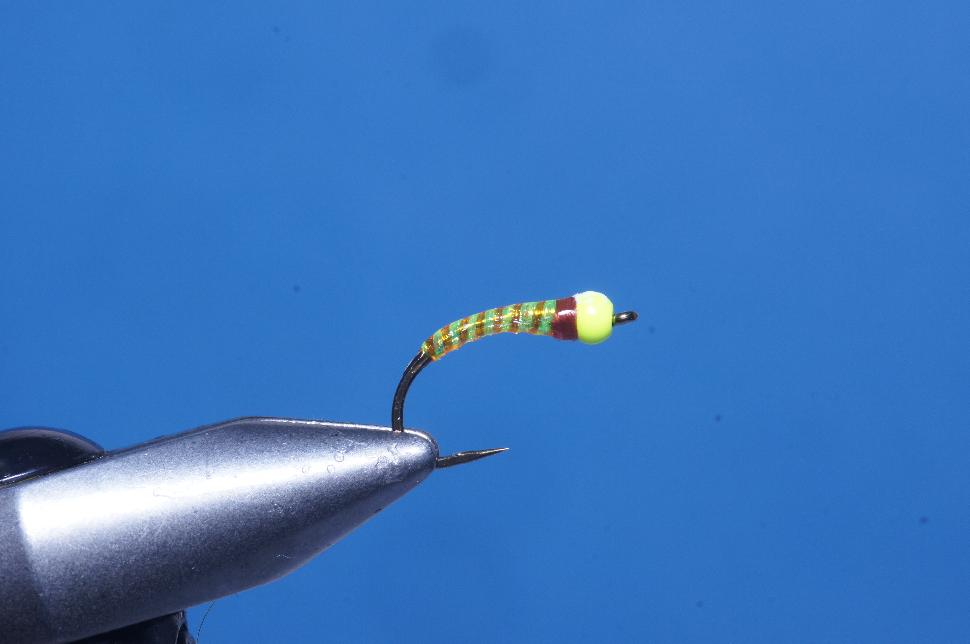
Using tying thread, build a tapered thorax directly behind the bead. The finished thorax should extend no further back than the width of the bead. Whip finish and remove the tying thread.
-
 Via Phil Rowley
Coat the body with brushable superglue. Once the glue has dried add a finish coating of thin UV resin or two coats of nail polish. Form the gills by placing a small neat dab of white fabric paint on the top of the bead.