 Via Keith Douglas
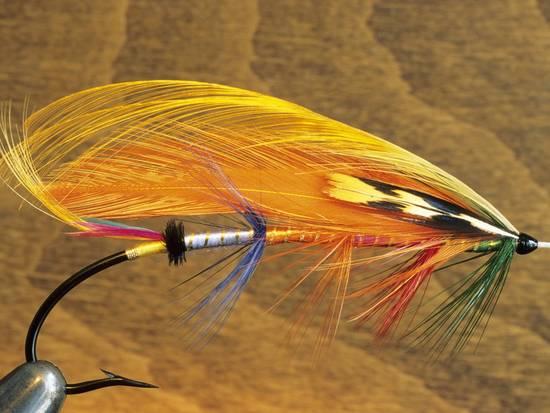
So many distinctly separate and rewarding factors separate fly-fishing from all other sports, especially the artistic or creative aspect of fly-tying. Little is as sweet as to create a fly and to have a fish take it or for others to catch fish it. Tying started for me at an early age; I needed a fly that I was unable to find to purchase. That was birth of Gardy’s Grunt, a simple pre-micro leech. My friends and I would slam trout with it, not just a few–I mean, it was hundreds– and we did this everywhere. And so, with the creation of that fly, my tying addiction took hold.
Advertisement
It doesn’t take much to get into fly tying. A beginner fly-tying kit that comes with all the basics to get started can be purchased at any fishing store for less than seventy-five dollars. My recommendation is to find a small, locally owned fly and tackle store and buy yours there. The big box stores have the kits but they tend to be lower end materials and not necessarily stocked with items for local fishing. It’s best to take the time to find a locally put together kit or to ask your specialty fly shop to put one together for you. Really, just ask, they will.
If you enjoy tying, you’ll want to upgrade right away. When you start to upgrade, don’t buy from an upgrade kit. This is the time for you to start to piece together the tools of your new obsession and quality counts. The most important tool for the tier is the vise. This is what holds the hook; the higher end you go, the more quality and functions you will have. You can buy a vise for around $20 but my advice is to buy once, not twice; get quality the first time. A lever vise can be purchased for under $50. This style of vise is a primitive rotary style that doesn’t ever need adjusting. Any hook, from a big tarpon fly to a miniscule midge hook, can be placed in this kind of vise and be held perfectly. There are many brands of vises, from high end Italian precision to affordable American made ones that won’t put you in the poor house.
Advertisement
You’ll need a pair of scissors, the second most important tool for a tier. Here again, go with the best quality that you can afford. Take them out of the package and handle them; find out which feel the best in your hand. If your fingers are large, try open loop style. Comfort should be one of the primary determinant factors in your choice of scissors. Never use your fly-tying scissors for anything other than fly tying. Pick up my $50 tying scissors to cut some fly line or your nails and you’ll see an entirely unique shade of red on my face; you may even be able to hear my blood boiling beneath my skin.
The bobbin is another vital tool of the trade. Bobbins come in all shapes and sizes, from the peewee to standard and all the way up to large. The most important thing is to buy one with a ceramic insert. This eliminates the excessive clogging that waxed threads develop inside them.
Advertisement
For the trout fisher, I would recommend a smaller sized bobbin – especially for chironomids, micro leeches or any other small pattern. The smaller bobbins help with the speed of your thread wrapping, giving you a better ratio and mechanical advantage. The same goes here, you can spend a little or a lot but aim to buy once not twice, quality should not be your sacrifice.
Good tying tool manufacturers have economy tools available and, for the avid tier, I recommend having a few extras with different types of thread on them.
A simple trick to threading your bobbin is to place the thread in your bobbin tube and to suck on the other end, which pulls your thread through. A bobbin threader for those you with bad eyesight is mandatory. A magnifier
on your work light is also helpful for the intricate parts of fly tying.
If you are working with deer or elk hair a hair stacker is important. From Tom Thumbs to muddlers you need to match the tips of your material. A cheap $5 one will do just fine; this is the only tool that I would cheap out on, unless you are tying with lots of deer hair, then I would advocate spending the money on one built from wood or billet aluminum.
To finish your flies you need to perform a series of half hitches. A whip finisher can perform this with speed and accuracy. This tool is the most difficult to master; take your time, speed will come with experience.
Any of the other tools that you may need, you can purchase later in your tying journey as finances permit. Remember, for your tying tools, think quality and buy once not twice. Tying stations for home tiers are a neat thing to have to keep organized and there are boxes that you can take with you when you travel, enabling you to create a fly to match the hatch wherever you are.
Fly tying doesn’t have to be a solo activity; families can spend time together creating personalized flies for wherever their fishing adventures take them. I have found that young girls excel in fly tying; their patience, fine motor dexterity and creativity lend perfectly to the task. April Vokey, look out! My girl Audrey is 3 1/2 and the pink and purple creations are already in her vise!