Biots are the tough, interlocking barbs found along the leading edge of a bird’s primary flight feather. The Prince Nymph’s signature white biot wings make it arguably the most famous pattern to integrate biots. Biots are also a common material choice for suggesting tails, antenna and legs on stonefly nymphs. Due to their wide flat, tapered profile, biots can also be used to create durable, realistic, tapered, segmented bodies, making them an excellent option for smaller nymphs and dry flies. Readily available goose and the larger, wider, more translucent turkey are the most common biot types. Shorter goose biots are popular choices for legs and tails on smaller flies and make excellent nymph, pupa and dry fly bodies. Turkey biots can also be used but due to their overall size are best suited for larger flies.
Advertisement
Goose biots are typically separated or stripped from the leading edge of the flight feather. Turkey biots tend to be packaged as complete feathers. Some tyers strip turkey biots from the flight feather in a similar fashion to stripped goose.
From a macro perspective, biots feature a subtle butt to tip curve when viewed flat and a furry leading edge. Different looks can be created depending on how the biot is tied in and wound. A body with the furry edge is exposed suggests gills or prominent body segments on nymphs and pupa. Overlapping the furry edge as the biot is wound forward produces a subdued rib common to dry flies.
Advertisement
Due to processing, dying and their general nature, biots are brittle, particularly near the tip. Without preparation, the biot’s fragile tendencies can become a source of frustration, both during the tie-in process and when winding it forward to form a body. The cure is simple: moisture. Although you could place the biots into your mouth just prior to tie-in, the wiser, sanitary option involves placing the biots within a moistened paper towel for 10 to 15 minutes. Moistened, supple biots are easy to work with.
Underbody preparation is critical. Tying in the prepared biot by the tip over a smooth foundation ensures a neat tapered body. Avoid excess thread pressure when tying a biot in as it can damage it. Prior to winding the biot forward, applying a thin coating of head cement or brushable superglue to the underbody provides additional durability.
Advertisement
How the biot is tied in determines if the body will have fuzzy ridges or smooth segments. Most tyers opt for ridged bodies on subsurface patterns such as pupa or nymphs. Dry flies most often feature smooth segmented bodies. The final choice depends on the look you prefer or wish to achieve.
Creating a fuzzy or smooth segmented body is not accidental. How you tie in the biot determines the body’s final look. Stripping a biot from the stem, as opposed to cutting it, creates a notch along one side of its base. Tying in the biot by the tip with the notch facing forward creates a distinct ridged body. If the notch faces back, the resulting body will be smooth and segmented as the overlapping biot wraps cover the fuzzy edge. Rather than stripping the biot, many trim the biot from the stem using the natural curvature of the biot as a guide. Tying the biot in flat with the natural curvature facing up creates fuzzy ribs; curvature down results in a smooth segmented look.
The next time you are at the vise contemplating body choices for a dry fly, nymph or pupa, consider the unique realistic look of a biot body. Although biots can be tricky to work with at first with practice and perseverance biot bodies soon become second nature. When targeting wary, selective trout, chances are they haven’t seen many biot-bodied flies. If presented properly, a fussy trout should take your fly without hesitation.
Hook: Light wire Curved Scud or Klinkhamar #12-#16
Thread: 8/0 or 70 Denier, Color to Compliment Body
Rib (Optional): Single Strand of Pearlescent Crinkle Mirror Flash, Mirage Opal Mylar or Crystal Flash
Body: Goose or UV2 Turkey Biot, Tied so the Ridges are Visible
Thorax: Fine & Dry Dubbing or Peacock Herl
Hackle: Grizzly
Wing Post: Gator Hair, White, Adams Grey, Black or Fl. Orange
Tying Note: Vary the body and thorax colors to match a variety of emerging insects. Use different colored wing posts depending upon the light conditions. Dark wing posts stand out better when fishing into bright light with lots of glare on the water.
-

 Via Phil Rowley
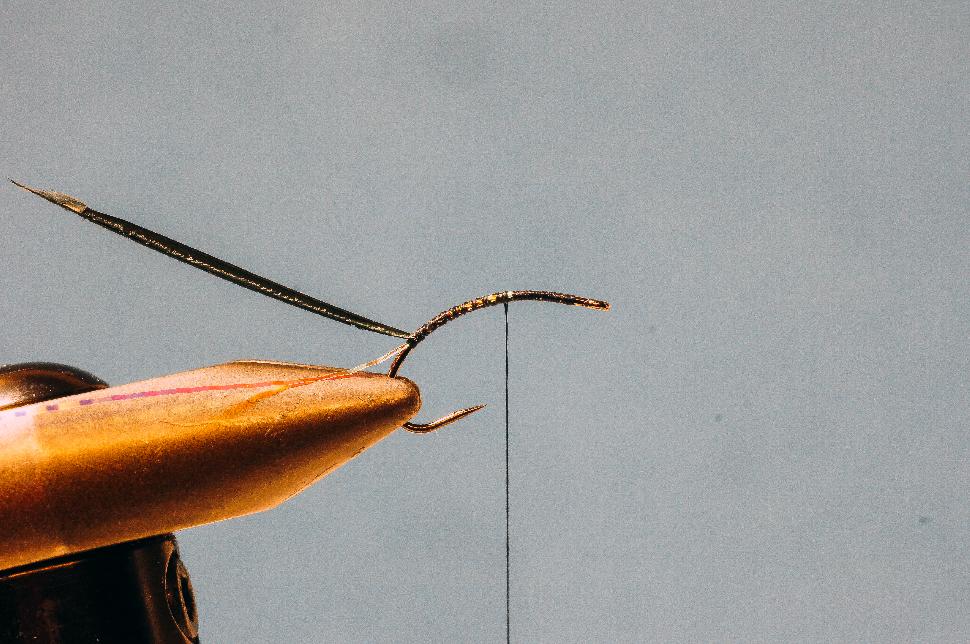
De-barb the hook and place it into the jaws of the vise. Cover the shank with tying thread. Tie in the Mirror Flash ribbing material along the near side of the shank, just in front of the hook point, and secure back down into the bend. Tie in a moistened goose or turkey biot in by the tip so the natural curvature of the biot faces up or if the biot was stripped from the stem, so the notch at the base of the biot faces the hook eye. Tying in the biot in this manner ensures the furry ridges of the biot will show helping to suggest segmentation. Form a smooth slightly tapered thread underbody. Leave the tying thread hanging just past the halfway point on the hook shank.
-
 Via Phil Rowley
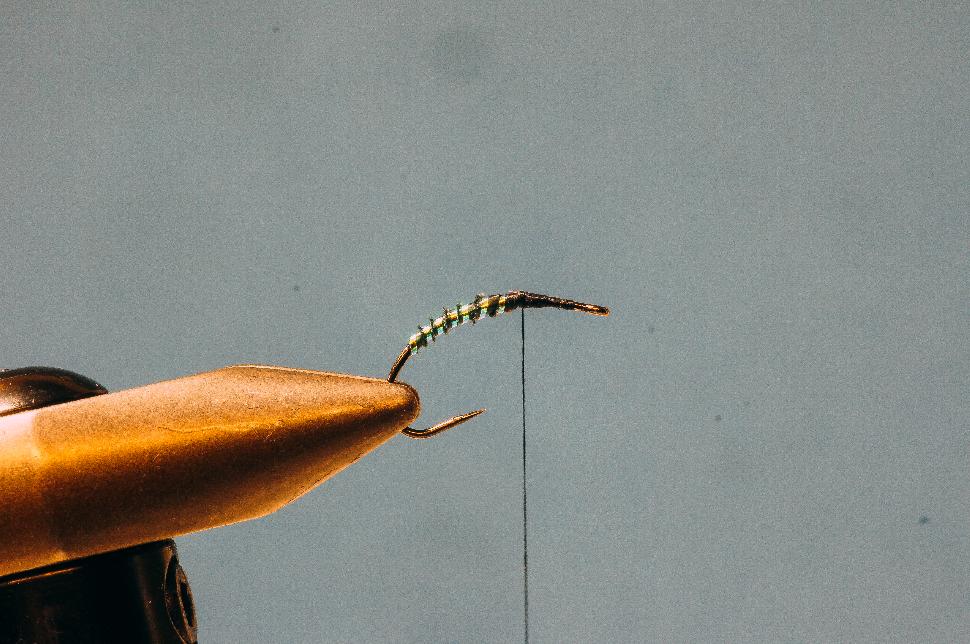
Apply a thin coating of brushable head cement to the thread underbody. To ensure proper control of the biot, attach a pair of hackle pliers to the butt of the goose biot. Wind the goose biot forward on an acute angle to form a balanced segmented body just past the midpoint on the shank. Make sure to position the biot so the notch faces forward as you wind. Tie off and trim the excess biot. Wind the Mirror Flash rib over the body between the body segments. Tie off and trim the excess.
-
 Via Phil Rowley
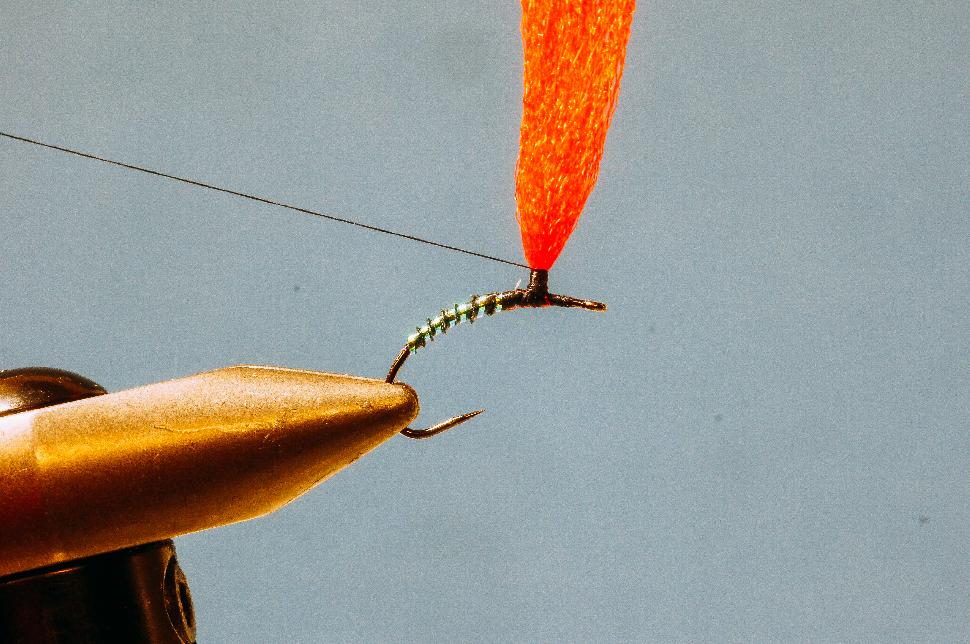
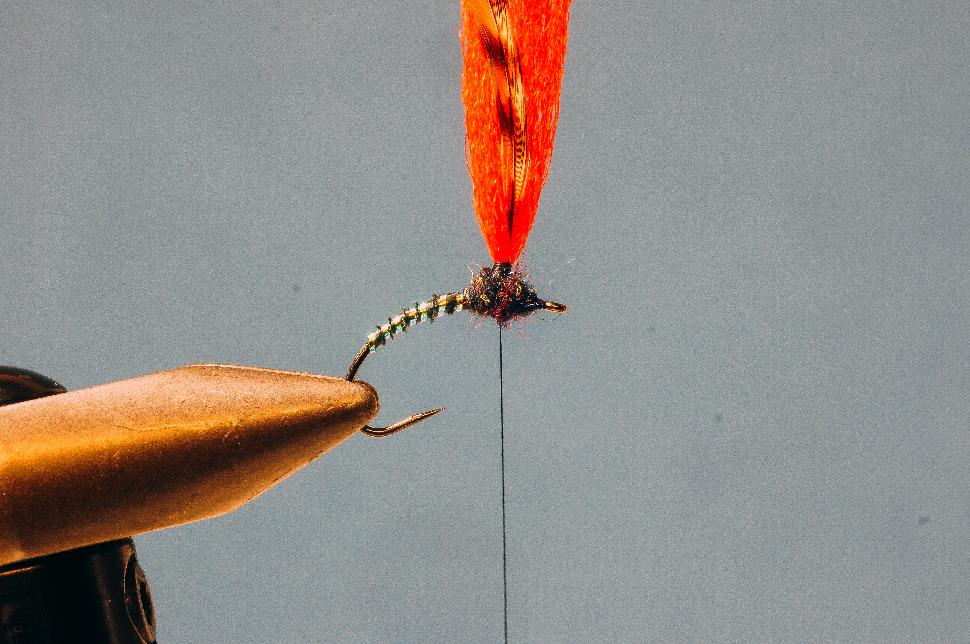
Using figure eight wraps secure the wing post material in place at the 60% point on the hook shank. Pull both ends of the wing post material up and hold them vertically. Form a thread post around the wing using horizontal thread wraps. Begin winding the thread at the base of the wing post and work your way up. Once you are happy with the wing position and the height of the thread base work the tying thread back down to the hook. Place two to three wraps around the hook shank to lock the wing post in place.
-
 Via Phil Rowley
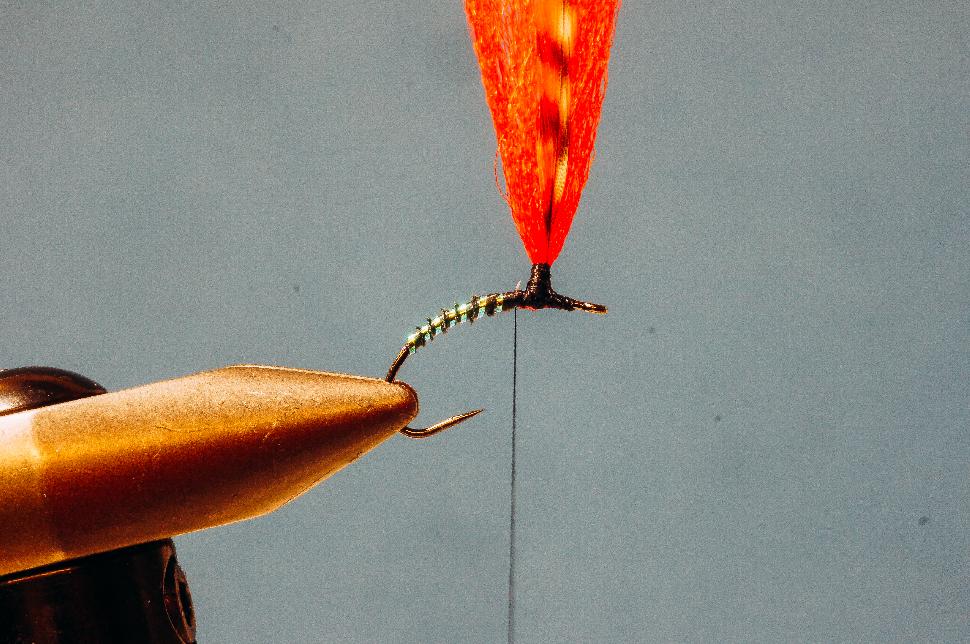
Strip the fibres from the steam at the base of a suitably sized dry fly quality grizzly saddle or neck hackle. Tie in the prepared hackle directly in front of the posted wing. Using horizontal thread wraps secure the hackle stem up the wing post. Return the tying thread back down the wing post and place two to three thread wraps around the shank to lock off the hackle and wing post.
-
 Via Phil Rowley
Form a neat, proportional, thorax. Once the thorax is complete move the tying thread across the wing post in front of you and over the back of the wing post and let the bobbin hang on the far side of the hook.
-
 Via Phil Rowley
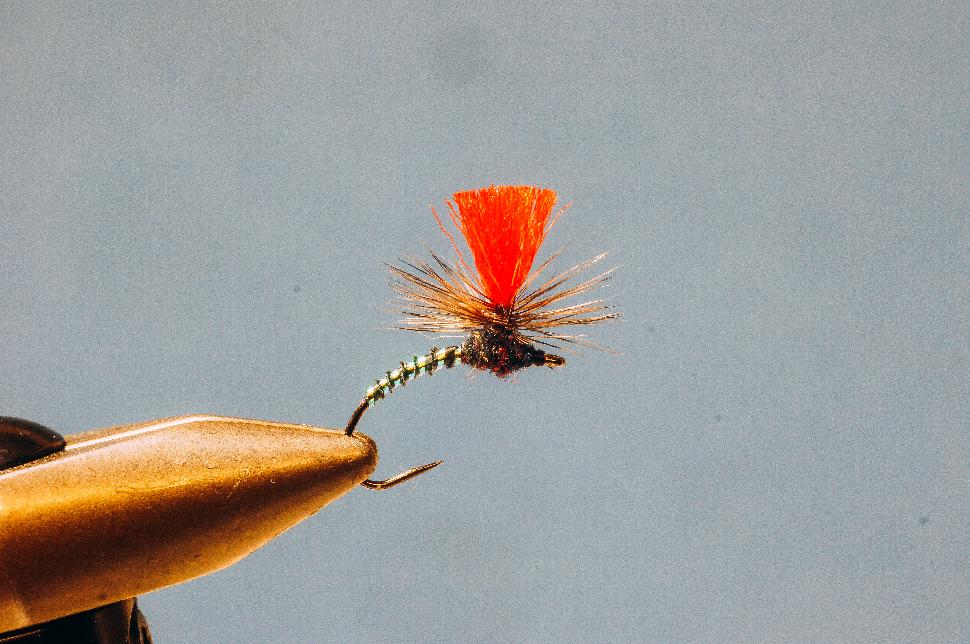
Using counter clockwise horizontal wraps wind the grizzly hackle down the wing post, parachute style, to the top of the thorax. Rough moving water requires more hackle wraps to support the fly. Calm flat water requires less hackle. Once the parachute hackle has been formed hold the remainder of the feather horizontally rearward under slight tension. Coat ½ to ¾’s of an inch of tying thread with brushable superglue or head cement. Using horizontal thread wraps, wind the coated thread under the hackle wraps but above the balance of the unused hackle to tie off the hackle feather. Reach in and snip the excess hackle feather. Using one wrap, advance the tying thread forward to the hook eye. Build a neat head, whip finish and remove the tying thread. Apply runny head cement to the thread wraps and to the base of the wing post above the hackle so the cement flows down into the hackle providing additional security. Remove any errant hackle fibers and trim the wing post to length. No longer than the length of the finished fly.