As a hunter, have you ever pondered the philosophical question, “Am I a meat hunter or a trophy hunter?” I believe we can be both. But where does it all begin? As a nimrod hunter, I vividly recall fidgeting away the night before my first day of deer season. No thought was given to trophy quality. It was all about that first deer and meat for the pot. But that changed for me, as it does for many hunters, when we down our first trophy buck, ram, bull or trophy gleaned on a hunt of a lifetime. For other hunters, it may be their first tom turkey, but whatever the stimulus, the response is the same: we want to immortalize this animal or bird in some way. Whether it is by simply mounting a set of antlers on a plaque or, alternatively, the ultimate trophy, a life-size mount.
Advertisement
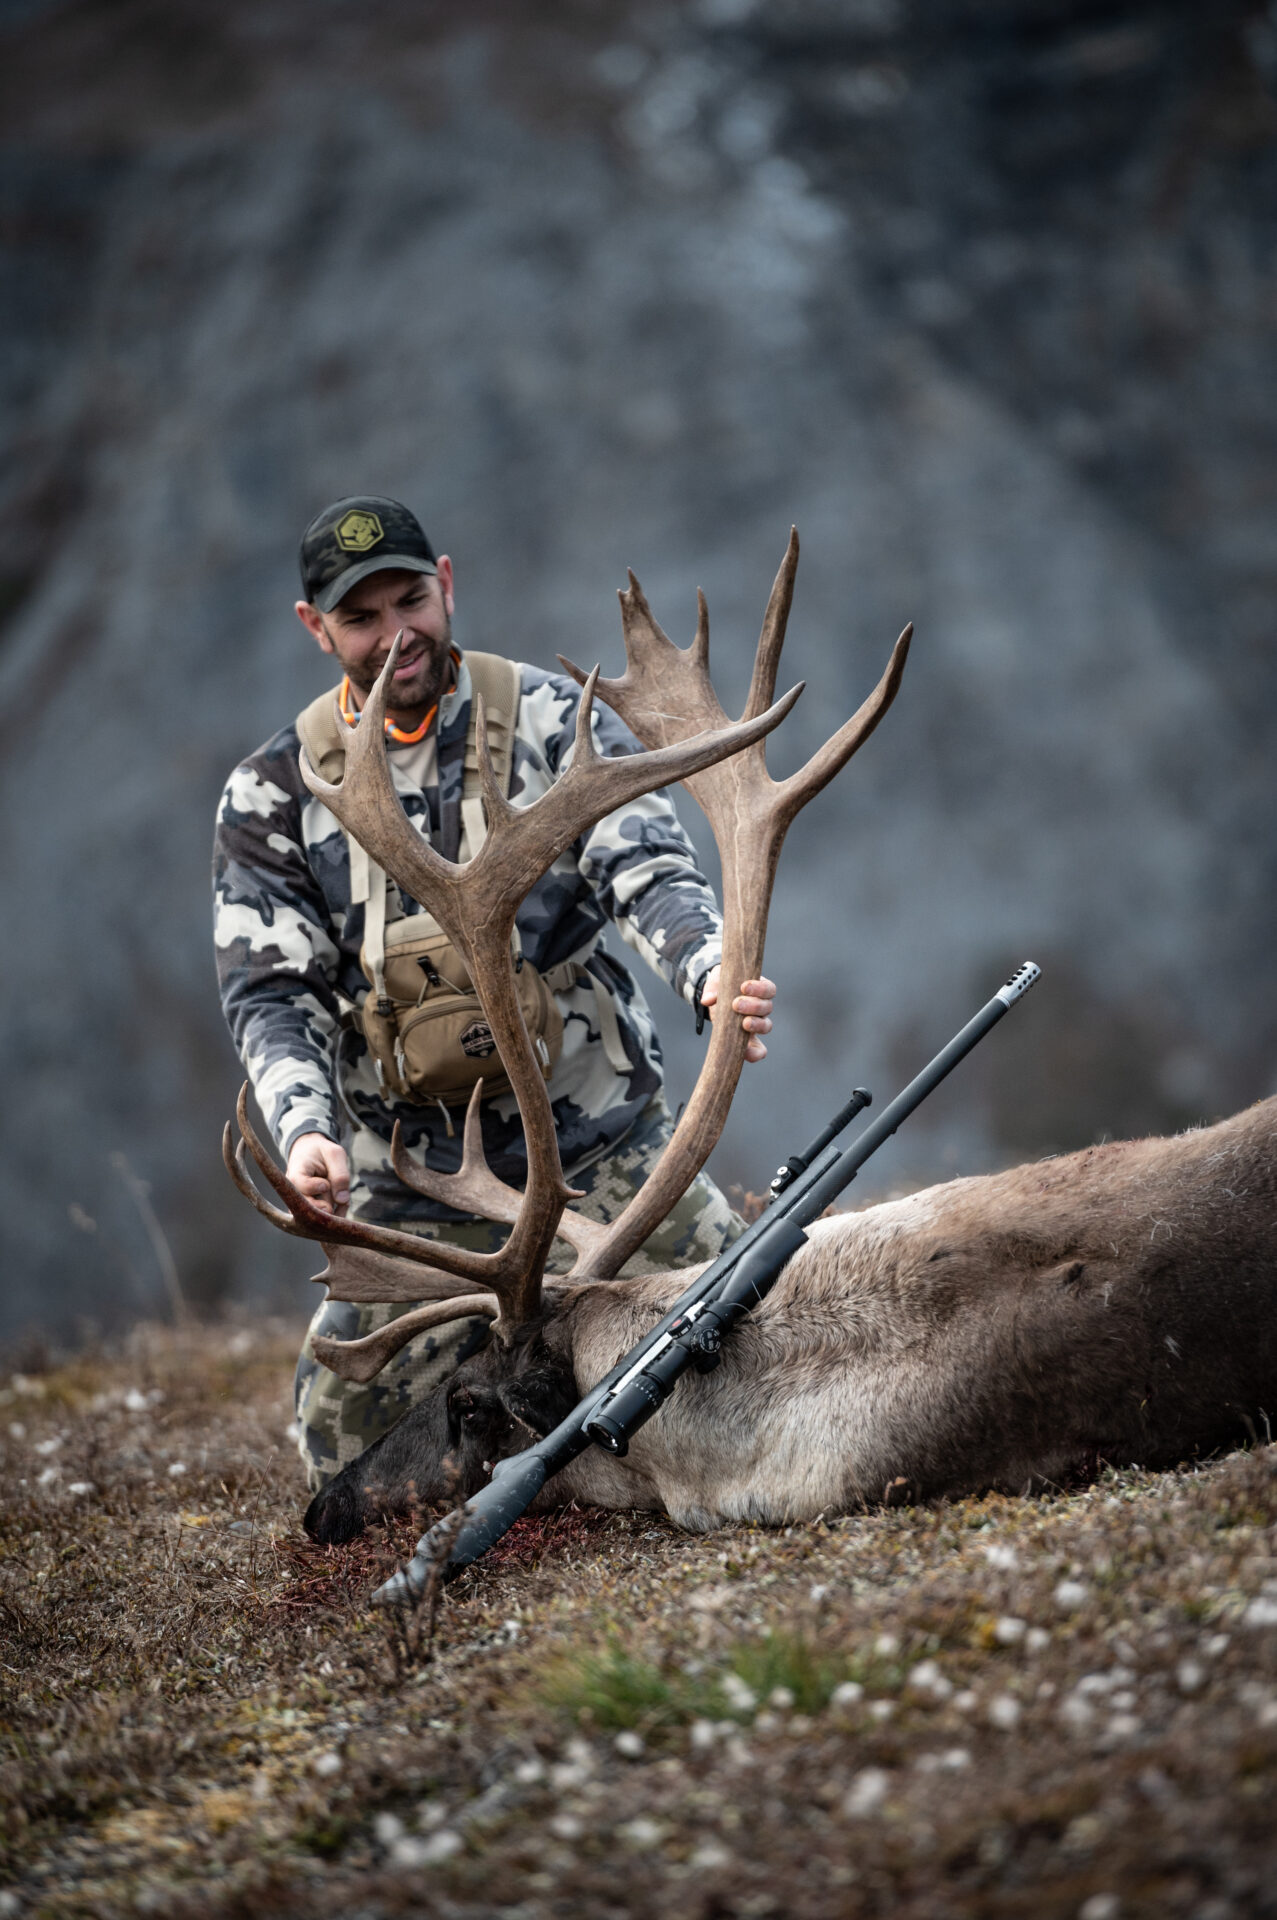 Photo by Nick Trehearne.
A well-mounted trophy can be a work of art, something that can provide the hunter with many years of refreshed memories and visual enjoyment. But it does not happen by accident. I will forever recall my first trophy, a large black bear. Unfortunately, I took it to a taxidermist that worked out of his basement and within two years it was an unsightly mess that, rather than being a fine work of art, now required disposal. That scenario taught me a number of very valuable lessons. To start with, I learned how to properly skin or cape a big game animal for eventual mounting. And while this is a critical first step, I don’t have the editorial space to provide a detailed description of how to do either but would encourage you, if you don’t know how, to learn from someone who does, such as a professional guide or taxidermist, just as I did. There are also some useful YouTube videos that can be of assistance. But if you want the best out of your mounts, field prepping or handling of a potential trophy also requires planning, proper handling in the field and a good taxidermist.
Big Game
Once your big game trophy is on the ground, the first decision you are required to make is just what type of preservation you want – is it a head/shoulder mount, a skull mount, a half mount, a life-size mount or, in the case of bears, a rug. So, I will start with some general advice on the handling of your animal in the field because, unfortunately, if it is not handled properly, irrevocable damage may occur. The following applies to all approaches except a skull or simple antler mount.
Advertisement
 The dos and don’ts of handling big game for future preservation include skinning as soon as possible. Photo by Nick Trehearne.
The Don’ts
- Don’t drag it against the hair.
- Don’t drag it with a rope or wire around the neck.
- Don’t shoot it in the head.
- Don’t cut its throat.
- Don’t cut capes short – leave lots of hide for your taxidermist to work with.
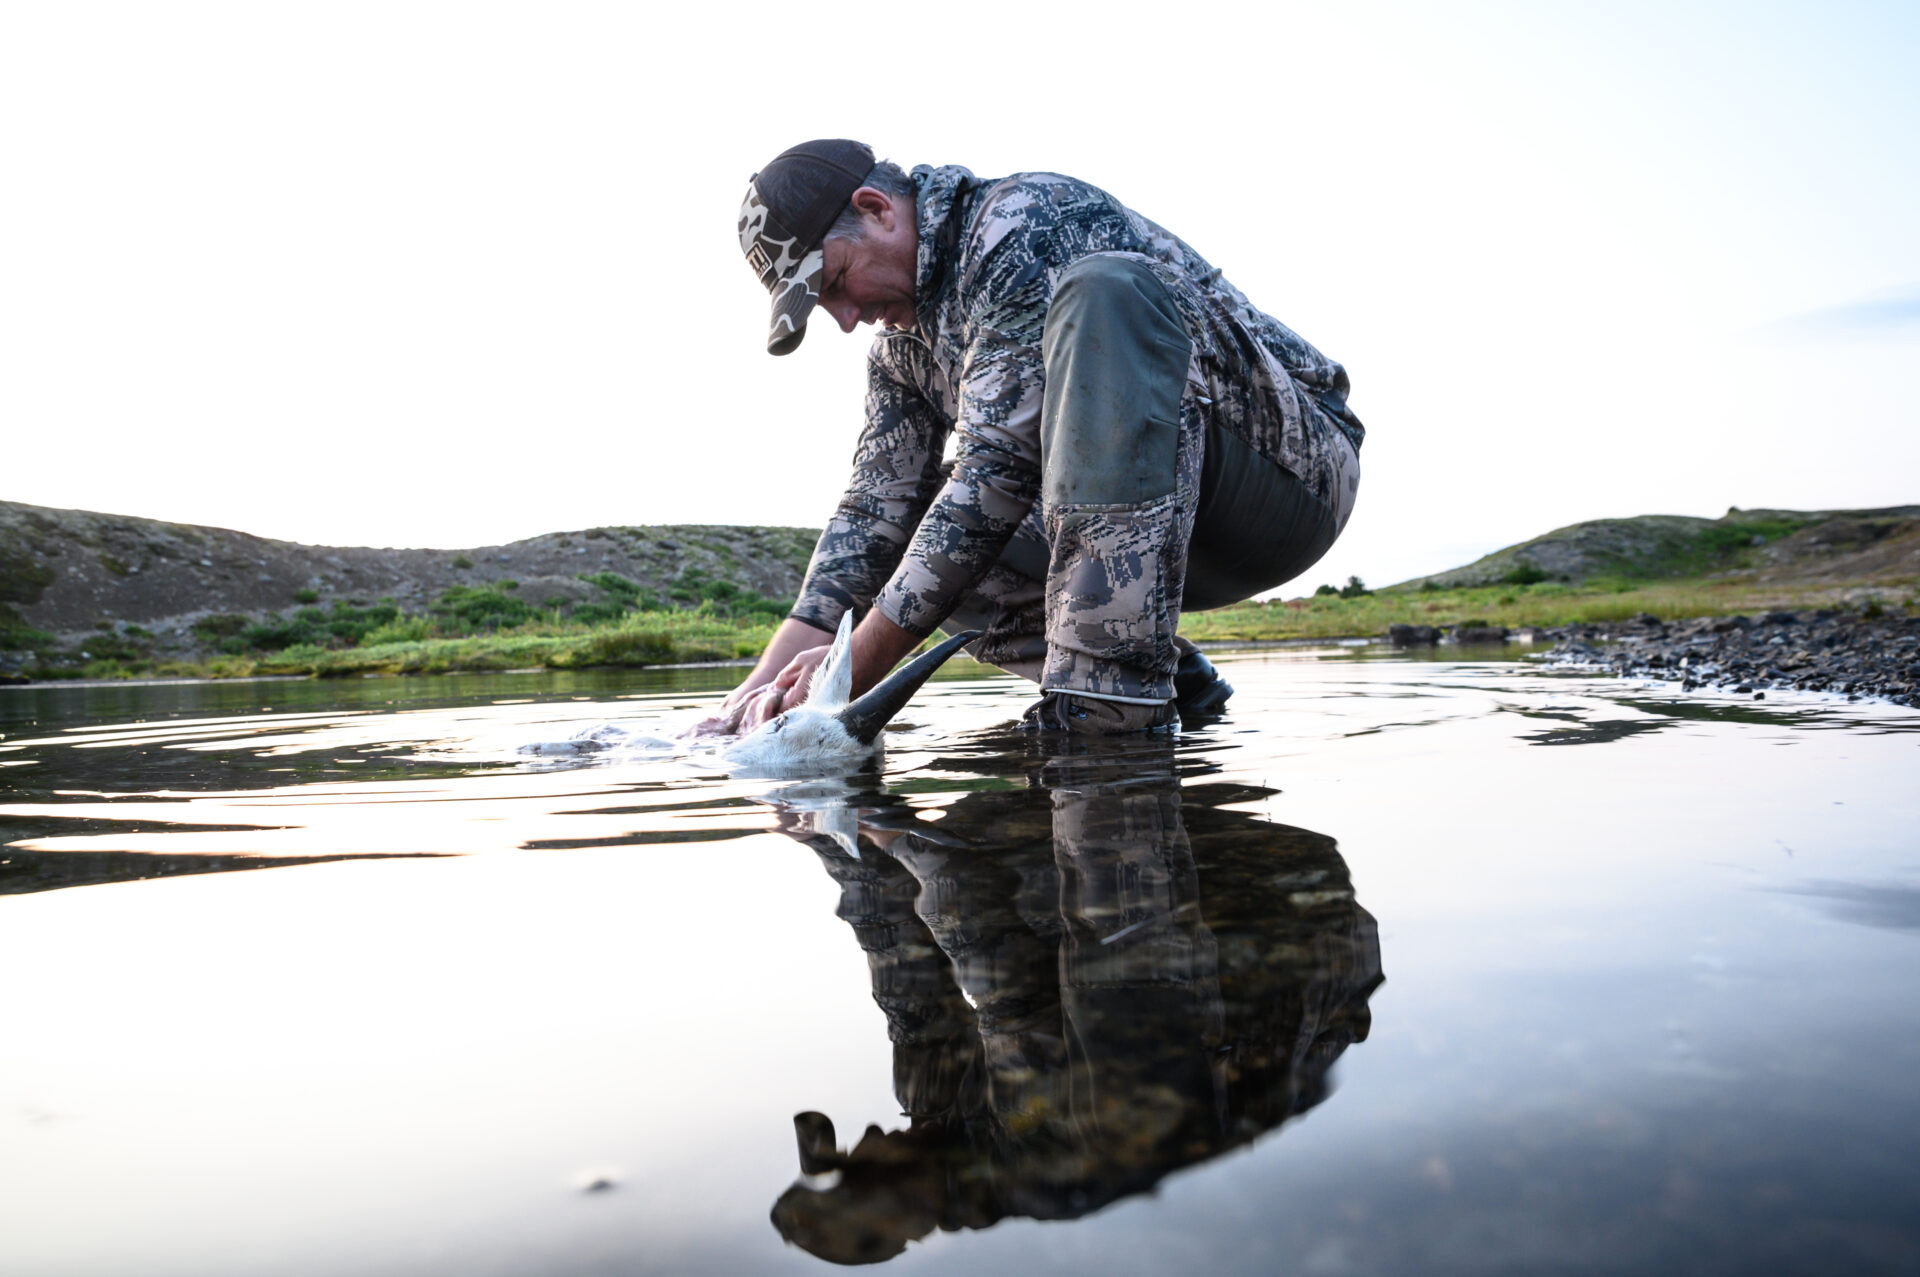 Washing the blood out of a cape or hide, particularly a white one, in cold water with a bio-safe soap will ensure its original lustre and shine. Photo by Nick Trehearne.
The Dos
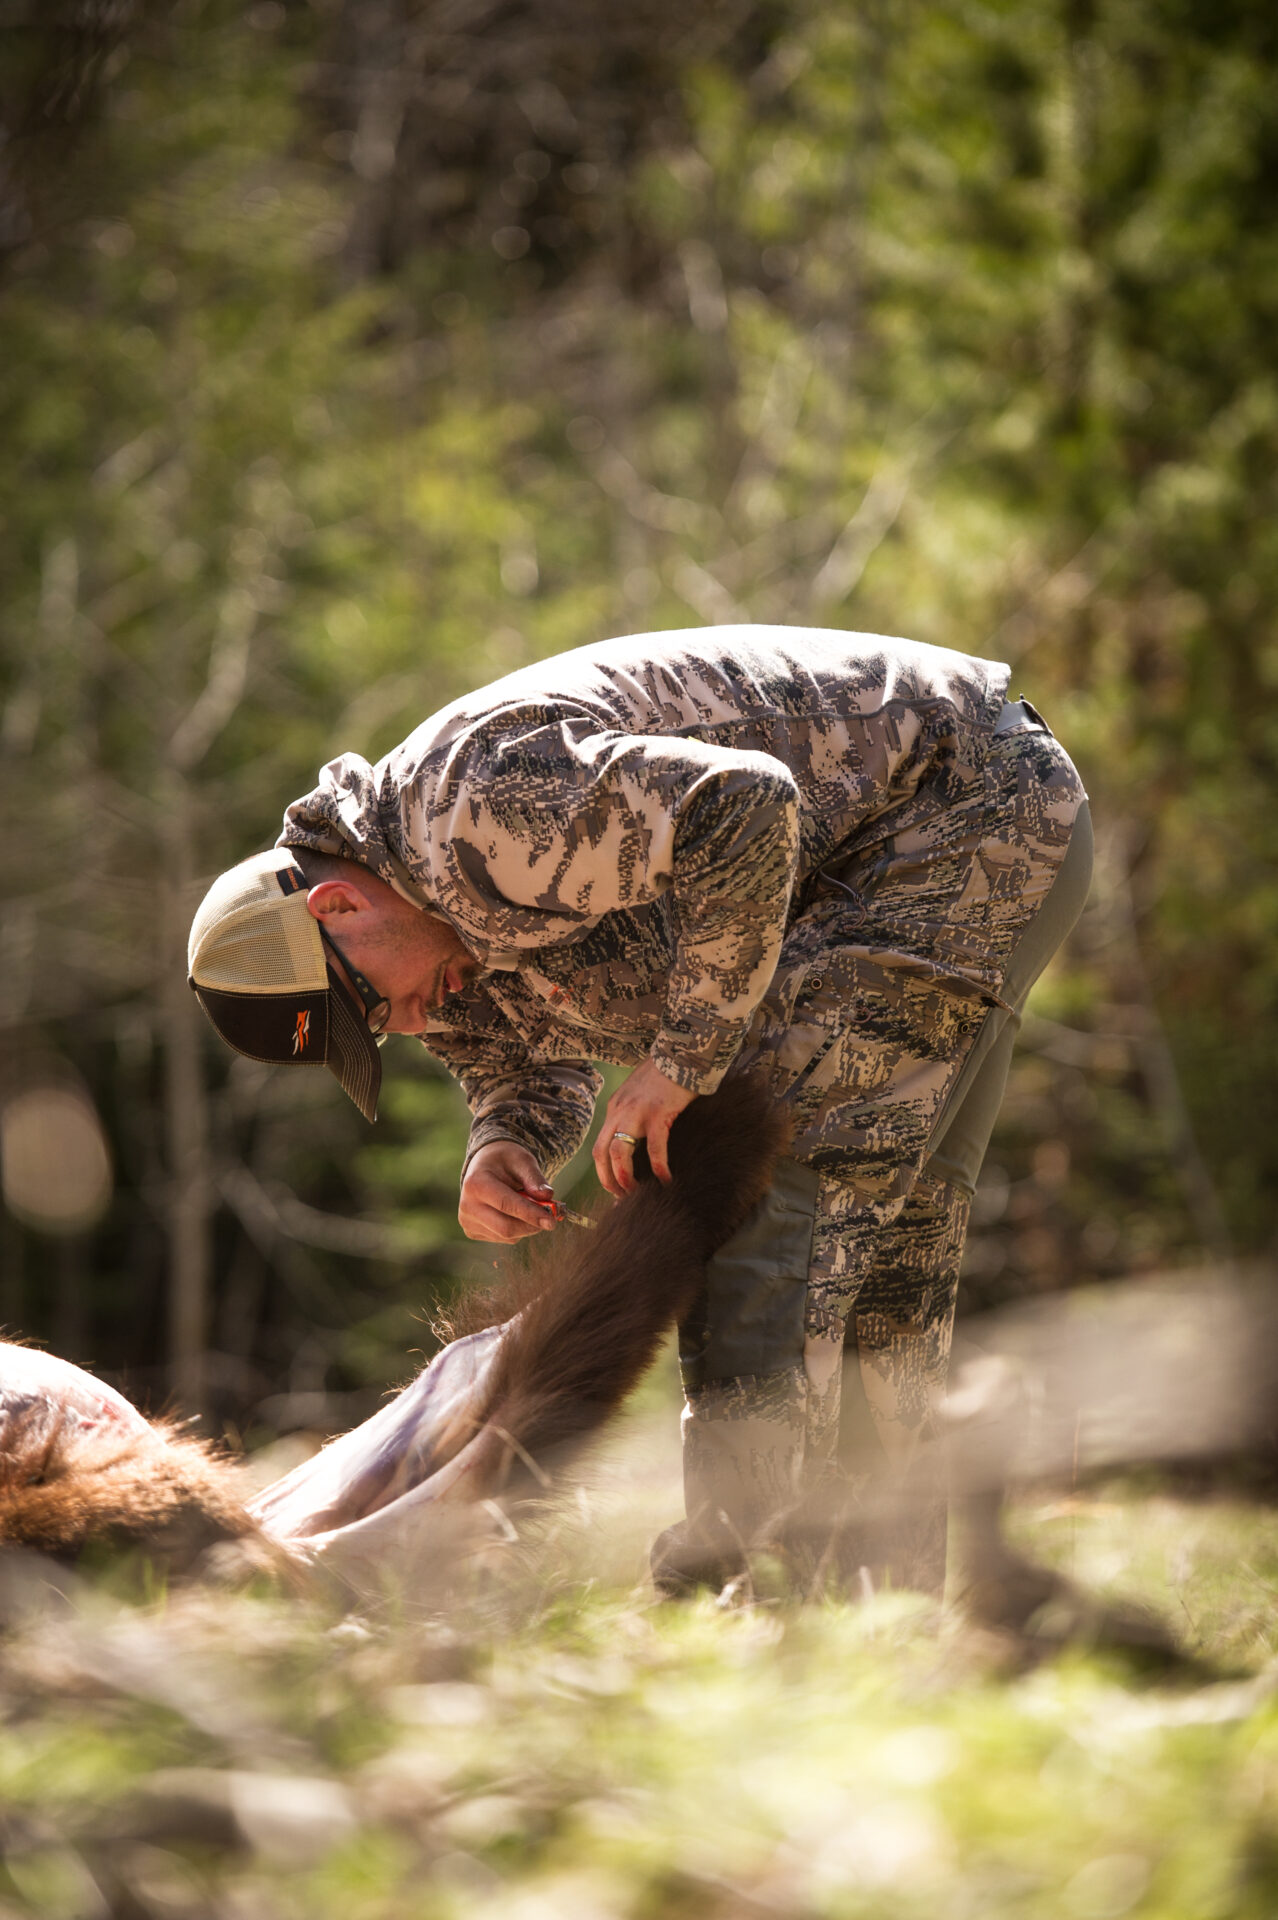
The first step is to remove the cape or hide in accordance with the type of preservation you have chosen. Each will require a different approach to skinning, so be sure you know the process for your selected objective. Then:
- Clean the blood off the cape as best as possible. For example, when sheep or goat hunting, I would carry a small container of bio-safe liquid dish soap and use it to thoroughly wash the cape in a creek or in a lake to remove all the blood. This is even more critical when dealing with a white cape.
- If you need to drag it, drag it by the antlers/horns or, even better, on a skid.
- Cape or skin it as soon as possible.
- If you don’t intend on salting the cape or hide, get it into a freezer as soon as possible.
- If you don’t have immediate access to a freezer, bring enough salt to properly field cure the cape or hide. A sheep or deer cape requires about a kilogram and plan on about two kilograms for a full hide, whereas a large bear hide, such as an Alaskan brown bear, can take as much as 10 kilograms of salt.
Here are the steps for salting a cape or a hide, and in doing so I have made the assumption that all the fat has been removed and the ears have been properly turned and that the lips are sufficiently split and so on.
Advertisement
- Lay the cape or hide out on a clean surface and rub salt onto every part of the skinned surface. Pay particular attention to those areas that are thicker, such as the lips and paws, etc.
- Fold the cape or hide salted skin to salted skin.
- Place it in a cool, sun shaded location for 24 hours.
- During the first 24 hours, the salt will draw considerable moisture out of the cape or hide, so drain it off and repeat the salting and 24-hour curing process. I most often repeat this process three times and then open up the cape or hide in a shaded and well-ventilated location to air dry.
- Once sufficiently dry, it can be carefully folded or rolled into a burlap bag. Don’t use a plastic bag or an airtight container unless it is headed straight for a freezer. One last bit of advice: If you are in bear country, ensure that your most valued cape is stored or cured in a bear-safe location. More than a few hunters have lost all but irreplaceable capes to a bear, so don’t be next on that list.
And always remember that the effort and time you spend in the field properly handling or prepping your trophy will repay you with a lifetime of memories at home.
Birds
Birds, such as a ringneck pheasant, can make a most spectacular mount and as such warrant consideration as a memory of a great day afield with your four-legged hunting buddy. Actually, all birds can be handled essentially the same, whether it is a bird the size of a quail or as large as a tom turkey. I would add to that a couple of qualifiers. Birds that are either badly shot up or are harvested early in the season with a lot of pin feathers may not make the best of mounts, so be selective. Late-season birds that are fully feathered and have their spectacular late-season plumage make far better mounts than birds shot in early fall when their plumage is lackluster and not fully developed. Also, set you sights on a mature bird that shows their age by its adult plumage, spur length and, in the case of wild turkey, beard length. A long beard turkey in a strut pose is nothing short of an impressive mount. You may even want to consider mounting a bird that was taken on a limited opportunity hunt, such a sage grouse, or simply because of their spectacular plumage, such as a harlequin duck. Insofar as field preparations, here are some simple guidelines.
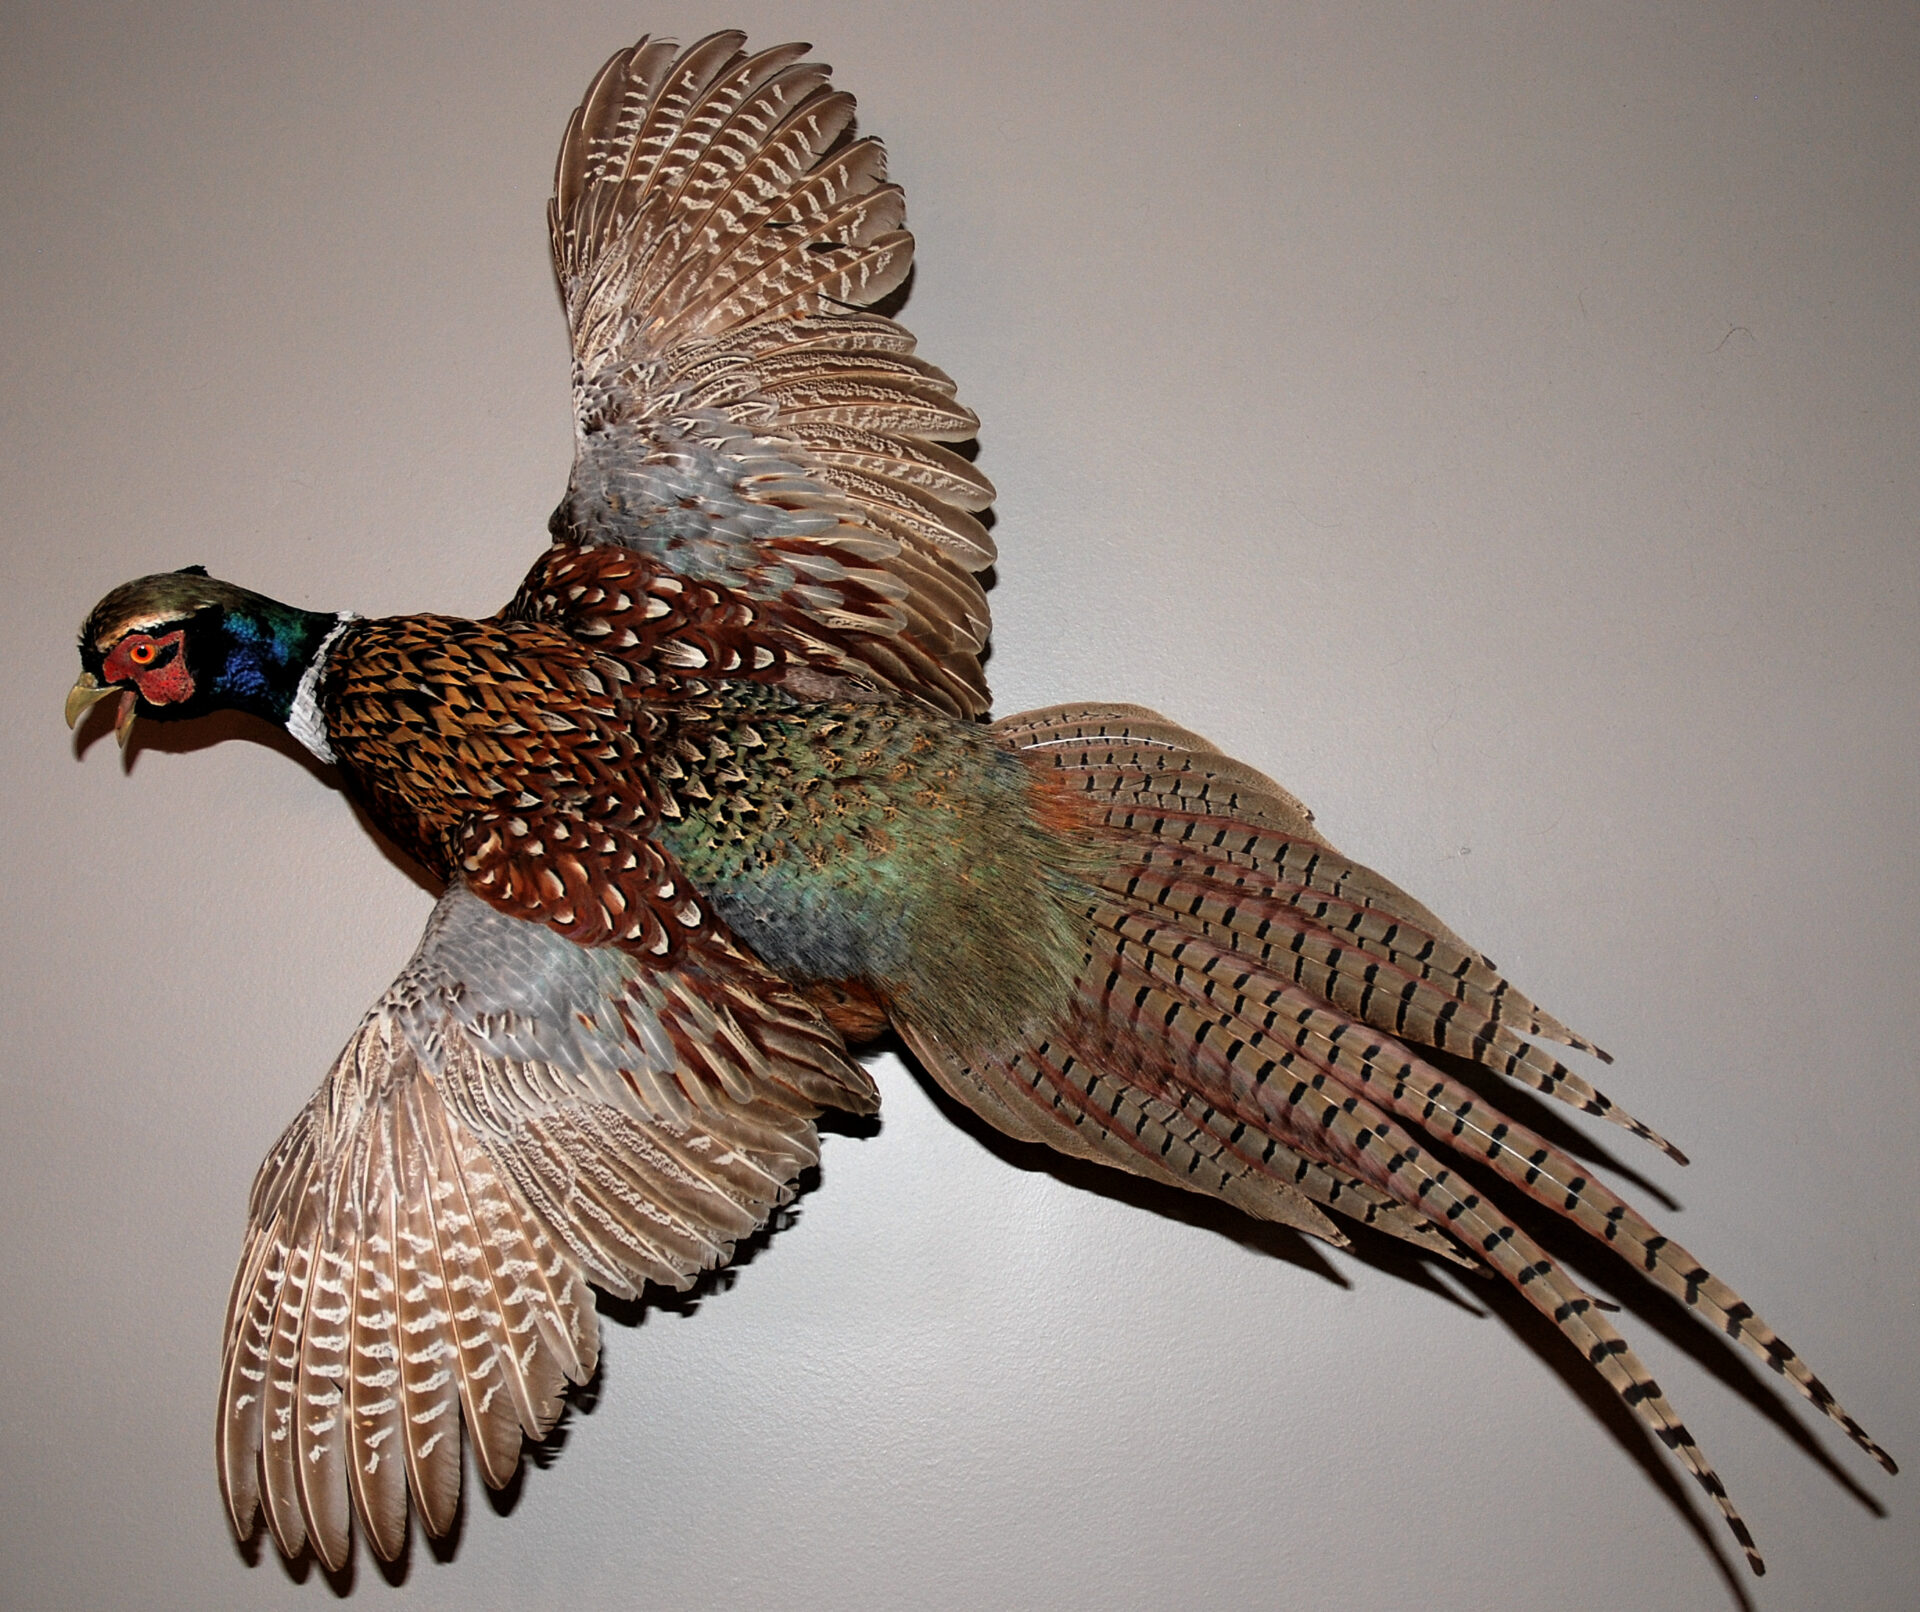 This colorful ringneck pheasant was the first flush of the author’s first retriever and has provided him with over five decades of memories of both the flush and the dog.
From the moment you collect the bird, be very careful not to damage its feathers. Don’t just throw it in a pile with other birds or bang it around in the back of your vehicle all day and expect the feathers to remain undamaged. Additionally, prevent it from bleeding on its feathers. I always carry two products to assist in this process. First are cotton balls, which I push down the bird’s throat in order to prevent it bleeding from its beak or bill and, second, a pair of women’s nylon hose into which I slide the bird, beak first. When in place, the nylon hose will align the feathers correctly and keep them flat against the body of the bird, thus protecting them from unwanted damage. In the case of a long-tailed bird such as a pheasant, I also like to roll it into corrugated cardboard that is longer than the bird and then put it into a freezer as soon as possible.
Selecting A Taxidermist
A good taxidermist is not only a craftsman, but also an artist. Thankfully, with the advent of quality forms and professional tanning, taxidermy is not quite the hit or miss that it used to be. Unfortunately, I still see taxidermy that, in my opinion, does not resemble the natural animal. My advice here is to visit a number of taxidermy shops to compare individual work. If that is not possible, the better taxidermists have websites with plenty of photos of their work. If you like what you see, ascertain where he or she has their tanning done and what tanning process they will use for your mount. If the answer is, “I do it myself,” you may want to look elsewhere as a professionally tanned hide or cape is critical to the quality and longevity of your mount. You should also determine how long it will take to get your mount back, precisely the type of mount and pose you want, and then lastly, what the cost will be. Just be prepared, good taxidermists don’t come cheap and frequently are not as quick as most of us would like. Quality work takes time and draws a lot of other hunters who are already waiting on their mounts.
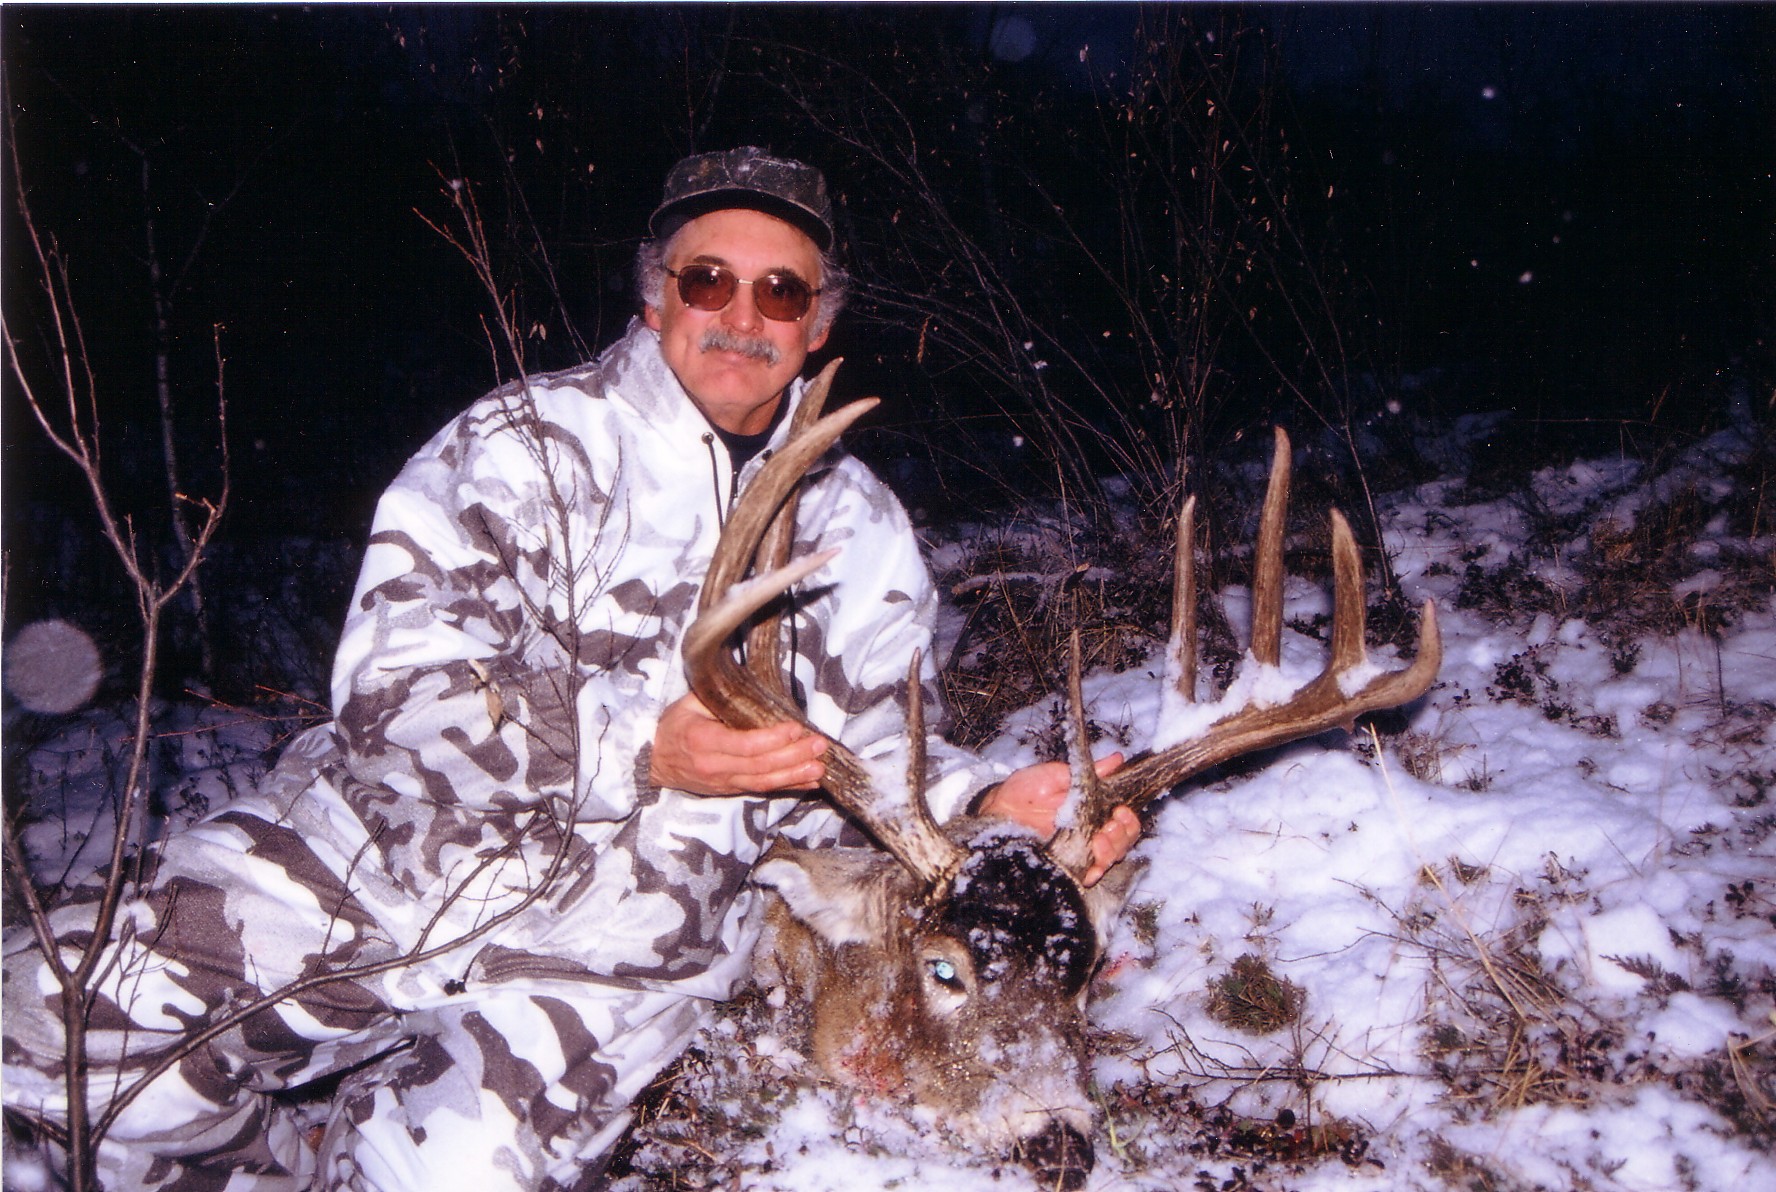 After decades of pursuing whitetail deer, this is the author’s best whitetail, an eight-and-a-half-year-old buck of a lifetime – from the field to the wall.
Types Of Mounts
First and foremost, the majority of mounts will be shoulder or head mounts. They are the simplest, least expensive and often the most effective way of preserving your big game trophy. One of the first questions you will need to answer is the type of pose you want for a particular head mount. I always try to envision how I want the animal to look in the display room and then decide on what type of turn I need, such as a right or left turn or whether a turn is even required in order to fit that vision. You may also want to determine whether a sneak or heads-up pose will work best. And yet for others, because of the lack of wall space, you may wish to utilize a pedestal style head mount. But if you find the cost to be prohibitive, consider a skull mount – they are the next best thing and are considerably cheaper. Meanwhile, a properly prepared bear or cougar skull will also make for a most valued trophy.
Next are rugs and some species, such as bears, lend themselves very nicely to being preserved as a rug. However, I have seen everything from mountain goats to muskox made into rugs; it is a matter of personal choice. Your options here are a flat rug versus a rug with a head mount and the colour of the trim. The head mount option, of course, will be considerably more money than a flat rug.
Ultimately, there will come a time when you harvest a very special animal that you want to preserve as it appeared in life. This is where a life-size mount is the ideal answer. A large tom cougar, mature rams, mountain goats, wolves and bears lend themselves well to a life-size mount as do some of the small cats such as bob cat. Or, alternatively, you may consider a half- life-sized mount. Mountain goats or even some bears can make an eye-catching half-life-size mount. Either of these mounts are considerably more expensive, but if done well, they are truly a wonderful trophy. Here, you should spend considerable time discussing with your taxidermist exactly what form and pose you want and what kind of base it is to be mounted on. The more complex and detailed the base, the more it will cost, but a base can make or break the quality and realism of your mount.
Last are birds and, from my perspective, nothing looks more attractive than a flying ring-neck pheasant, colorful drake duck or as impressive as a wild turkey in a strut pose.
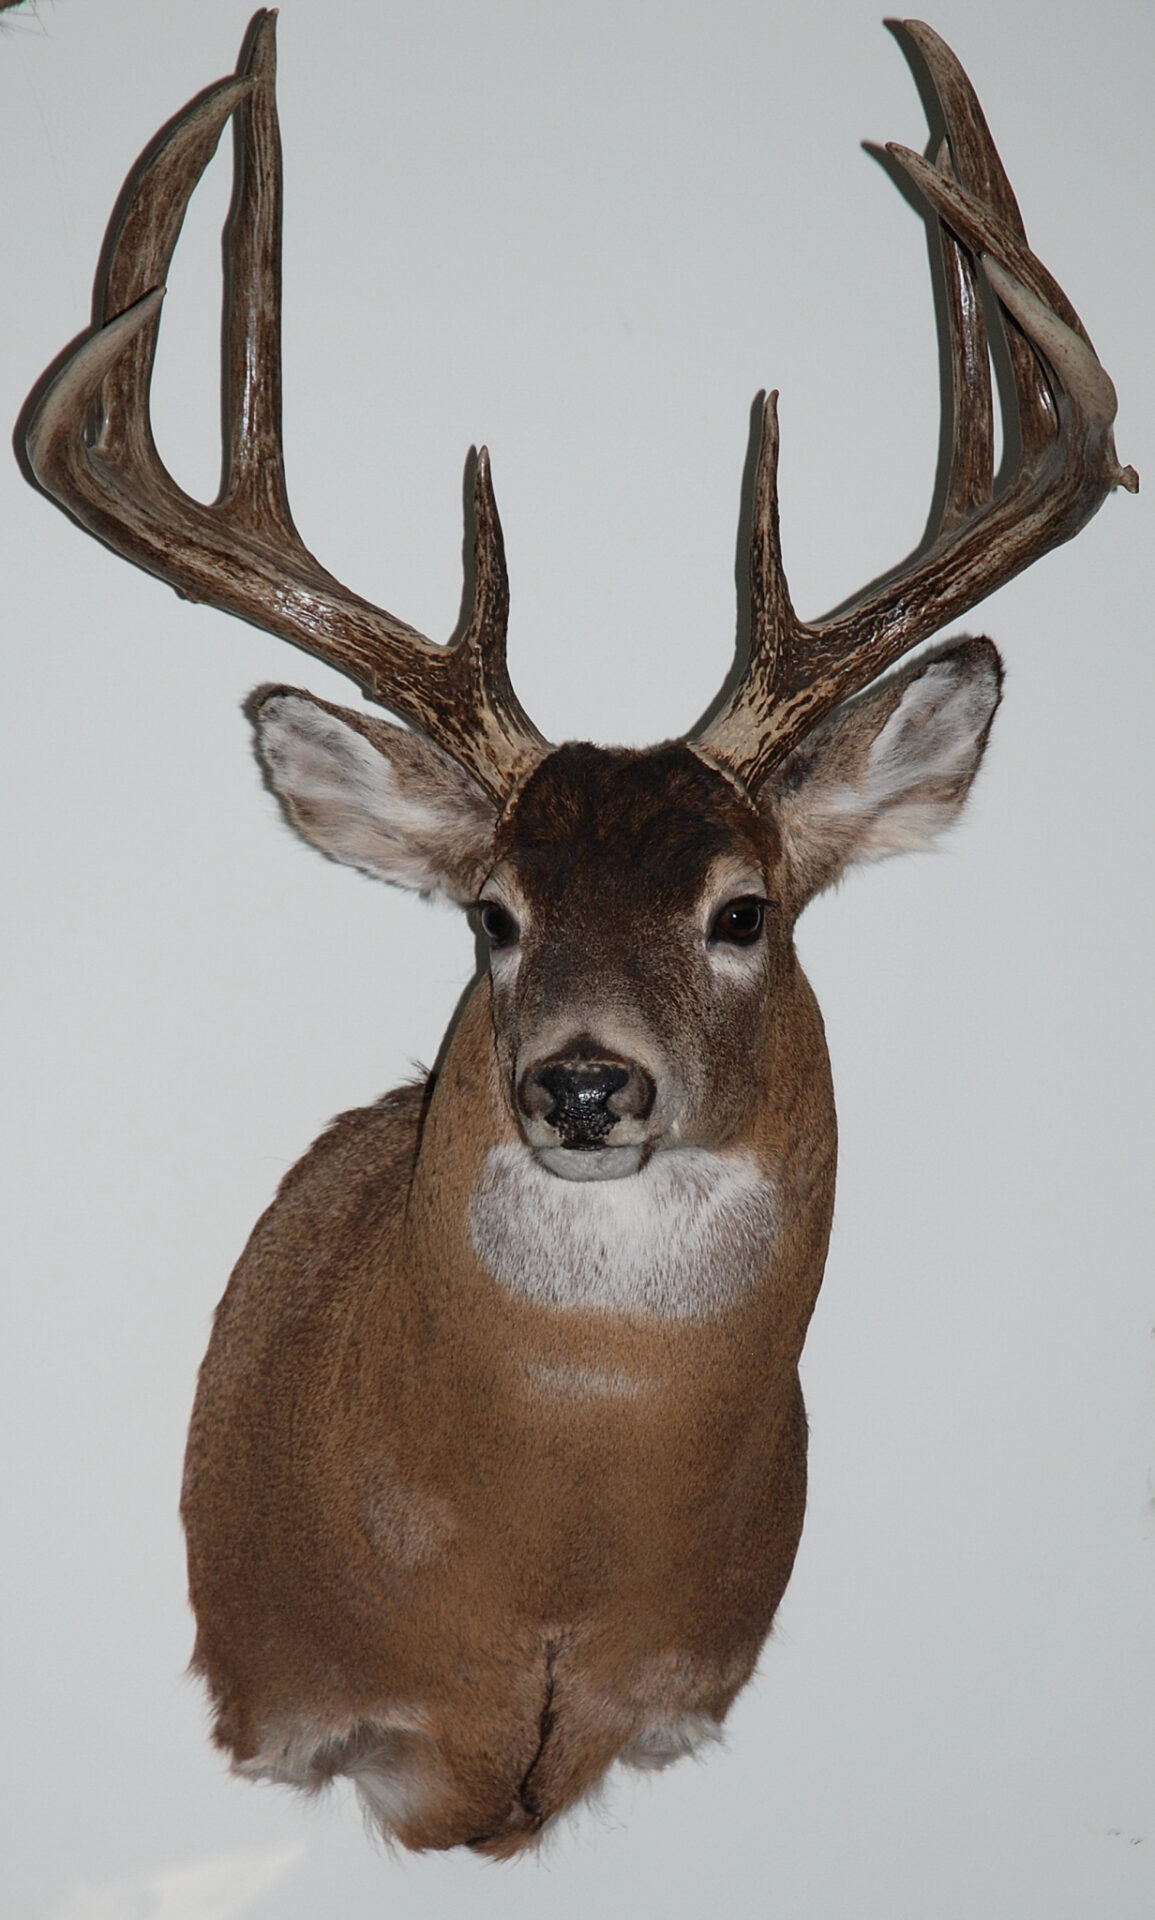 After decades of pursuing whitetail deer, this is the author’s best whitetail, an eight-and-a-half-year-old buck of a lifetime – from the field to the wall.
Trophy Care
It would be remiss not to mention care of your mounts. Over time and depending on where you live, they tend to collect dust and need to be cleaned. I have gone through the full gamete of approaches as to how best to approach this task and have discovered the ultimate answer – the Swiffer Duster. With it and by running the duster in the direction of the hair or feathers, I can quickly and effectively dust all my trophies at least once, if not twice, yearly. It cleans and picks up the dust rather than simply moving it around and can be used on everything from fish and birds to all my game mounts. The only exception is rugs, which I carefully vacuum or gently shake out. And finally, a clean cotton cloth works wonders on re- brightening eyes and a small hairbrush can be very effective in smoothing out any rumpled hair. Take care of your mounts and you will have memories for a lifetime.