Conor O’Shaughnessy is an innovative, creative fly tyer. His mind is constantly engaged, trying to figure out new ways to deceive fish. Conor’s flies blend his talent and unique tying techniques to solve the presentation challenges before him. His BC Crayfish utilizes composite dubbing loops, one of his favourite tying techniques.
Advertisement
A composite dubbing loop involves using two or more dissimilar materials spun and twisted together in a dubbing loop. Typically, a base layer of dubbing is combined with various other materials, including fur, synthetics or any other material that can be layered on top of each other and twisted together to provide incredible durability. This technique offers a myriad of combinations that provide both volume and motion. Composite loops range from simple to complex depending on the tying challenge and the individual needs of the tyer. It is a technique common to many west coast steelhead patterns, such as Intruders.
Advertisement
Dubbing is the base of any composite loop. You want to choose the proper dubbing, not too coarse or soft. A blend that, once twisted tight in a dubbing loop, will brush out to provide the necessary volume and movement.
To begin, lay out the appropriate volume of dubbing. Pull the dubbing fibres apart a few times to align the dubbing fibres. This helps the fibres radiate outward making them less prone to twisting within the loop. For consistency, some tyers lay out templates or gauges on their tying bench or a three-inch by five-inch Post It Note. One inch of dubbing typically equates to three turns of a dubbing loop.
Advertisement
With the dubbing base laid out, add the other materials. Place the materials perpendicular to the dubbing, so they stick out once twisted tight. Popular composite materials include Flashabou, rubber or Sili Legs and ostrich herl. For his BC Crayfish, Conor uses rabbit fur trimmed from the hide.
Once the materials are layered, one on top of each other, sandwich them together using a second, sparse dubbing topcoat. Depending on the look you are trying to accomplish, you have the choice of dispersing the materials equally along the dubbing or not. For example, if you were combining ostrich herl, you may wish to concentrate the fibres at the bottom of the loop, so they help provide an animated front hackle when wound forward.
Use a stout tying thread. Having a dubbing loop break during the twisting process is frustrating. Keep your dubbing loop a manageable length, so it isn’t awkward to wind. If it looks like you might need a long loop, consider using multiple shorter loops that allow controlled, accurate wraps. A weighted dubbing whirl or twister is also an advantage, as it keeps the loop under tension, helping to hold the dubbing blend in place before twisting tight.
Once you have created your composite mix, it is time to load the dubbing mix. Some tyers carefully pick up their blend and insert it into the loop. Others use tools such as bulldog or chip clips. If you envision using composite loops often, dubbing loop tweezers featuring long tips are a handy addition.
With the loop loaded and ready to spin tight, pinch the base of the dubbing loop near the dubbing whirl or twister. Begin turning slowly to trap the fibres. As the blend begins to twist like a drill bit, increase the tempo. Maintain your pinch and give the dubbing whirl a healthy spin. Release the pinch, allowing the twist to travel up the loop, locking everything in place. Continue twisting until the various materials radiate out perpendicular to the loop. A tight, twisted loop will also have a degree of elasticity adjacent to the shank if you relax the loop tension.
Before winding the loop forward, push a dubbing needle gently through the composite loop or use a dubbing brush or pick to free up any trapped fibres. Use the appropriate tool for the materials to avoid accidentally breaking or pulling any fibres from the loop.
When winding the completed loop forward, moisten your fingers to sweep and pinch the components back out of the way with each wrap. With the loop wound forward, brush and sweep the fibres to release any accidentally trapped fibres.
Composite loops are a versatile technique all tyers should become familiar with. It is a technique that spans a variety of patterns. The combinations and permutations are endless. Be sure to document your ingredient list so when you create that killer combination, such as Conor did for his BC Crayfish, you can easily duplicate it.
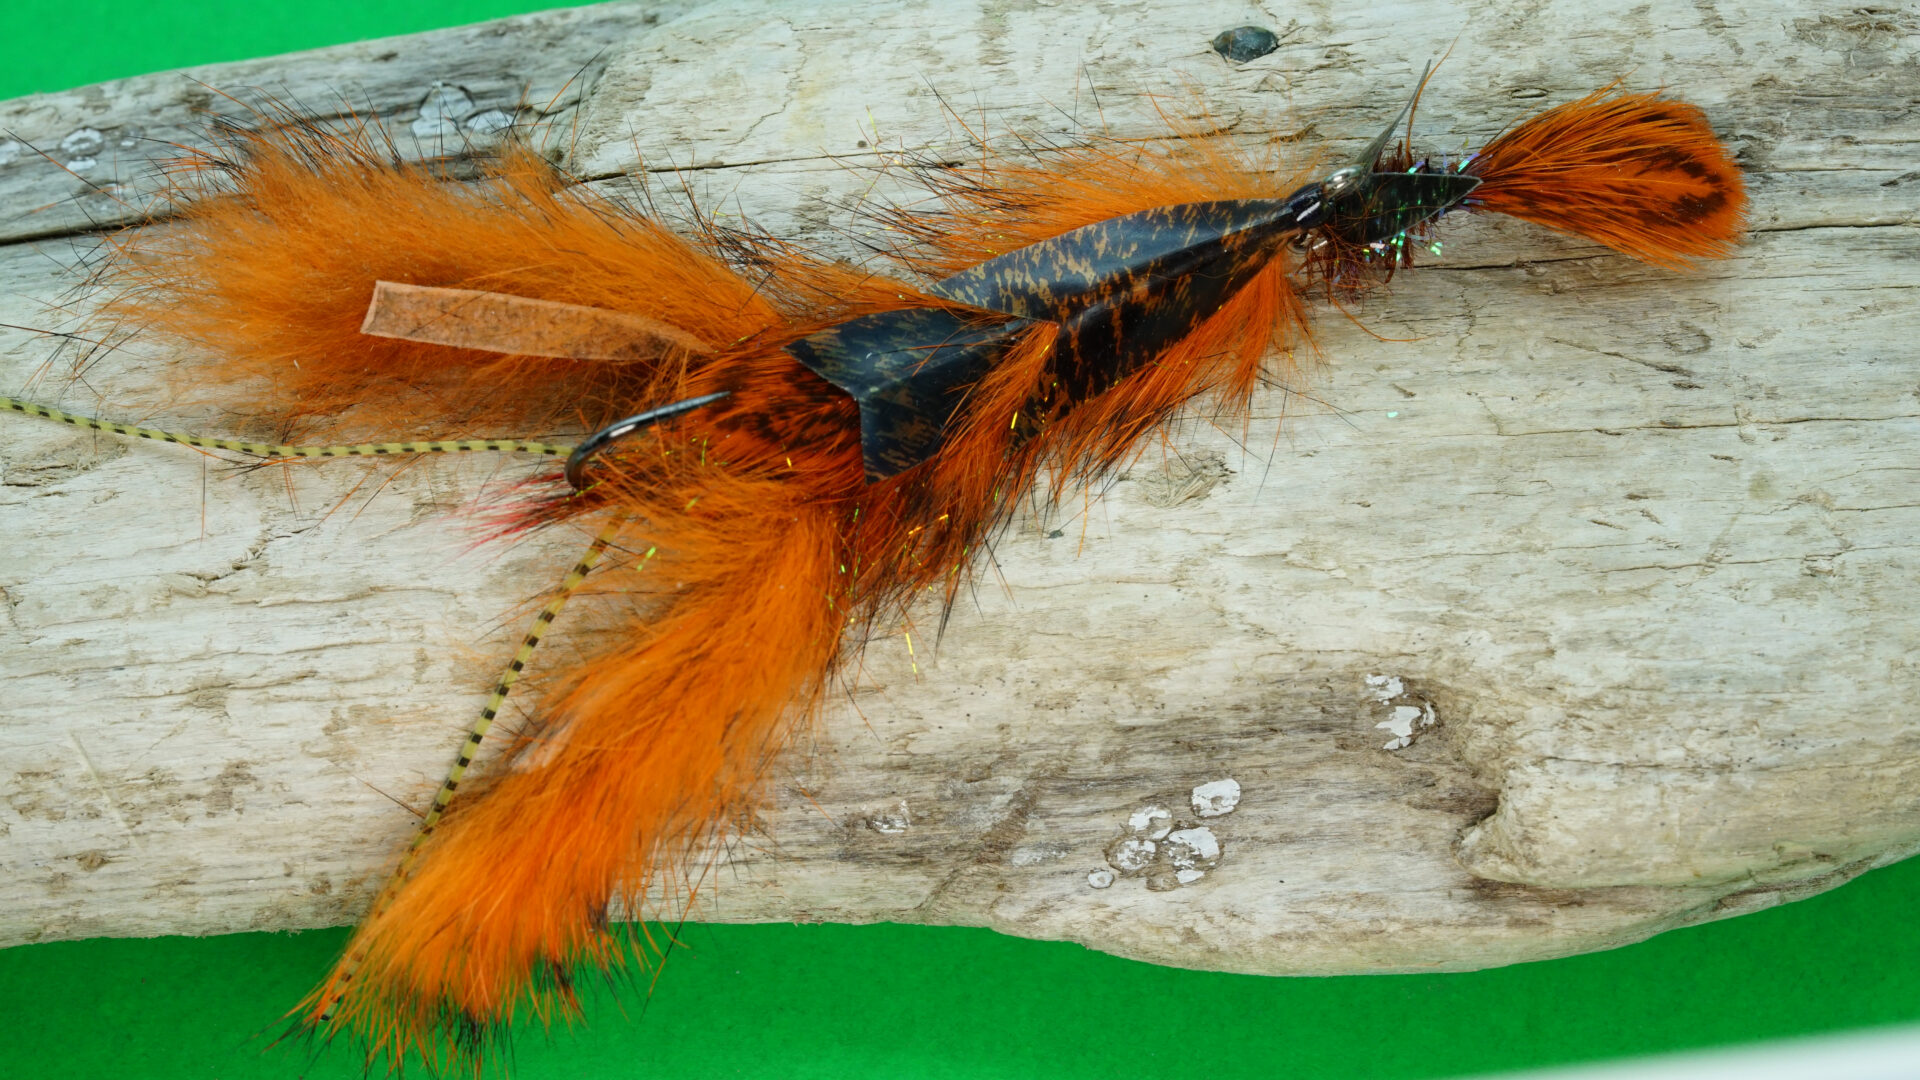
How to Tie the BC Signal Crayfish
Designed by Conor O’Shaughnessy
- Hook: Predator style, straight eye hook, #1
- Shanks: 15-millimetre and 20-millimetre shank
- Thread: 50 Denier GSP, Power Thread or nano silk, White
- Antenna: Flutter Legs
- Feelers: Dyed pine squirrel
- Head: Sculpin Head
- Claws: Rabbit Zonker strips
- Body: Mixture of rabbit fur and Ice Dub
- Underwings: Hen saddle
- Overwings: Thin Skin
Tying Note: This pattern can be tied in a variety of colours. Rust and olive are the two most popular.
Tying Instructions
- Place the hook in the vise, hook point up. Cover the rear third of the hook with tying thread. Tie in Flutter Leg antenna and pine squirrel feelers at the rear of the shank, so they point out past the bend. The pine squirrel feelers should be roughly three-quarters of the shank. Trim the antenna to extend back about three shank lengths. Cover the thread wraps with Super Glue. Slide the weighted Sculpin Head onto the shank, tapered end towards the bend, eyes up toward the hook point.
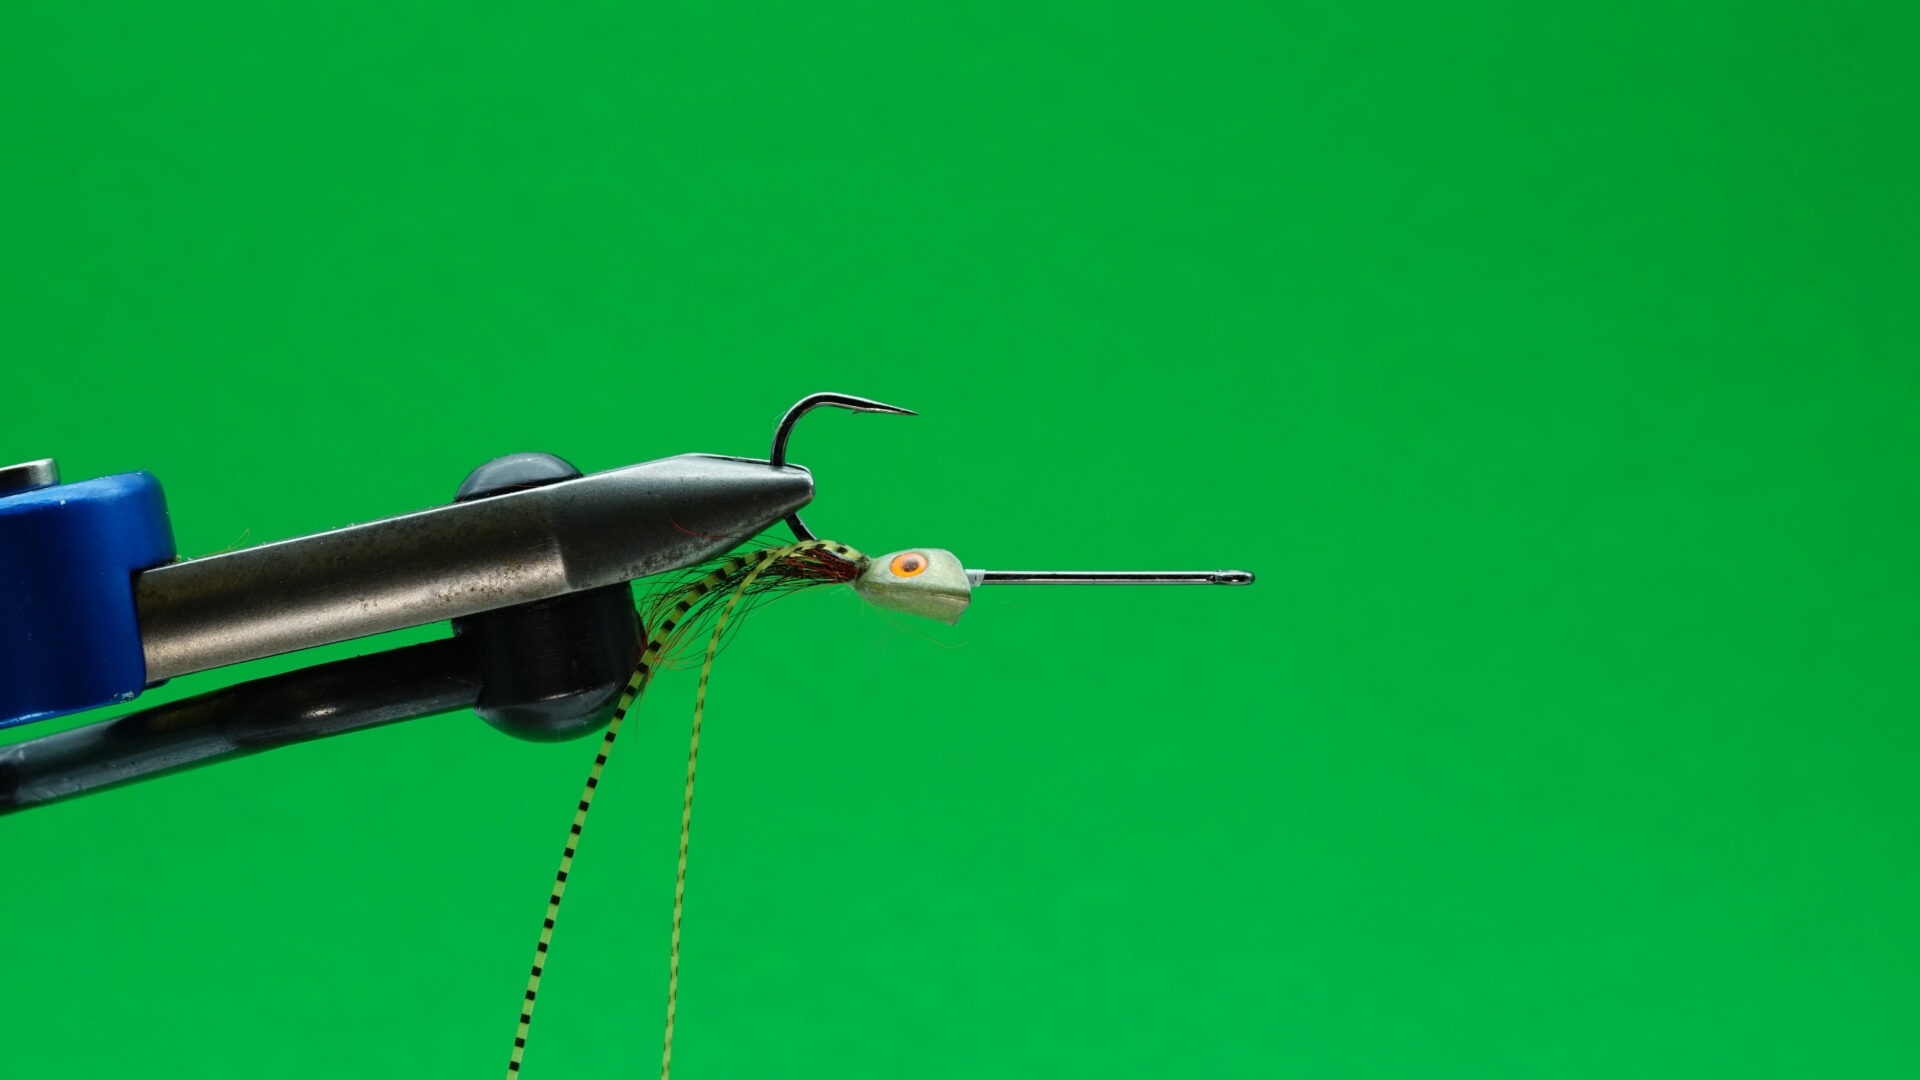 The BC Signal Crayfish: Step 1.
- Reverse tie in the rabbit strip claws tight against the Sculpin Head along the sides of the shank, so the hide faces outward and the natural grain of the fur sweeps forward to the hook eye. Trim the finished claws so the hide is approximately shank length. Form a dubbing loop and secure it in place against the Sculpin Head. Temporarily place the dubbing loop back over the Sculpin Head, antenna and feelers.
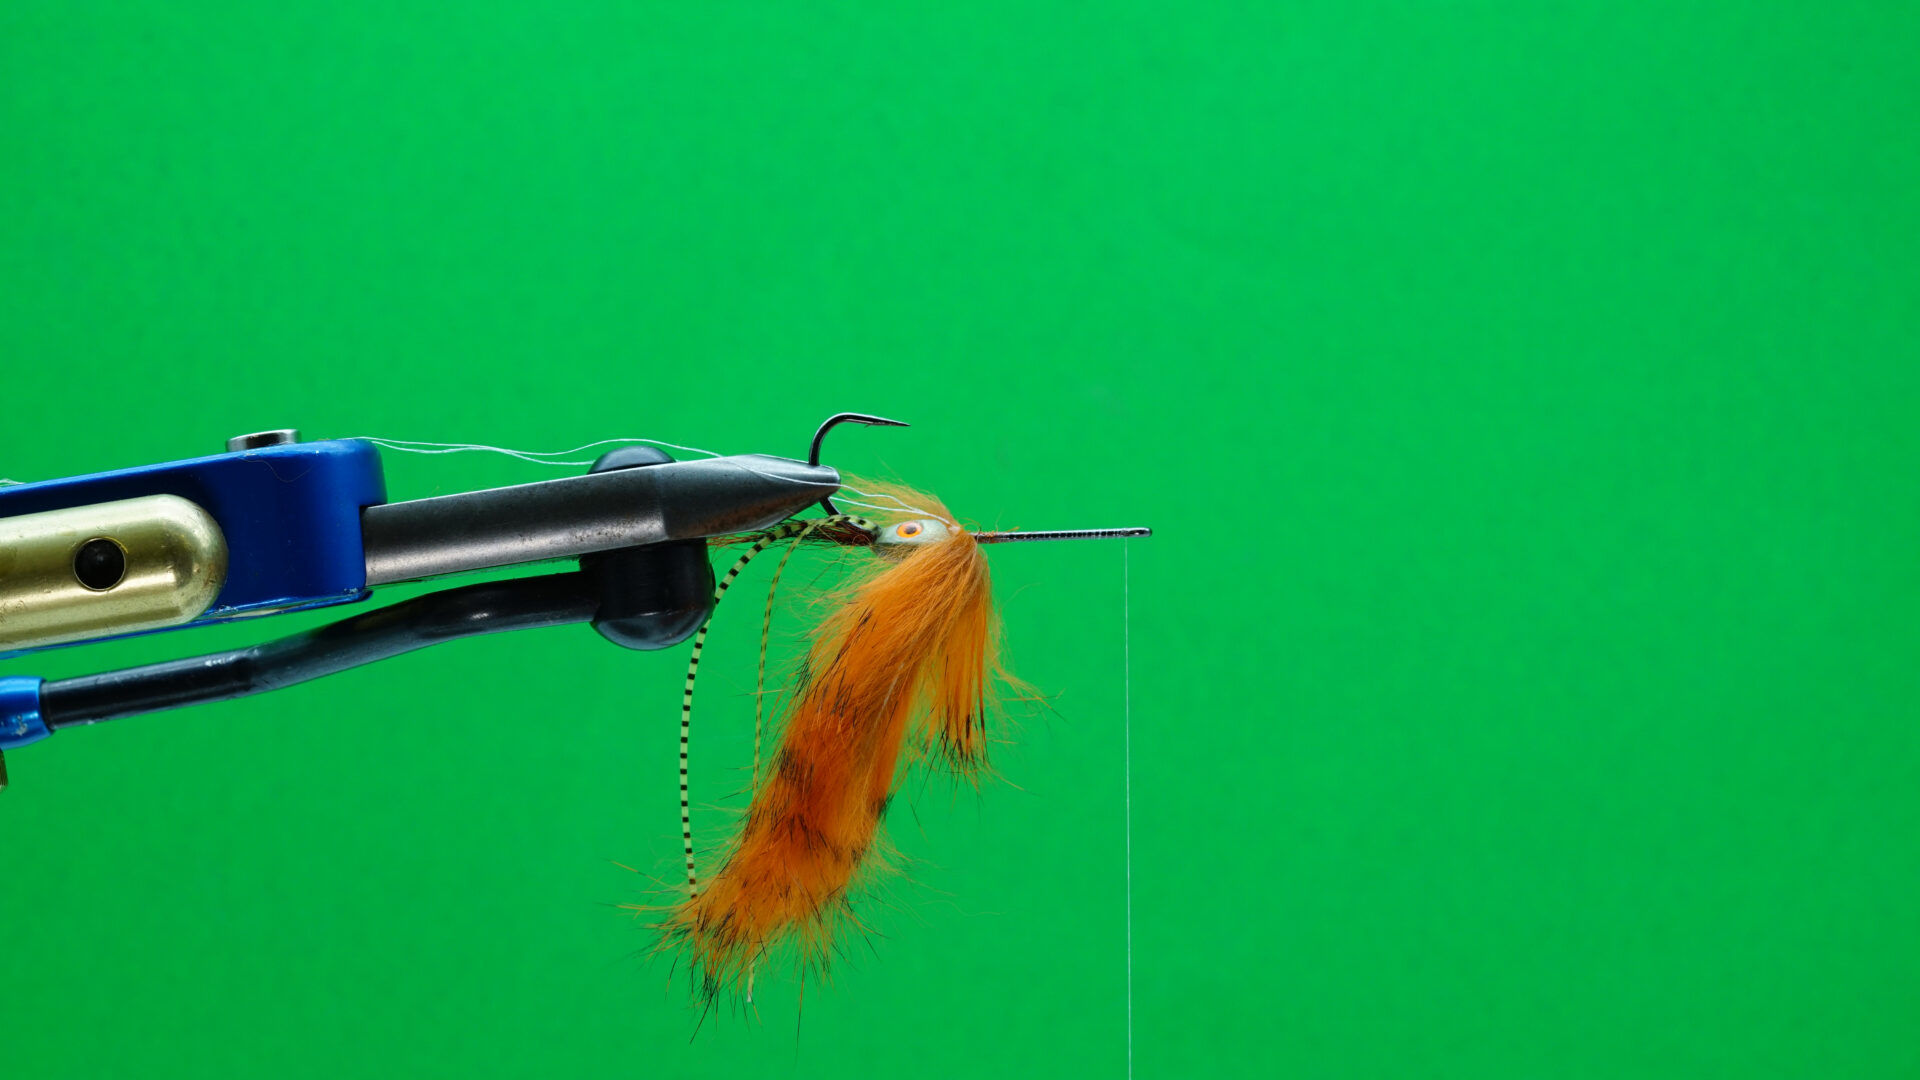 The BC Signal Crayfish: Step 2.
- Trim a triangular section of Thin Skin roughly the hook gape wide at its widest point. Trim the wide end of the Thin Skin into a notch. Tie in the prepared Thin Skin in place by the narrow, tapered end, pointing forward in front of hook eye. Lay out a sparse amount of dubbing. Trim a section of rabbit fur from the hide and distribute it evenly on top of the dubbing. Lay a second, equally sparse layer of dubbing on top of the trimmed rabbit, to sandwich it in place. Carefully place the fur and dubbing together into the dubbing loop, with most of the rabbit fur tips protruding out of the loop. Beginning slowly, twist the dubbing loop tight, locking the materials in place. Brush the dubbing loop to free up any fibres that twisted around the thread.
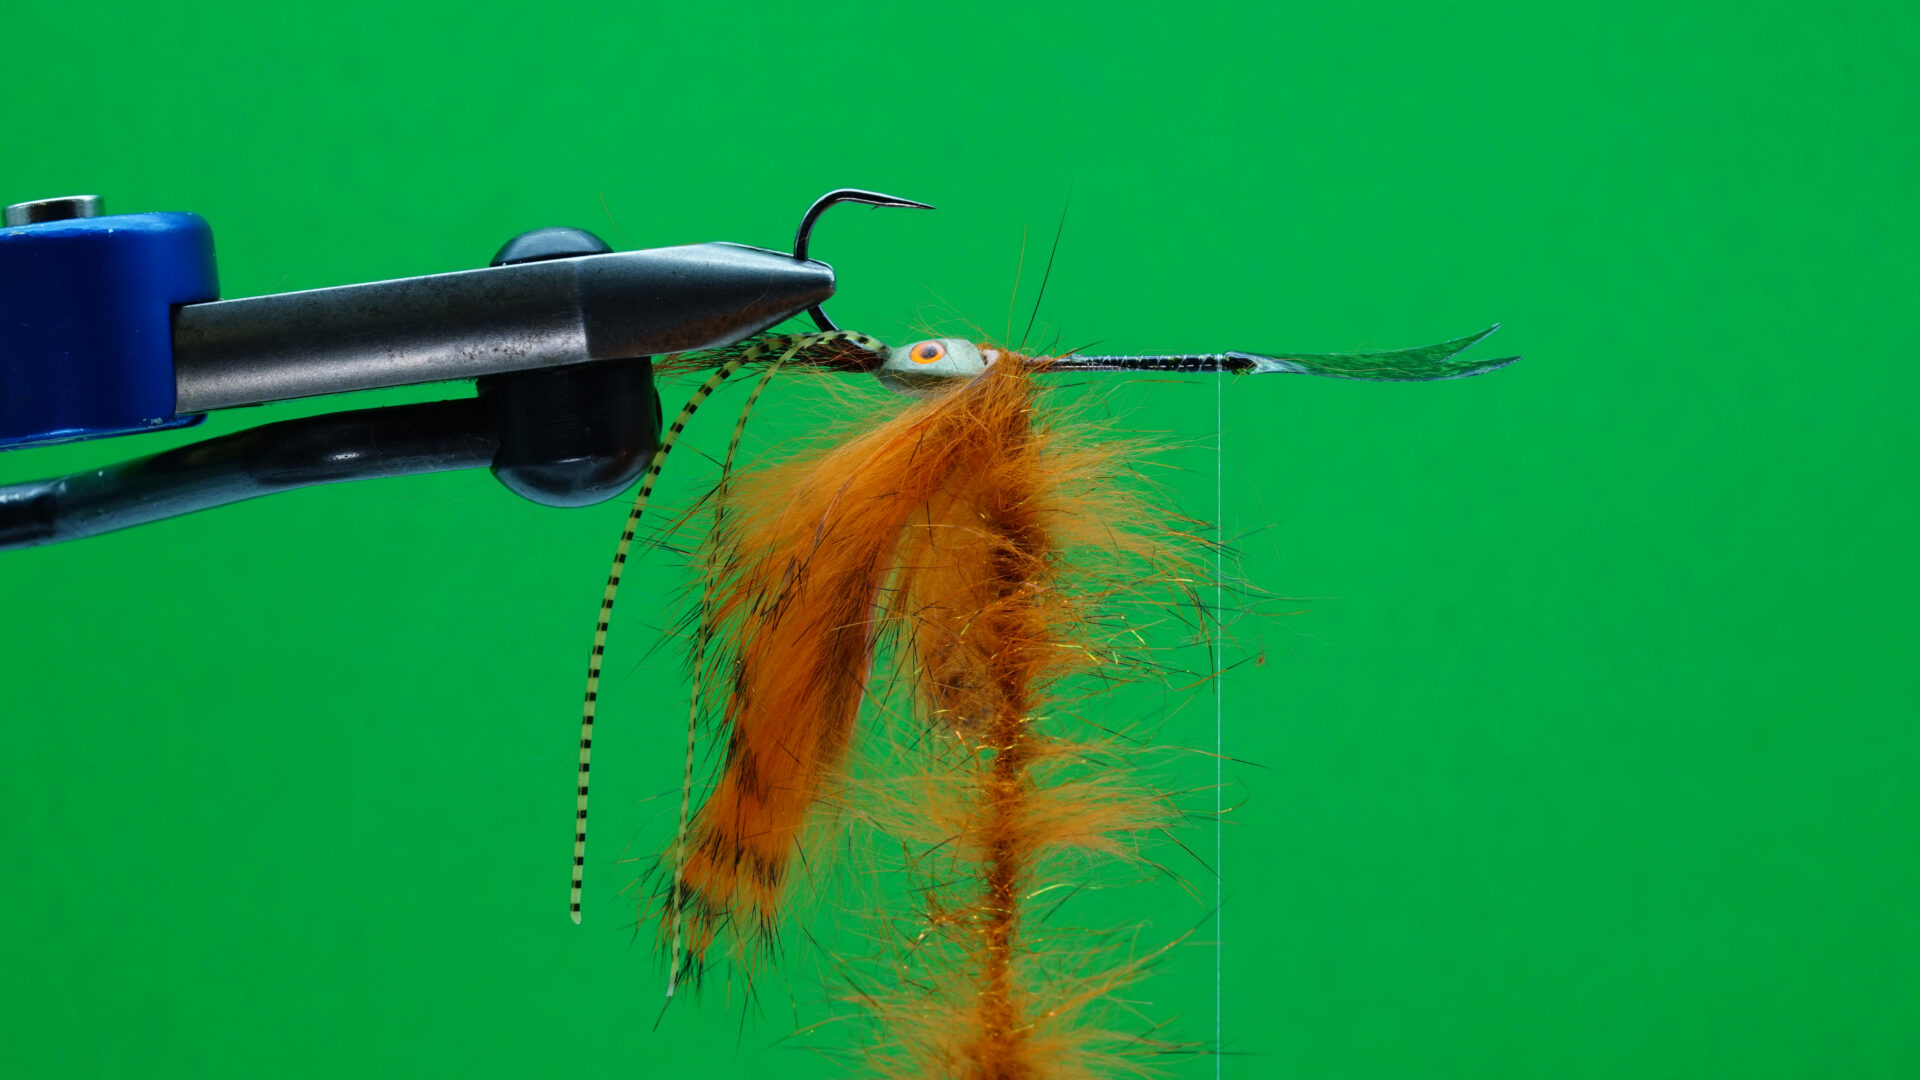 The BC Signal Crayfish: Step 3.
- Using the dubbing loop, fold the rabbit strip claws back against the sides of the Sculpin Head so the fur faces out. Wind the dubbing loop forward to the hook eye using tight, touching wraps to form the balance of the body. Tie off and trim the excess. Brush out the body to free any trapped fibres. Tie in a single hen saddle feather flat along the body, concave side down, so the tip extends back to the hook point. Trim the excess stem. On top of the hen saddle feather, trim the excess. Fold the Thin Skin wing back over the body and hen saddle tip. Place a few controlling thread wraps back over the body slightly to position the hen saddle and Thin Skin wing so they lie low over the body. Tie off, whip finish, remove the tying thread and apply head cement. Remove the finished rear body section from the vise.
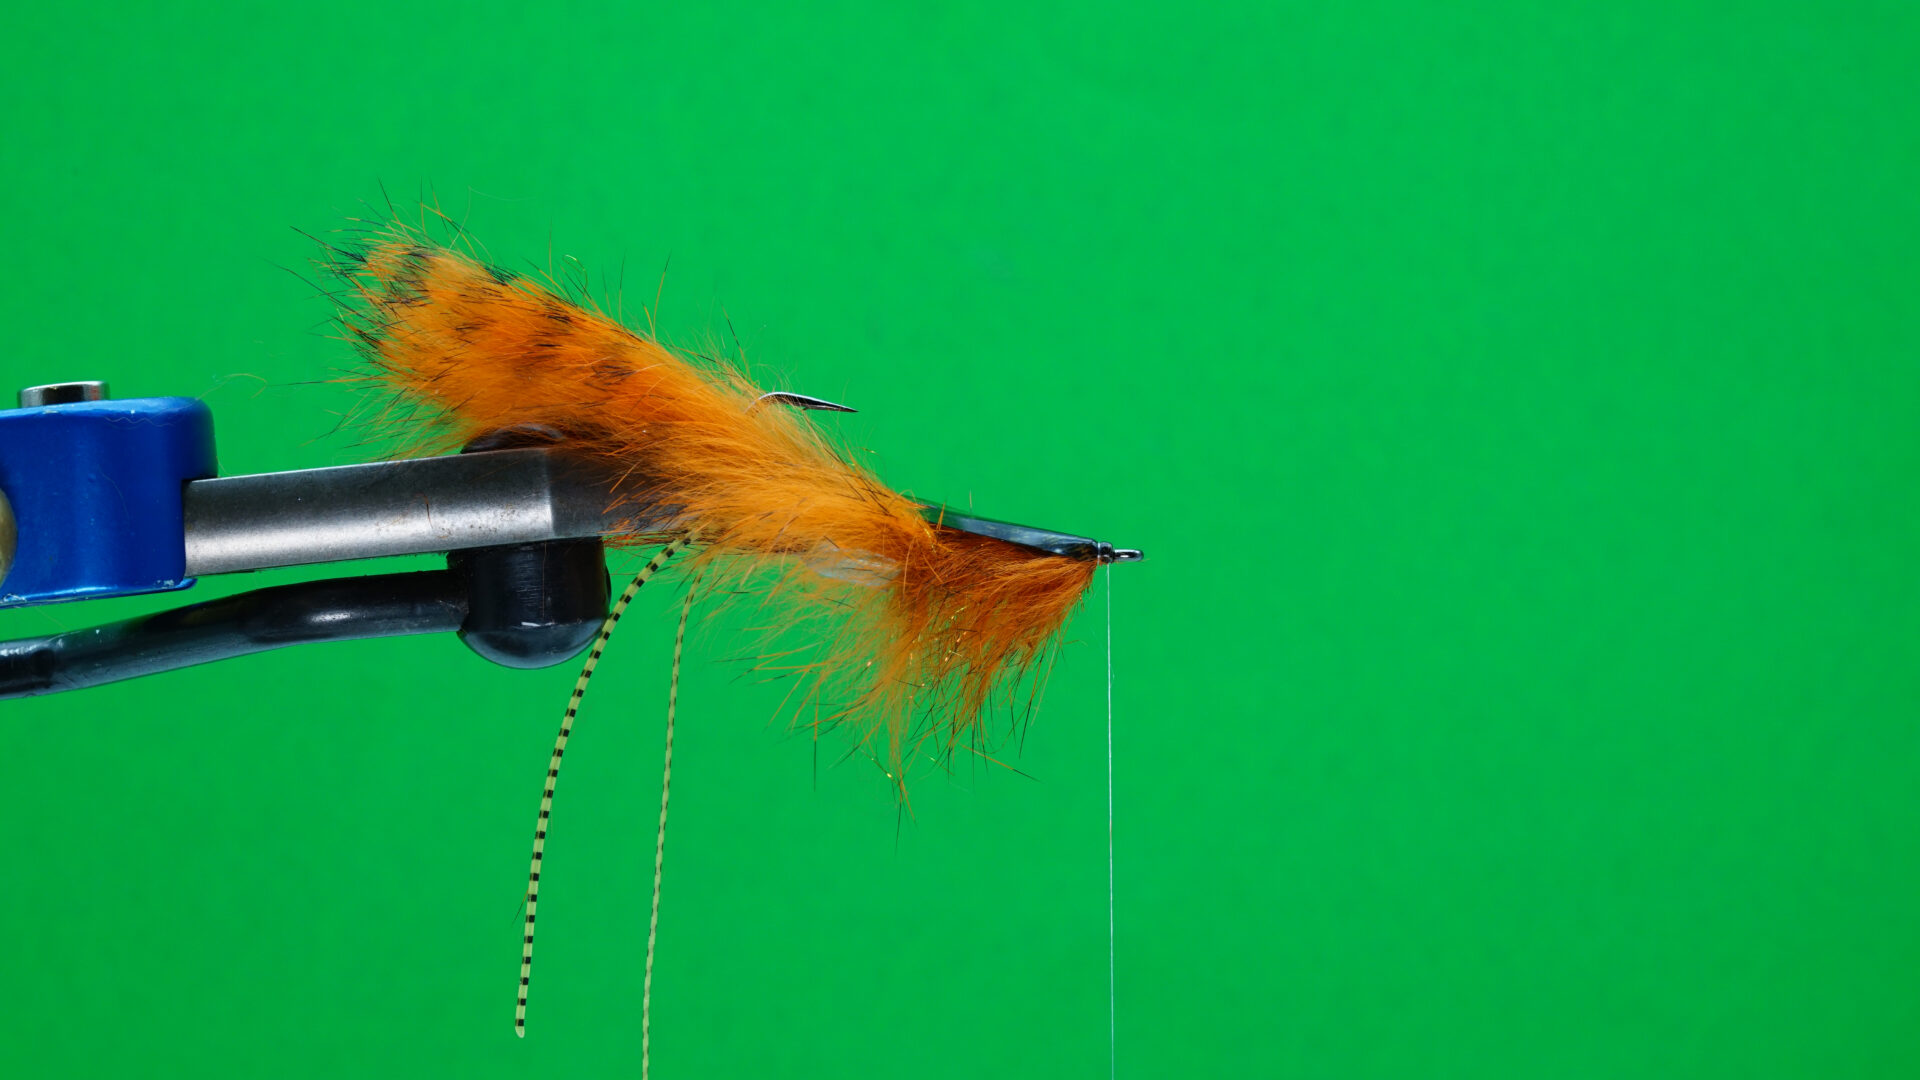 The BC Signal Crayfish: Step 4.
- Slide a 60-degree shank onto the hook eye of the body section. Place the loop of the 60-degree shank into the vise with the hook eye portion pointing up and with the body section trailing behind. Attach the tying thread onto the eye return. Wind the thread forward to the eye using close touching turns to close the return, locking in the rear body section. Tie in a short wire or mono loop on the underside of the shank just in front of the return. Secure the loop along the shank, down the 60-degree bend to the hook eye. Fold the loop back up the 60-degree bend and secure it in place.
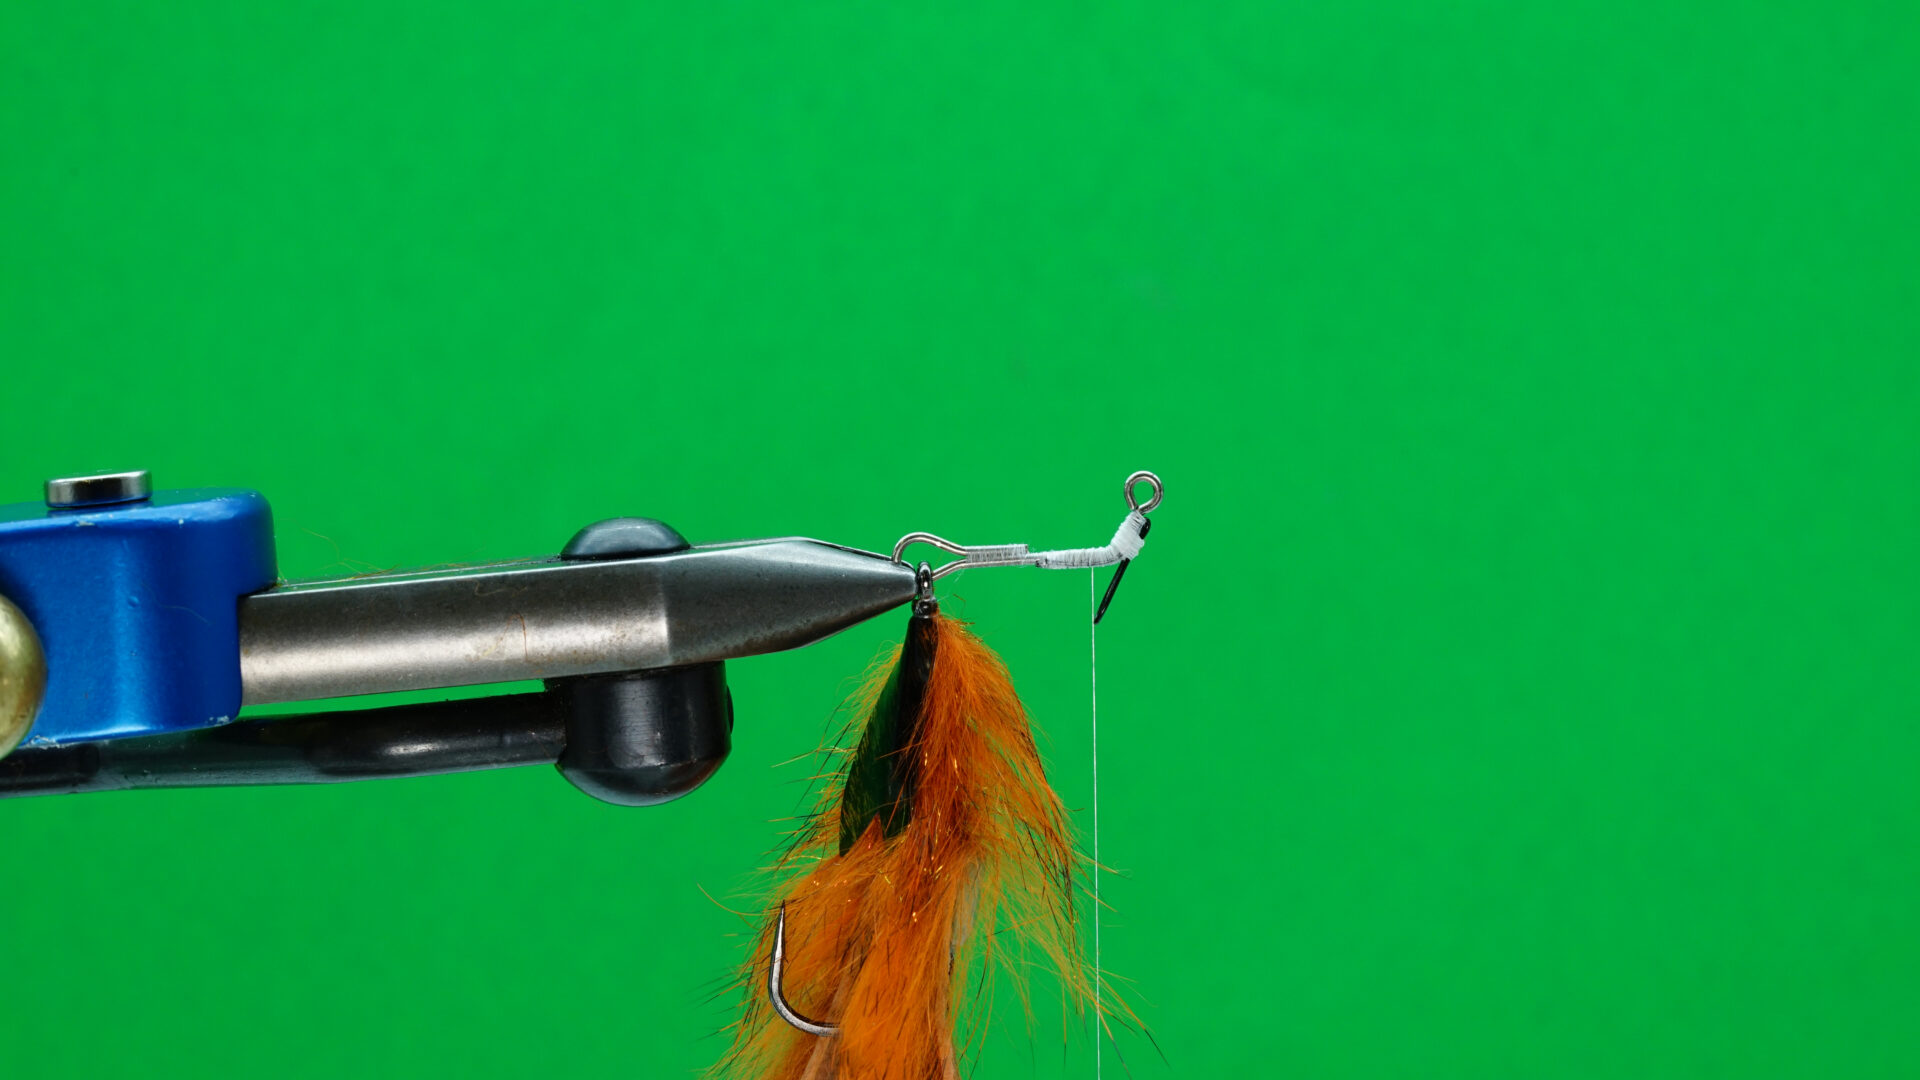 The BC Signal Crayfish: Step 5.
- Form the body and wings of the abdomen using the same procedure as for the rear body section to form the body and layered wings. The tips of the wing section should mask the joint between the rear body and abdomen.
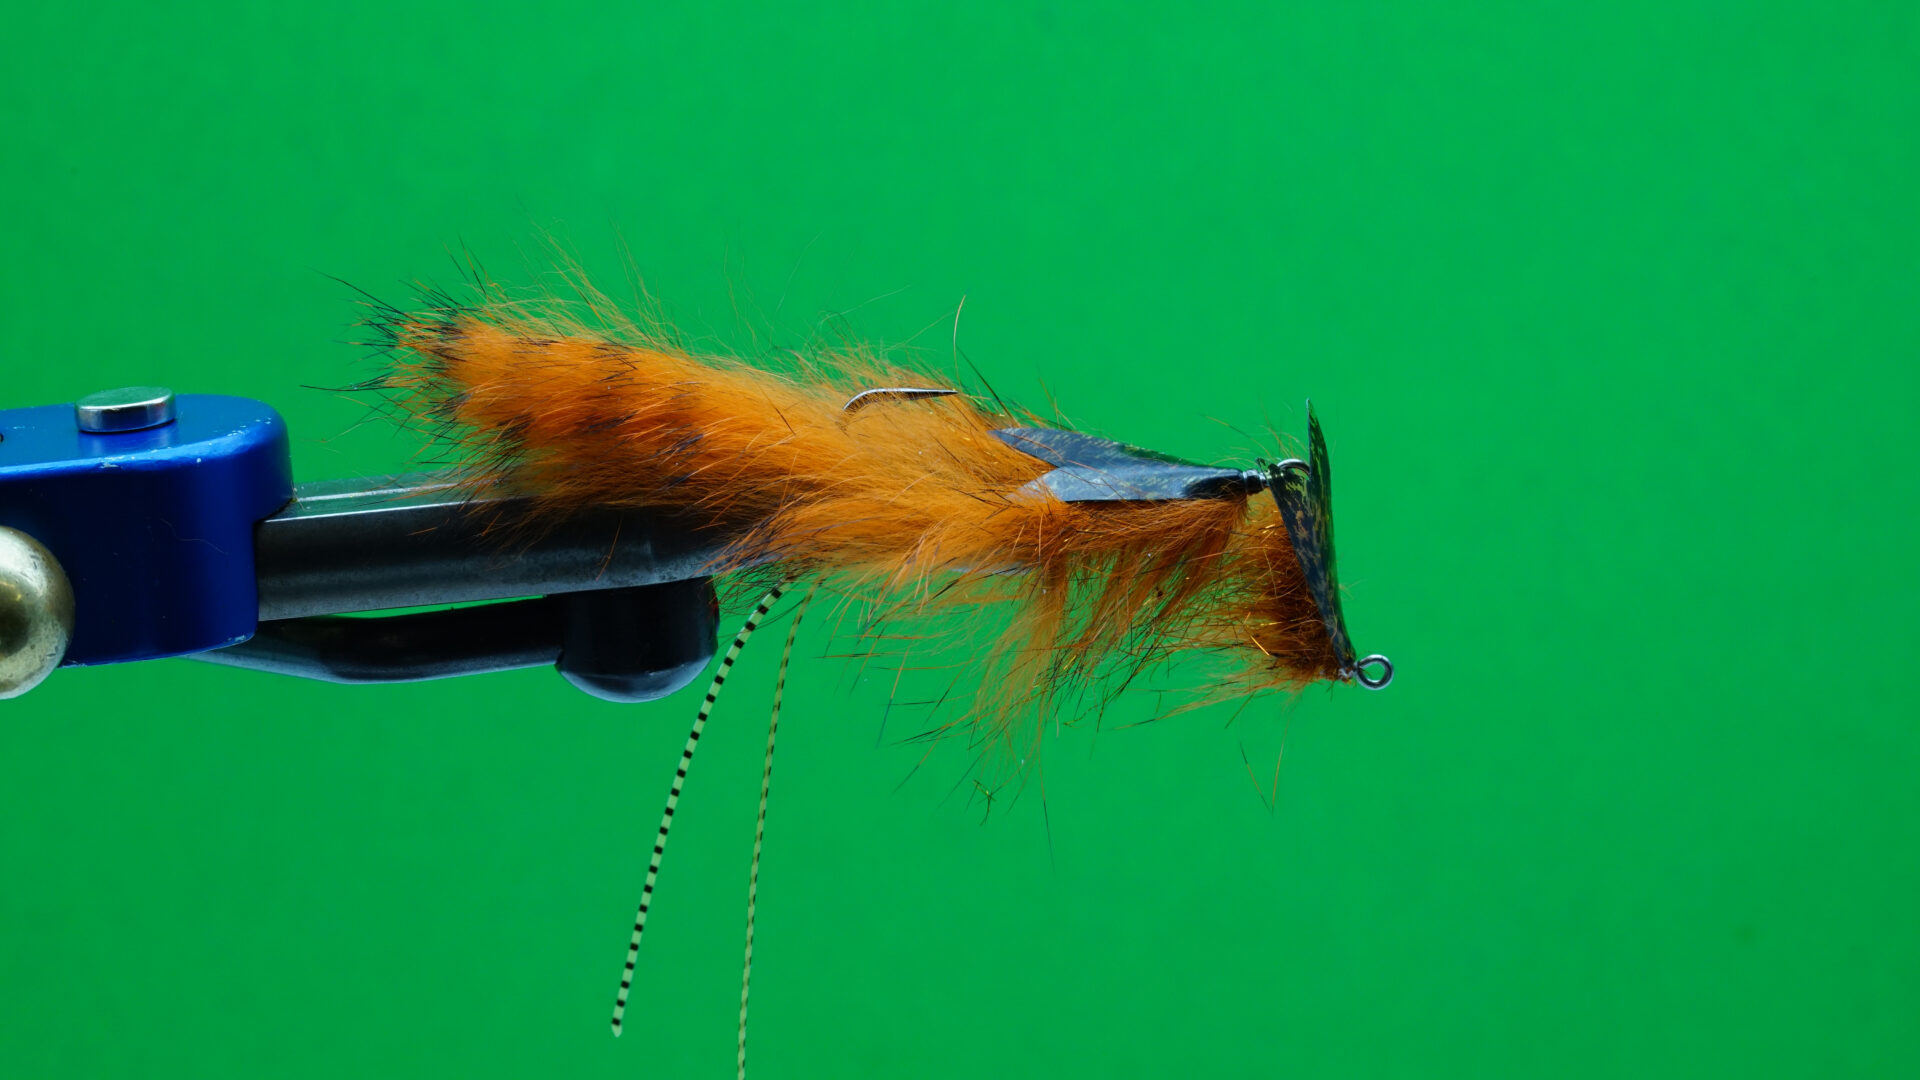 The BC Signal Crayfish: Step 6.
- Loop a short 15-millimetre, 60-degree shank to the wire/mono loop. Place the eye of the return into the jaws of the vise, so the abdomen and body sections hang down. Make sure the hook eye of the 60-degree shank used to form the abdomen points reward. Attach the tying thread to the return. Wind the thread forward using firm close touching wraps to the rear of the hook eye to close the return, locking the abdomen section in place. Form the telson by placing five to six hen saddle feathers one on top of each other and secure them directly behind the hook eye, dull side facing down, convex side facing up, tips pointing forward just longer than the 15-millimetre shank. Trim the excess stems. Trim a triangular section of Thin Skin that is roughly half the hook gape wide at its widest point. Tie in the prepared Thin Skin by the narrow, tapered end at the rear of the 15-millimetre shank. The notched end of the Thin Skin should point rearward.
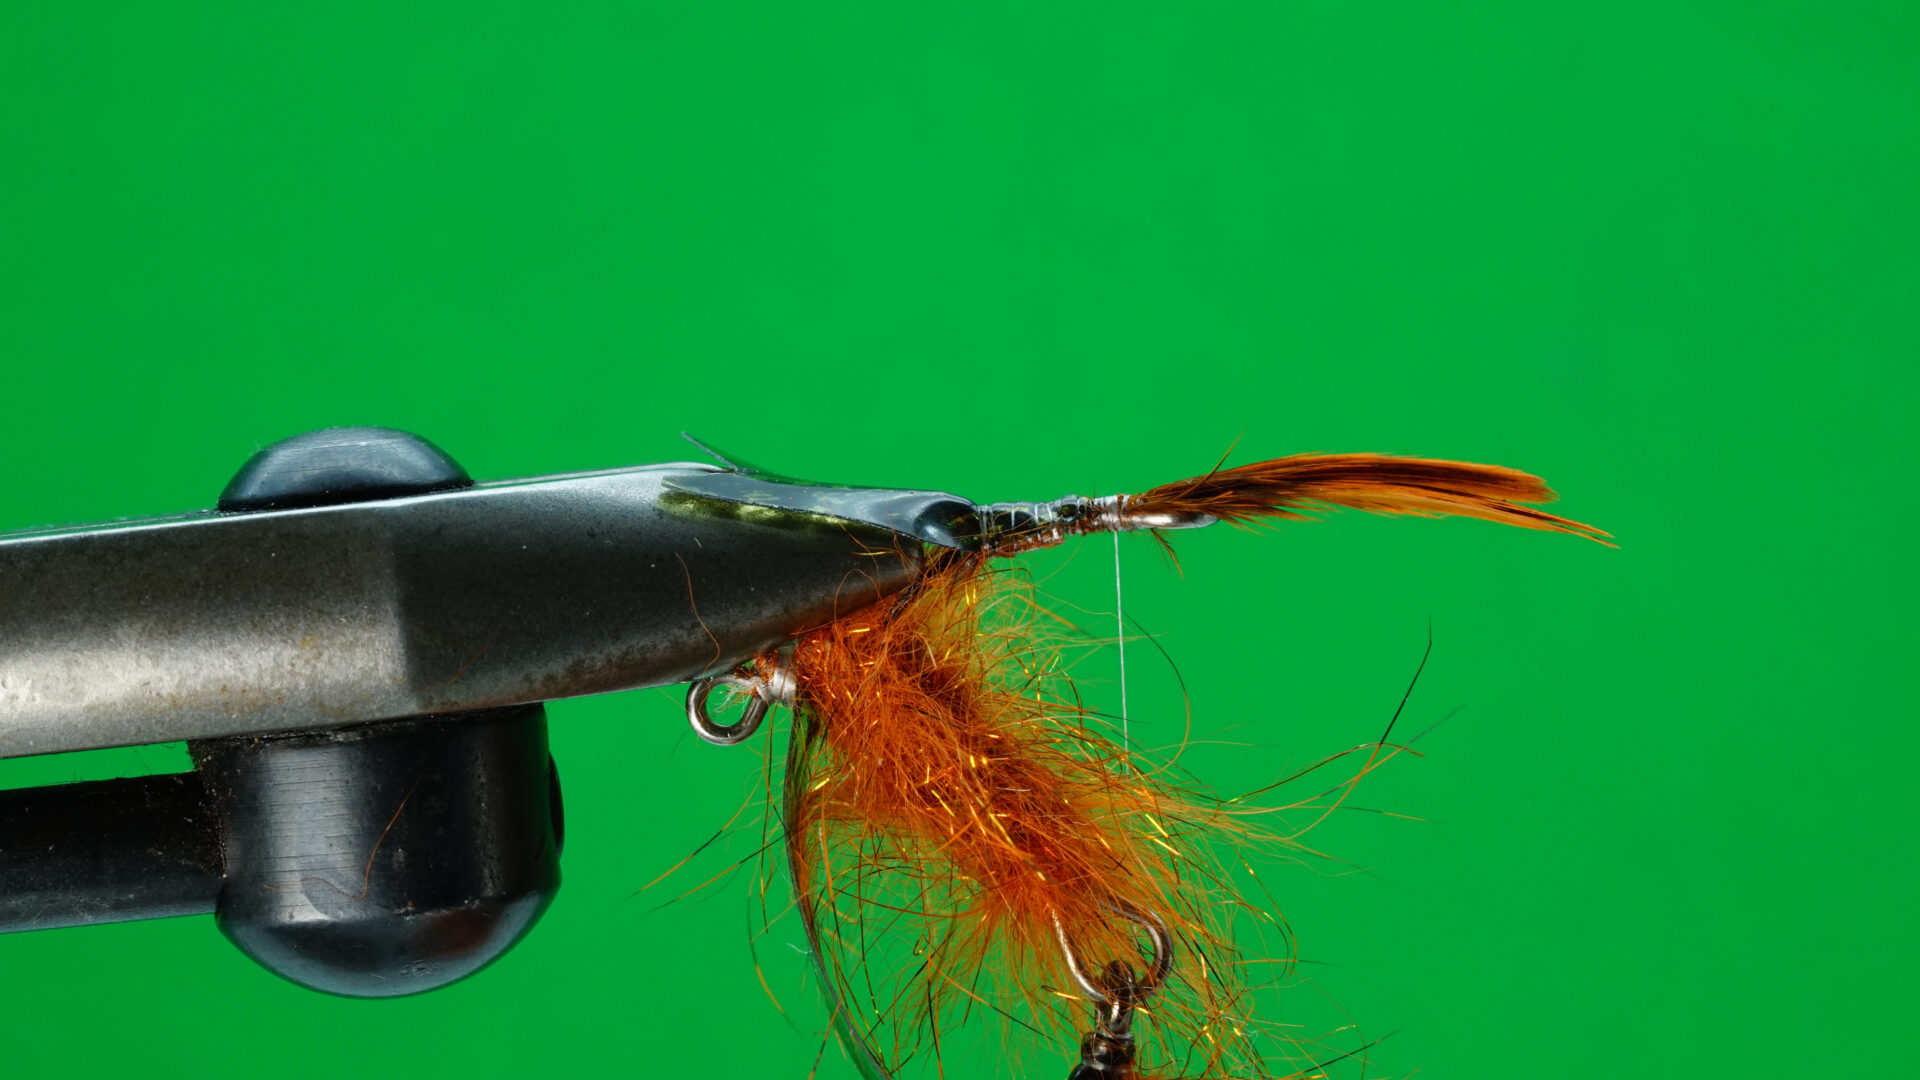 The BC Signal Crayfish: Step 7.
- Cover the shank with dubbing to form a ball-shaped profile. Whip finish with a minimum amount of wraps at the base of the hackle tips and apply head cement. Fold and pinch the Thin Skin wing section back over the dubbing. The notched end should reach slightly over the hackle tip telson.
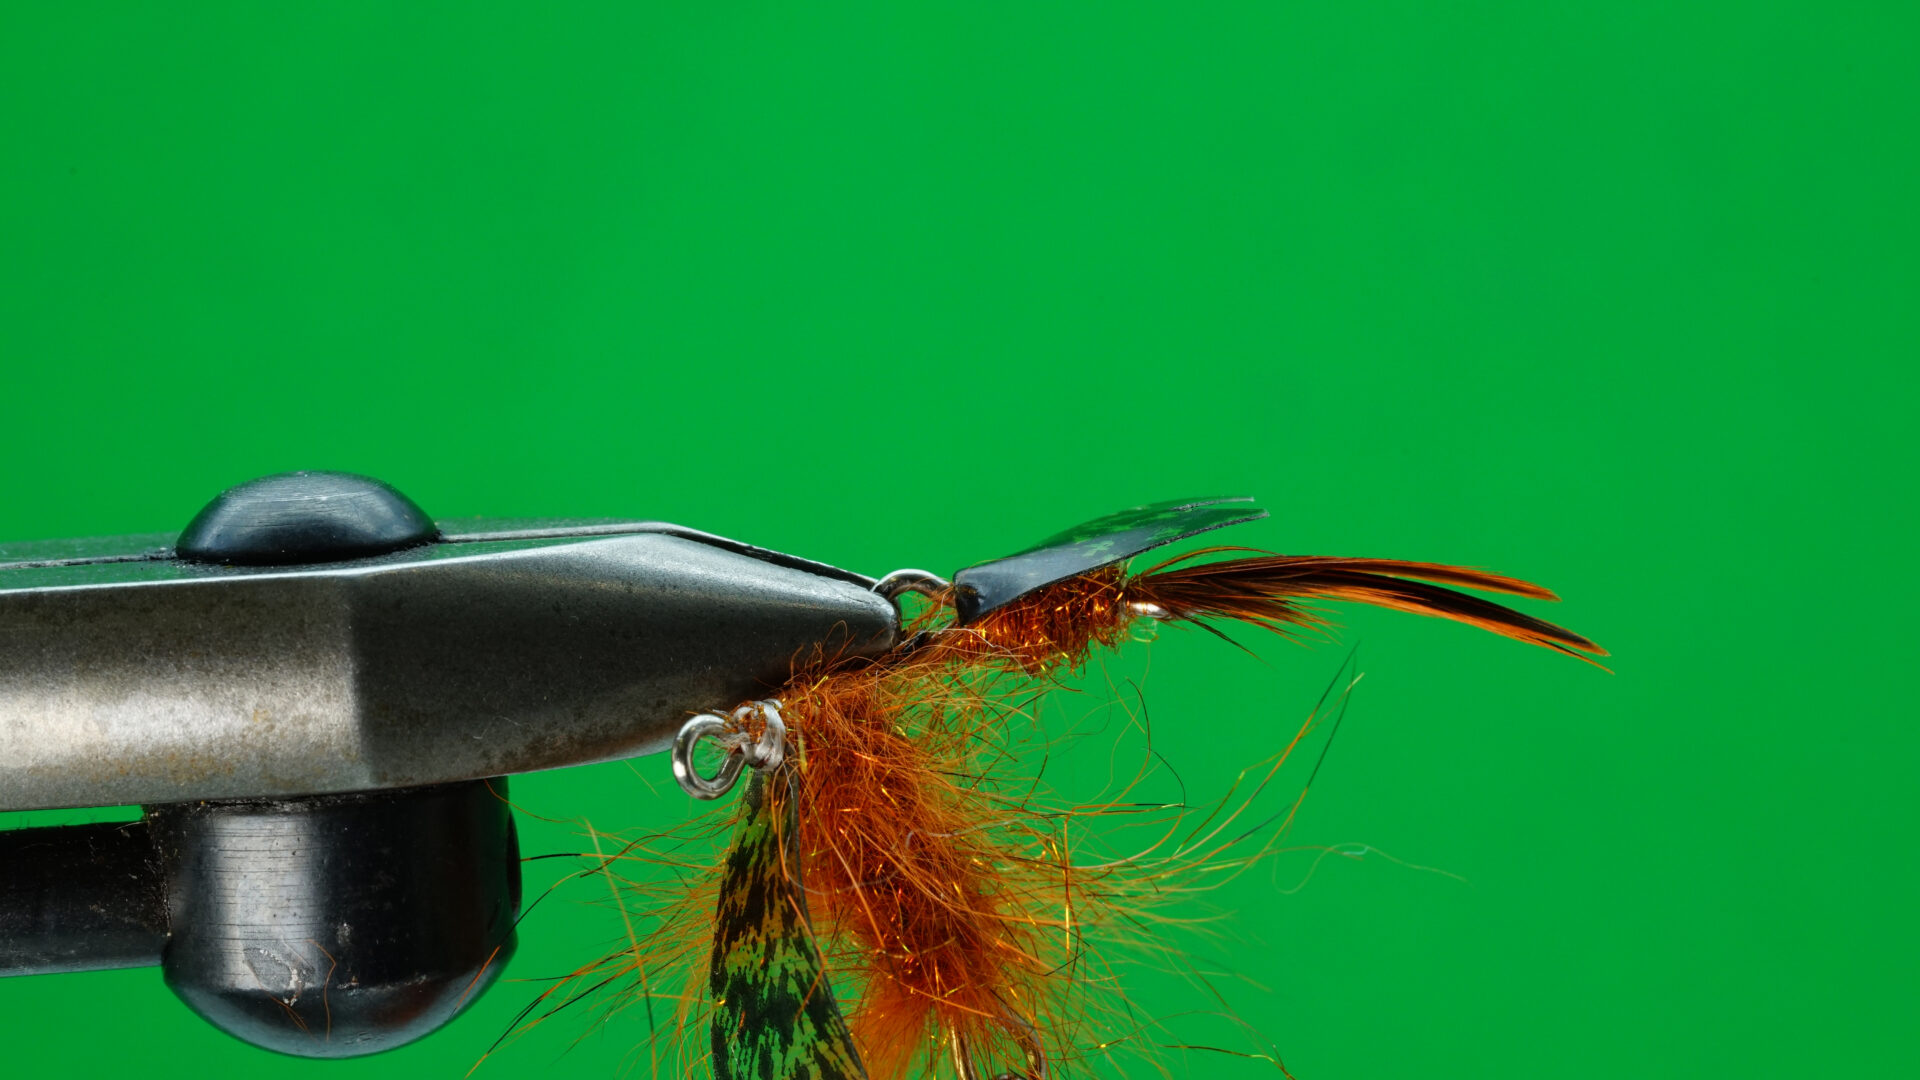 The BC Signal Crayfish: Step 8.