Clark Pierce, or Cheech to many fly fishers and tyers, created one of my favourite small baitfish patterns, the Baby Fat Minnow. Cheech is one of the owners of the Fly Fish Food empire, consisting of a website, store and YouTube channel. If you haven’t visited the Fly Fish Food YouTube channel, I strongly recommend you do. There you will find hundreds of fly-tying videos. Fly Fish Food also has a healthy, active social media presence too, along with the Clark’s Fly Tying with Uncle Cheech Facebook group.
Advertisement
A short shank, wide gape carp hook provides the foundation for the Baby Fat Minnow. As most predatory fish target the head area of a minnow, having the hook point in the vicinity of the head of the fly ensures a solid up hook up on the savage, confident strikes associated with this fly.
Advertisement
A small, 7/64-inch (2.8-millimetre) silver tungsten bead provides ballast and weight to compensate for the buoyant synthetic materials used for the body and head. The silver tungsten bead also provides an attractive flash from within the core of the fly. The most important aspect of the bead is its location. It is important to secure the bead far enough back from the hook eye to allow placement of a pair of molded eyes. On a #8 hook, the bead should be located in line with the hook point.
With the bead in place, tie in a long tail, twice the length of the shank. It is critical to keep the tail of the Baby Fat Minnow sparse. A sparse tail is critical as it flares less, helping maintain the Baby Fat Minnow’s overall tapered profile. You can use either white marabou or Cheech’s current favourite tail material, a single Spey hackle chickabou feather.
Advertisement
The clump dubbing technique Cheech uses to create the fly’s iridescent inner glow that mimics the translucent body and entrails is what makes the Baby Fat Minnow unique. Cheech uses a variety of Ice Dub colours to form the translucent body, including Callibaetis, UV Tan, Dark Dun and UV Pearlescent Ice Dub. Pinch a sparse, easy-to-read-through, quarter-sized clump of Ice Dub from the package. Place the clump on top of the shank, directly behind the bead so there are equal amounts of dubbing on either side of the tie-in point. Make two loose wraps to secure the dubbing clump in place while massaging the dubbing around the hook. With the dubbing secure, fold the dubbing forward of the tie-in point back over the body and tail and secure in place, enveloping the rear portion of the fly. Brush the dubbing back, so it veils the body and tail.
Cheech uses Bruiser Blend Junior synthetic dubbing for the head, a dark colour for the dorsal portion, white or crème for the belly. Tie in the dorsal clump first. Pinch, pull apart and lay the dubbing back on itself several times to align and stack the dubbing fibres. Place the prepared dubbing on top of the shank directly behind the eye, so two-thirds of the clump protrudes forward. Secure the dubbing in place. Using the same procedure, tie in the lighter belly clump on the underside of the hook. Form a small bullet head by folding the forward-facing portion of the dark upper clump back over itself and secure it in place. Spread the dubbing, so it occupies the top portion of the hook. Repeat this process with the lighter belly dubbing, so it covers the lower half of the fly. Whip finish and remove the tying thread.
A pair of 1/8-inch molded eyes add an element of polish to the fly. The eyes must mount on a smooth, flat surface. Squash the sides of the bullet head flat using a pair of flat-bladed pliers or forceps. Coat the flat sides of the head with brushable superglue. While the glue is wet, pinch the eyes on each side of the head, tacking them in place.
Cover the eyes and head area with UV resin. Begin by filling in the gaps between the eyes with resin, cure the resin, place additional resin on both eyes and using a bodkin evenly distribute the resin all over the head area. Spread the resin back slightly onto the wing and belly to ensure the eyes are completely encapsulated to ensure they don’t fall off. A rotating vise comes in handy when finishing the head to ensure the resin doesn’t run or sag. A final coating of thin UV resin provides a critical finishing touch.
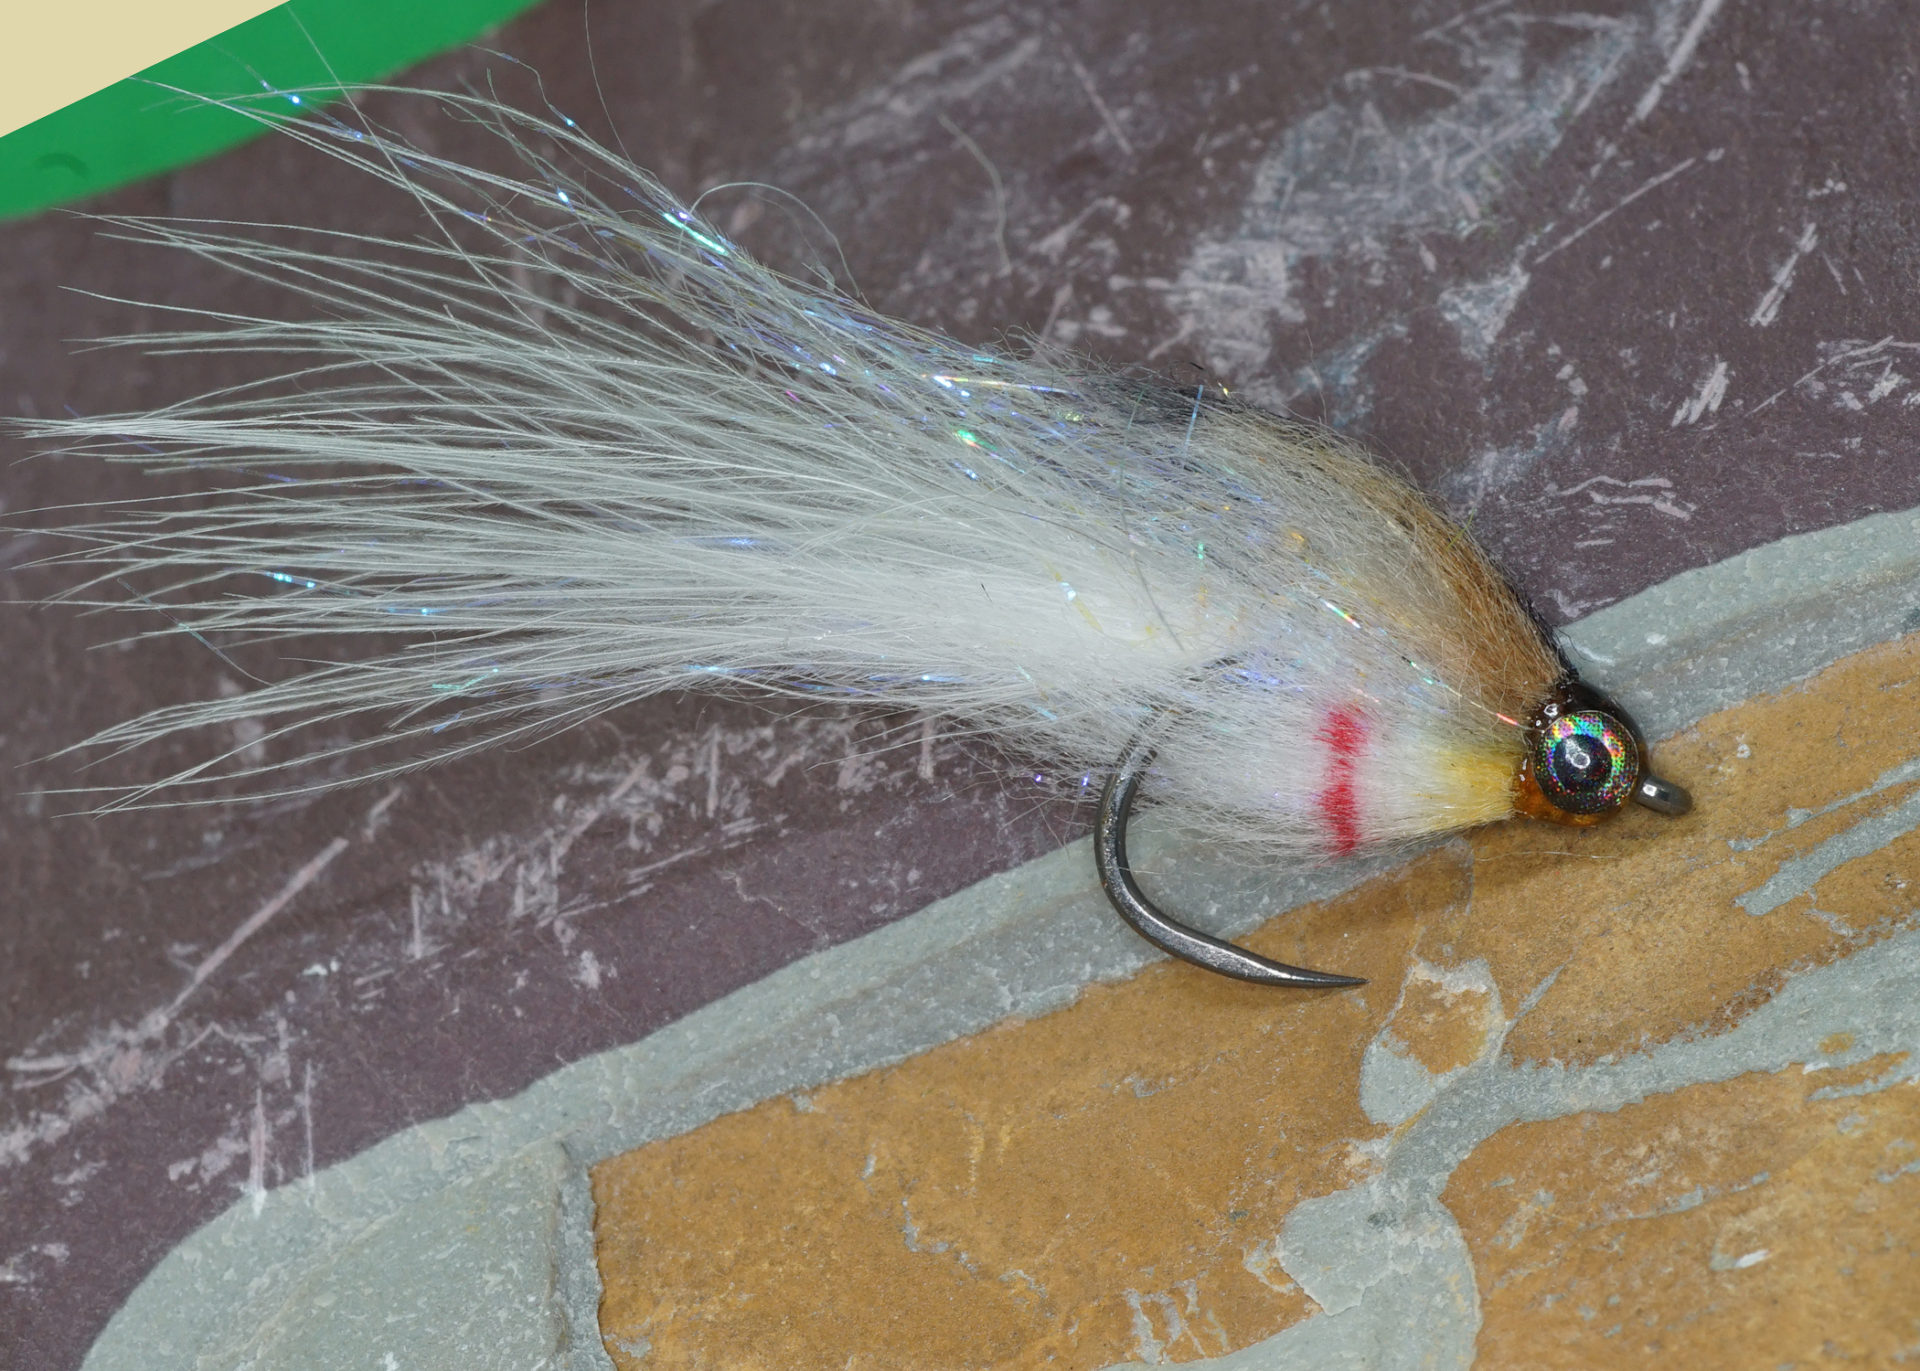
Cheech’s Baby Fat Minnow is becoming one of my favourite small baitfish or minnow patterns. It is simple to tie, durable and deadly for any trout, char, bass or any other fish that likes a little sushi in their diet. Don’t be afraid to use this pattern whenever the opportunity arises. After all, this fly has guts!
Baby Fat Minnow
Designed by Clark (Cheech) Pierce
- Hook: Carp Bonio hook, #8
- Thread: White
- Tail: Marabou, Spey soft hackle or bird fur, white
- Body: Ice Dub or Ripple Ice Dub, Callibaetis or Pearl
- Wing: Bruiser Blend Junior Dubbing, Gray Holo
- Throat: Bruiser Blend Junior Dubbing, cream
- Bead: 7/64-inch (2.8-millimetre) tungsten, silver
- Eyes: 1/8-inch molded eyes
Tying note: Use permanent markers to colour the wing and chin area of the throat to match the baitfish in your area.
Tying Instructions
- Slide a silver 7/64-inch tungsten bead onto the de-barbed hook, narrow opening towards to the eye. Place the hook into the vise. Secure the bead in place at approximately the midpoint of the hook shank. Make sure there is enough space between the bead and the hook eye to accommodate a pair of 1/8-inch molded eyes.

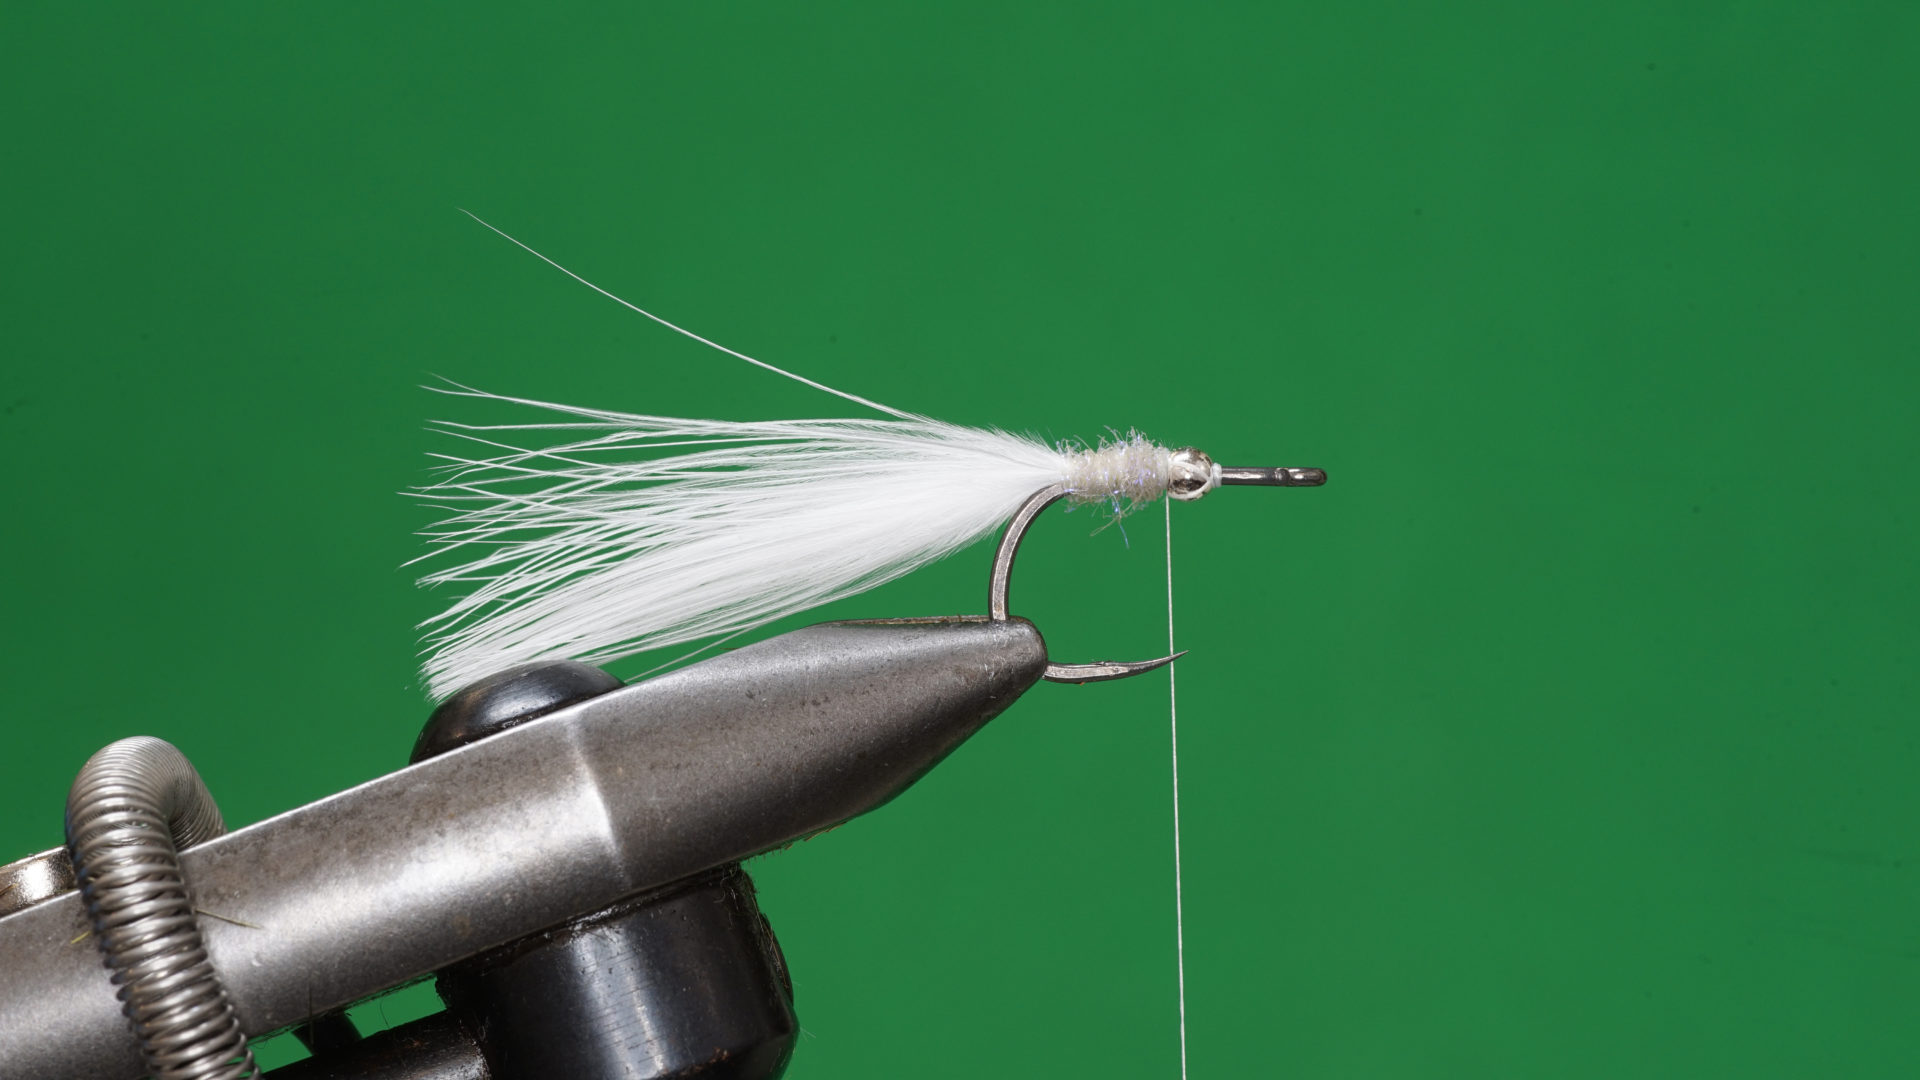
 Baby Fat Minnow: Step 1.
 - Tie a sparse tail. The finished tail should be twice the length of the hook shank. With the tail in place, dub a body from the base of the tail to the rear of the bead.
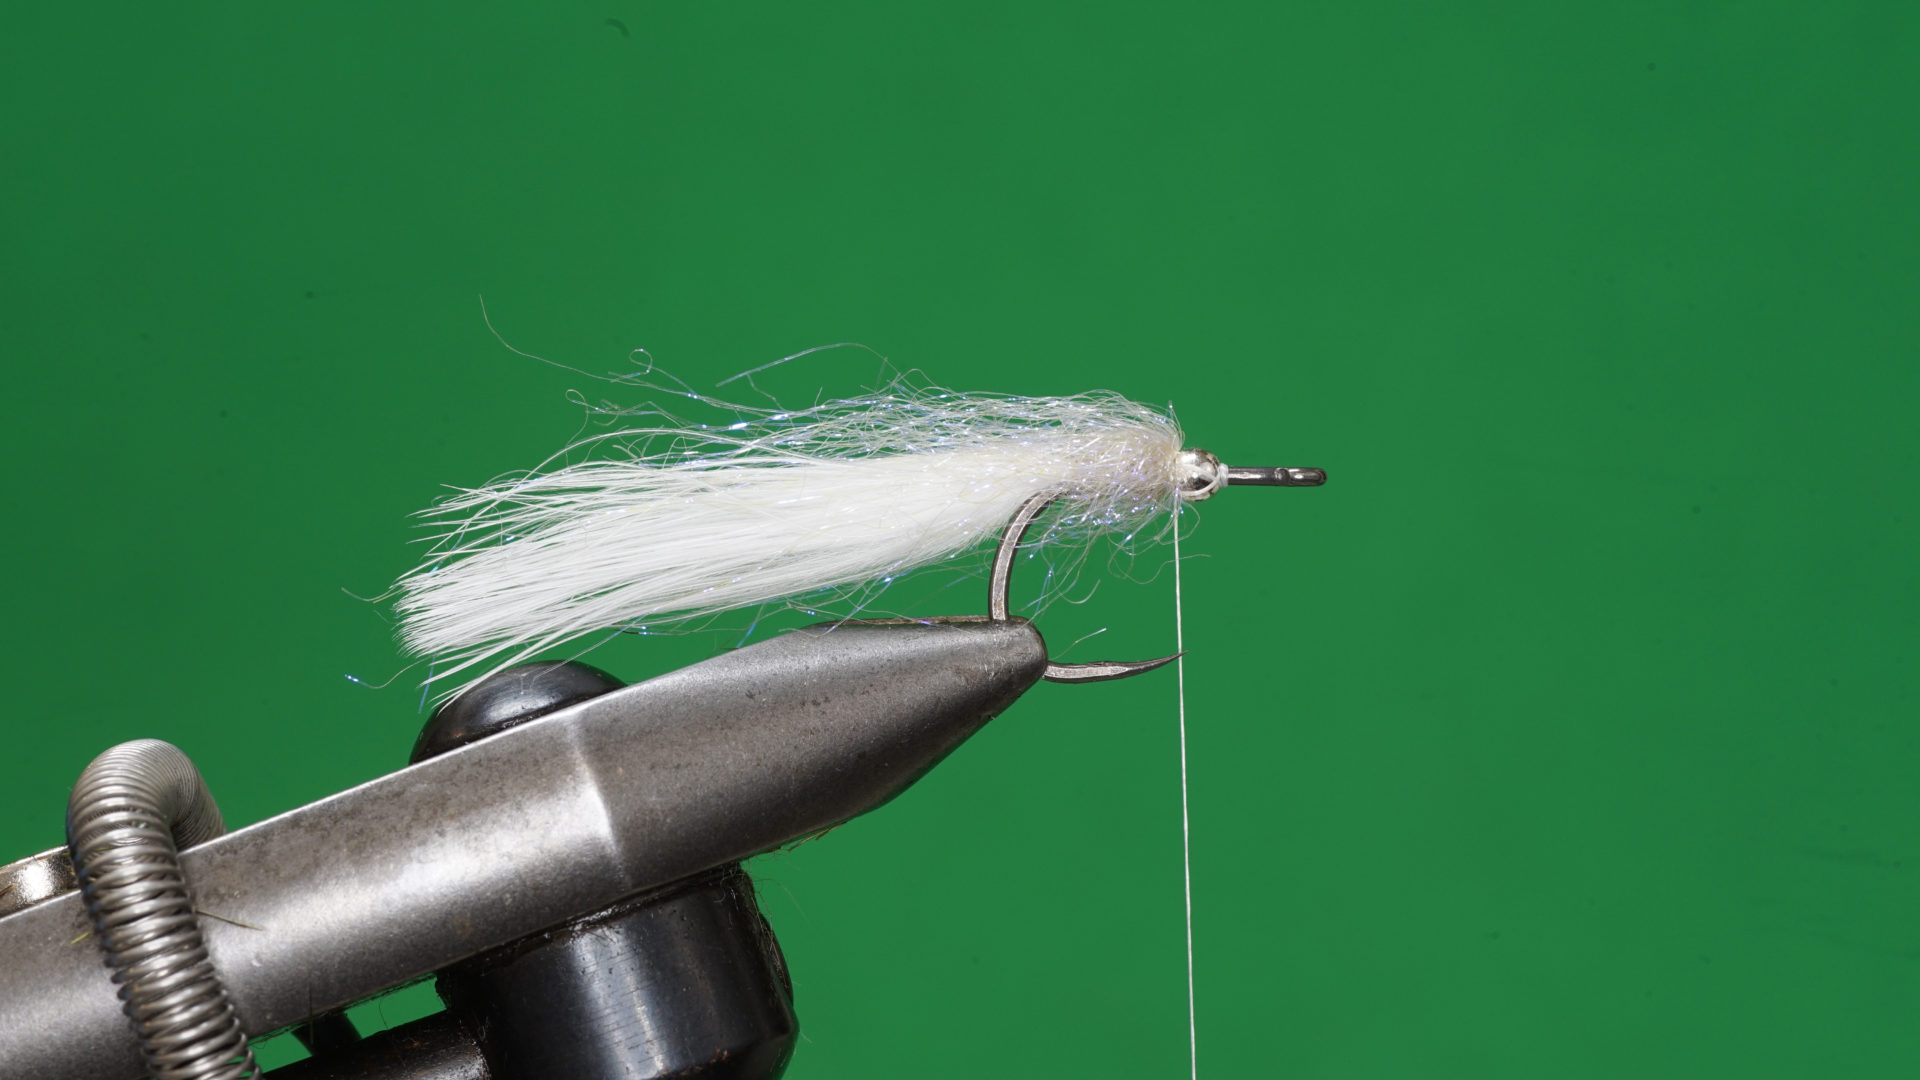
 Baby Fat Minnow: Step 2.
 - Tie in a sparse dubbing clump at the rear of the bead so there are equal amounts of dubbing on either side of the tie-in point. Use your thumb and forefinger work the dubbing clump around the shank. Use two loose wraps to bind the dubbing in place at its midpoint. Sweep the dubbing forward of the tie-in point back over the body, forming a dubbing veil or sheath over the body. Secure the dubbing in a swept-back position behind the bead.
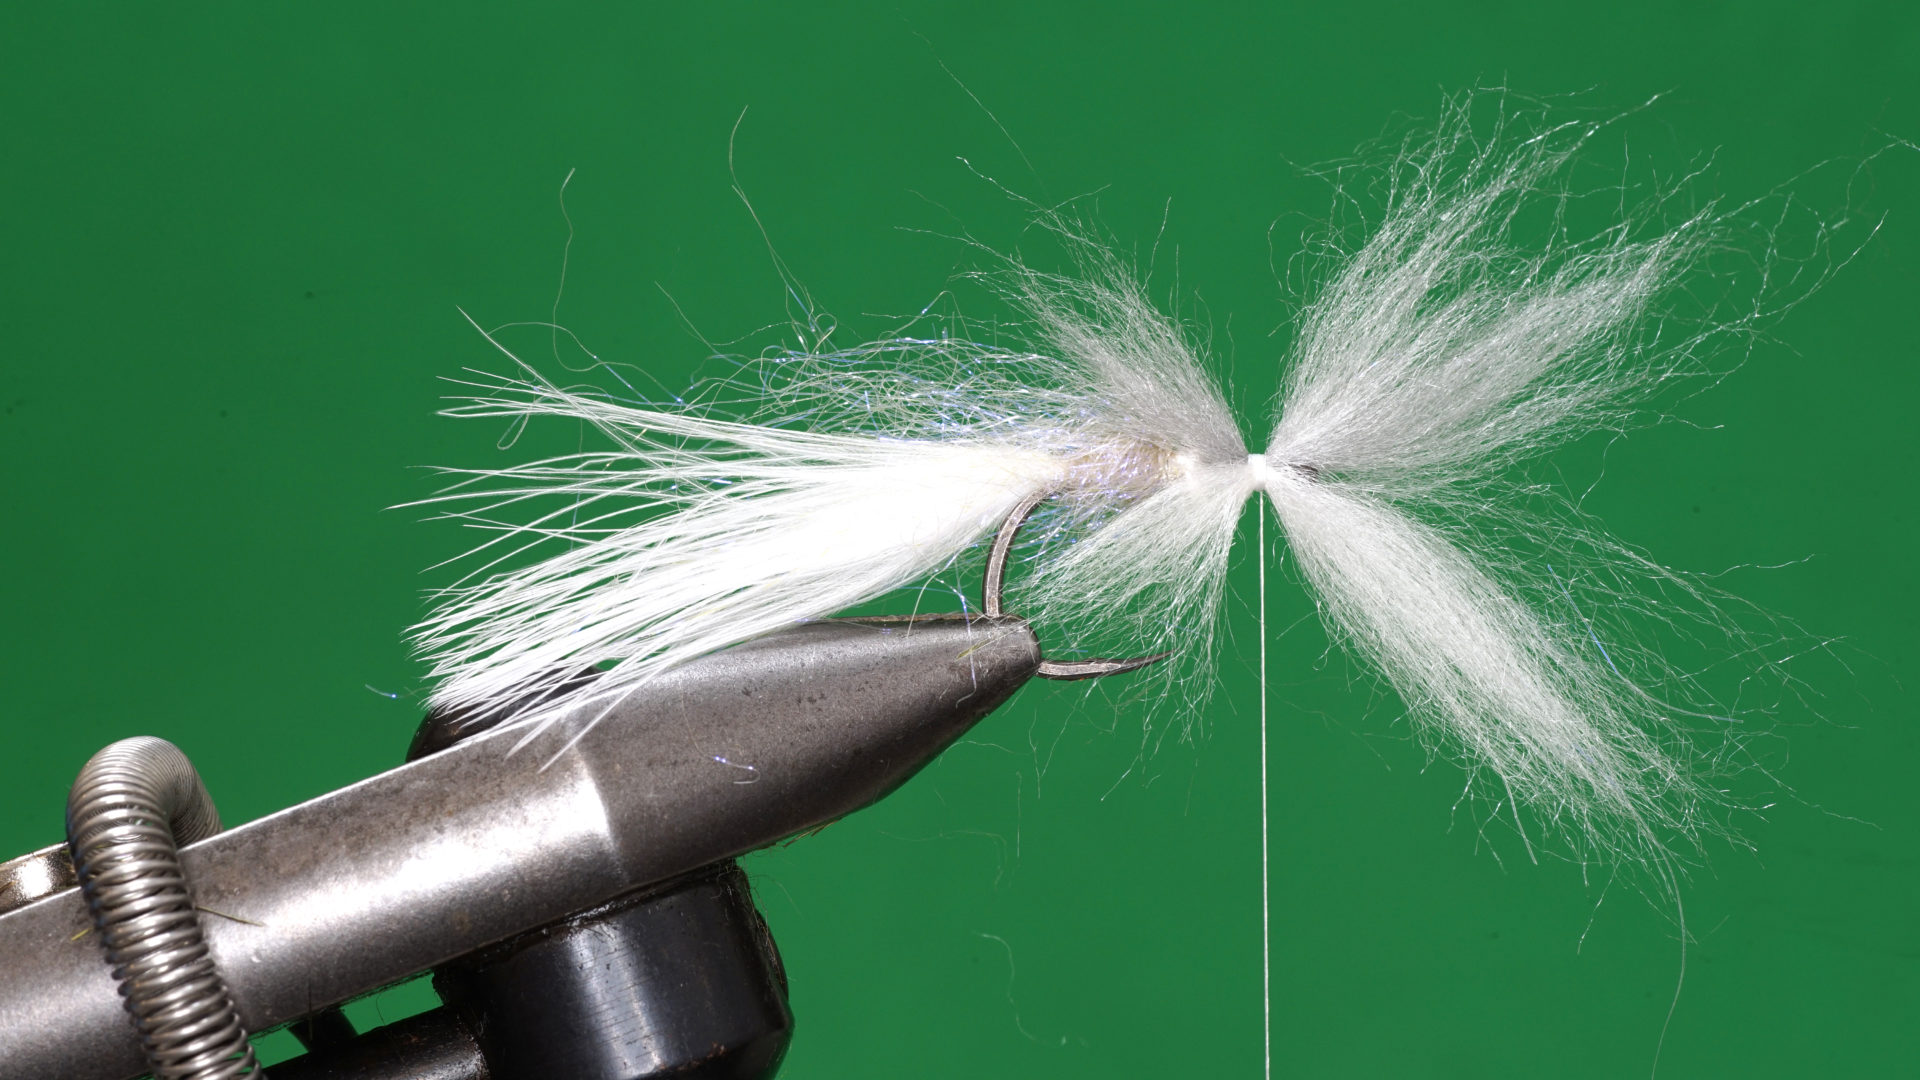
 Baby Fat Minnow: Step 3.
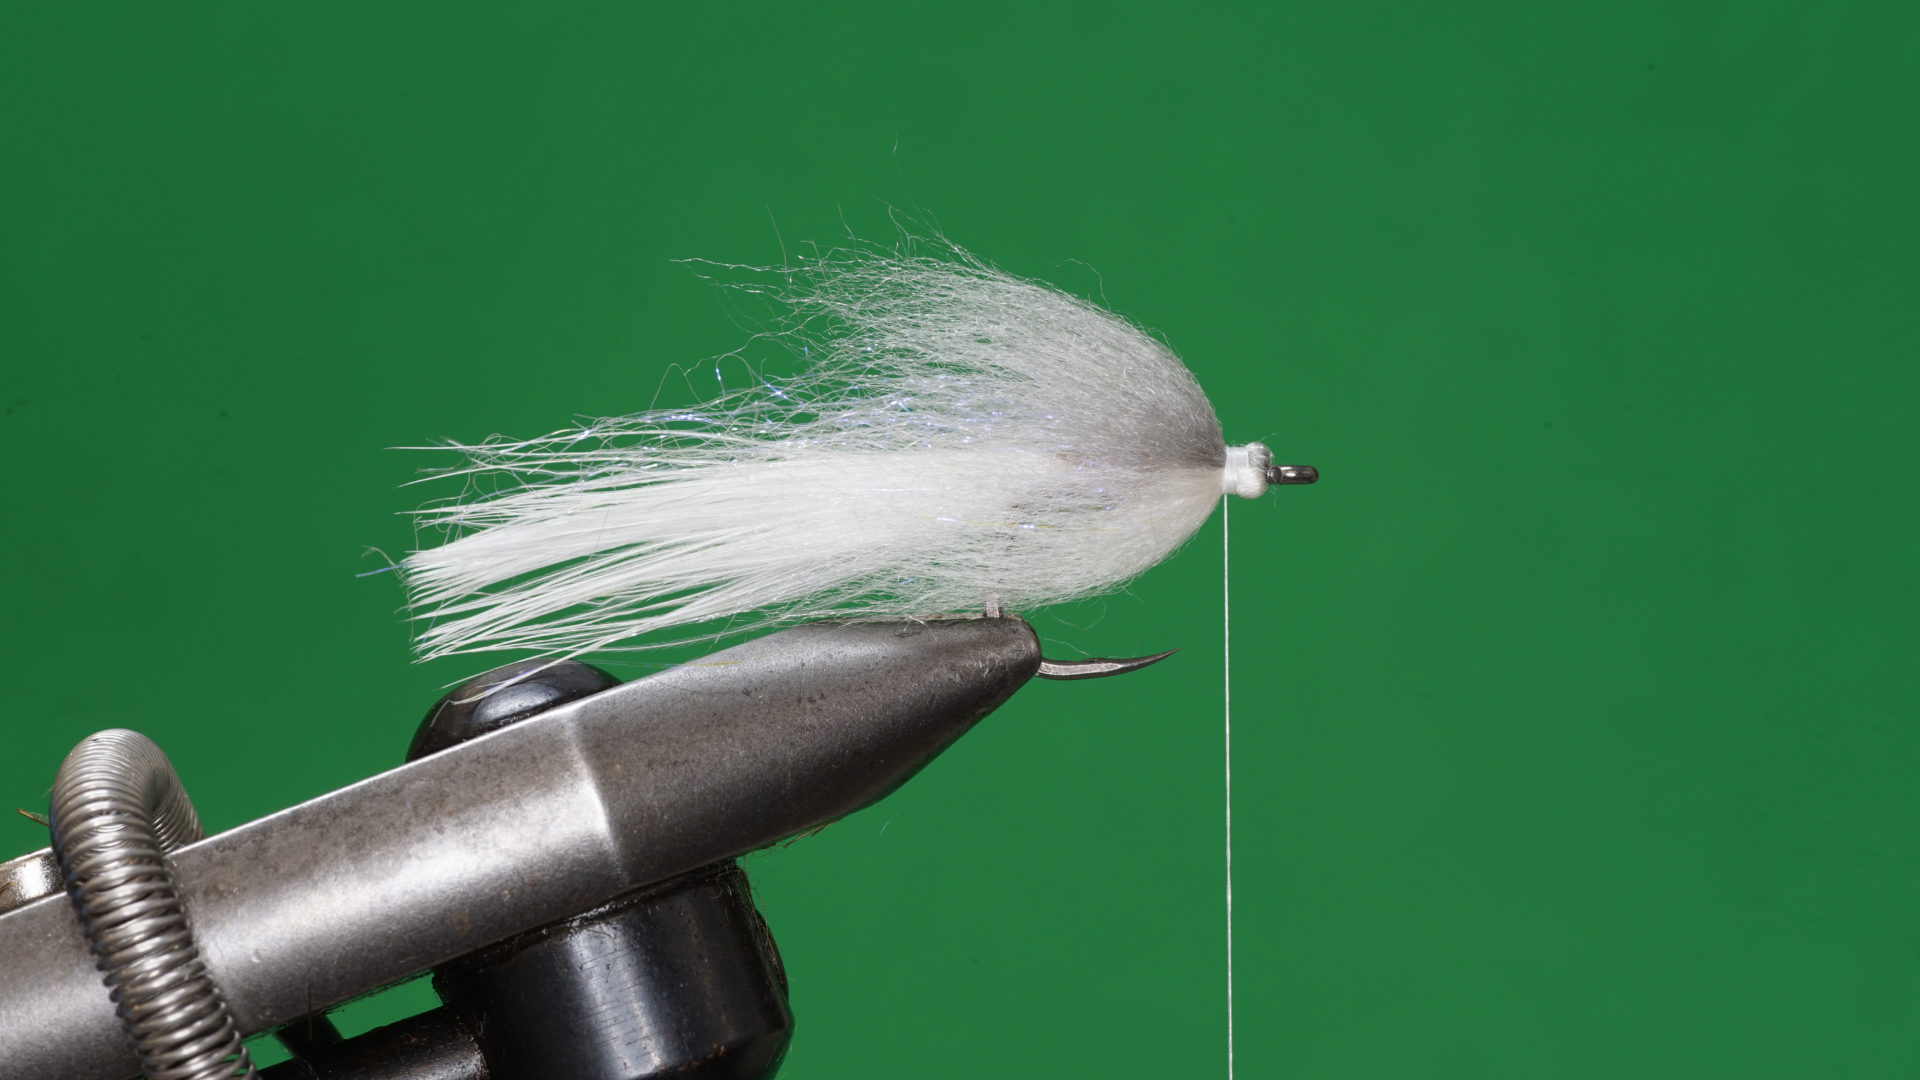
 - Advance the tying thread forward past the bead, so it hangs halfway between the front of the bead and the eye of the hook. Form the wing by tying in a sparse clump of dubbing on top of the hook. There should be more dubbing forward of the tie-in point. Spread the dubbing so it occupies the upper portion of the shank. Repeat this process for the white dubbing throat. Remember to spread out the white dubbing, so it fills the lower part of the shank.
 Baby Fat Minnow: Step 4.
 - With the thread hanging approximately halfway between the front of the bead and the hook eye, sweep the wing material forward of the initial tie-in point back. Secure in place with two to three wraps of tying thread. Spread the wing as necessary to ensure it encompasses the upper portion of the hook. Repeat this process for the white dubbing throat. As with the wing, remember to spread out the white dubbing, so it occupies the lower portion of the shank. Whip finish and remove the tying thread.
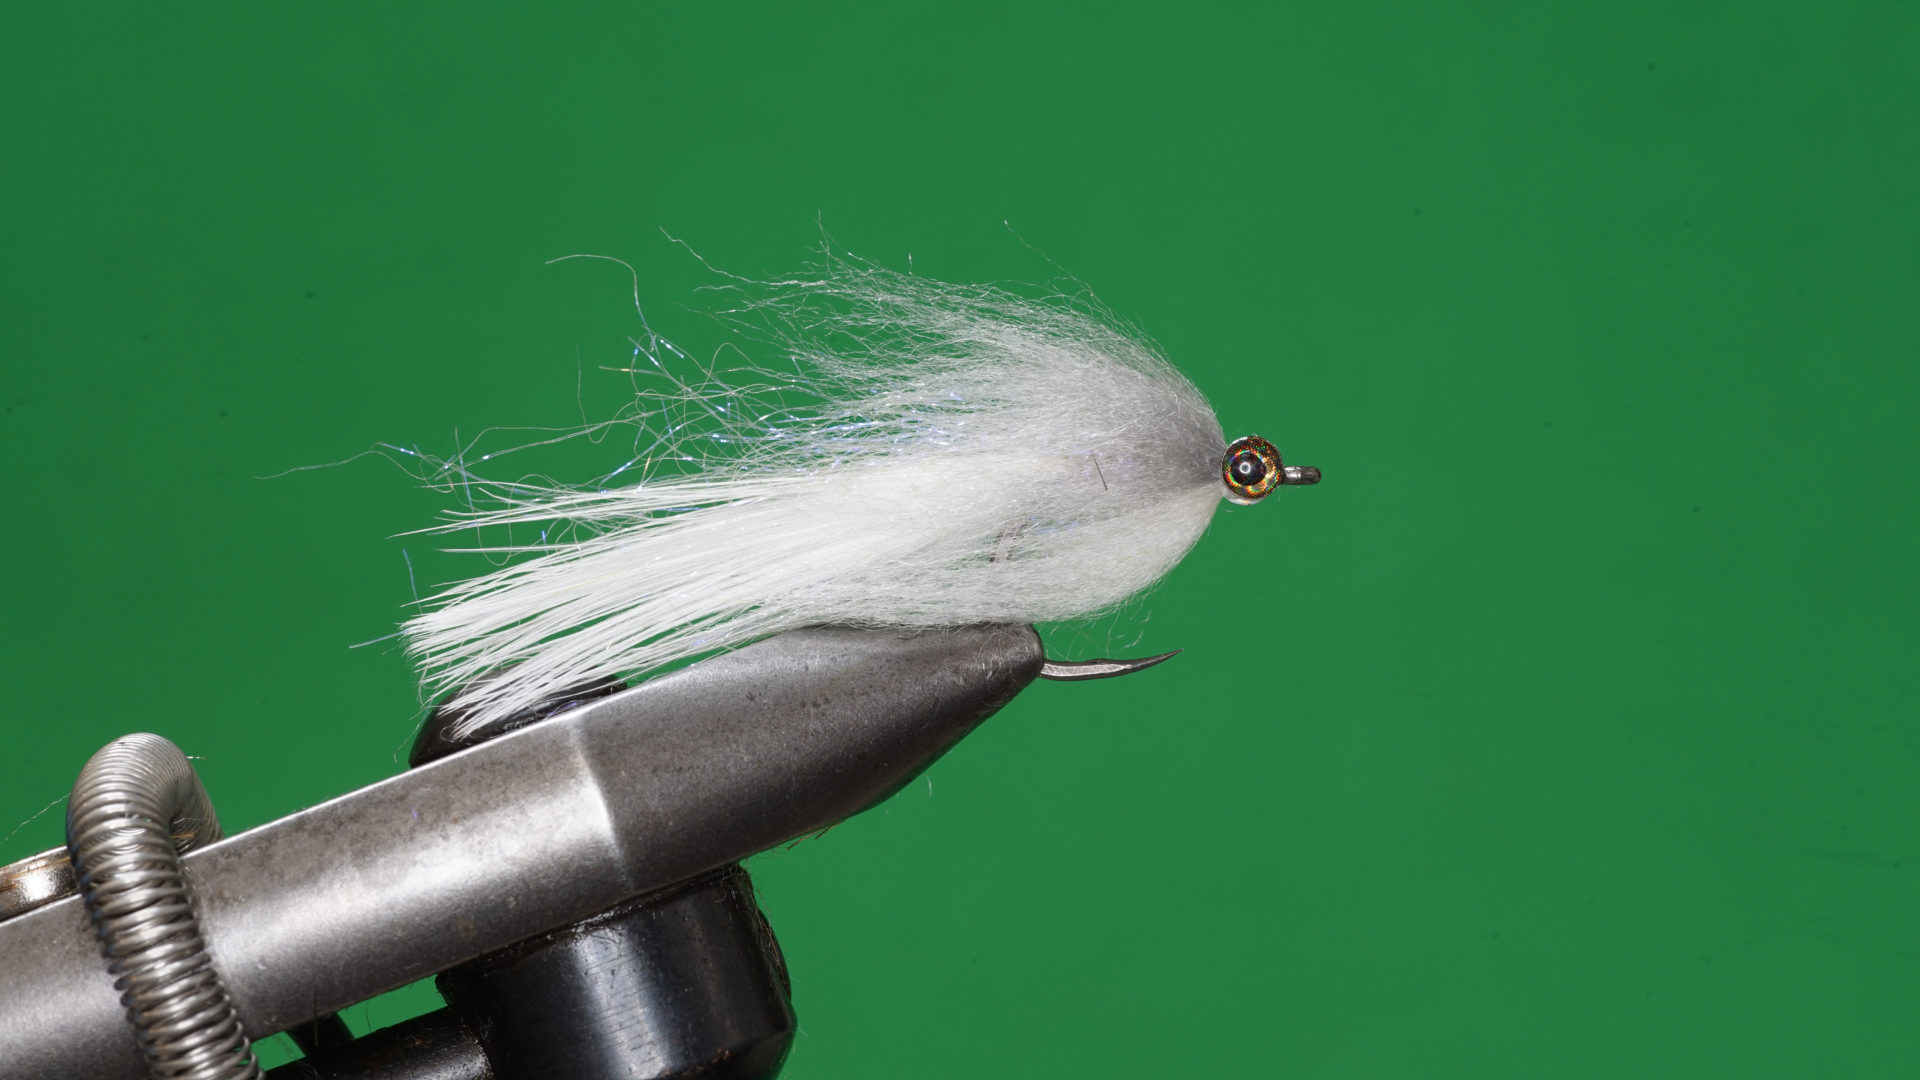
 Baby Fat Minnow: Step 5.
 - Using a pair of haemostats or non-serrated jaw pliers, squash the sides of the head area flat, forming a flat base to mount the molded eyes at the base of the wing and throat. Using brushable superglue, coat the sides of the squashed head. Place and pinch the eyes on either side of the head to secure them in place. Coat the eyes with UV resin. Using a dubbing needle, spread the resin all over the head and eyes. Completely encapsulate the eyes by spreading the resin slightly onto the wing and throat. With the eyes encapsulated, cure the resin. Rotating the vise during the curing process ensures an even and balanced head and eyes.
 Baby Fat Minnow: Step 6.
 - Using permanent markers, darken the top of the wing and the lower throat just behind the eyes. Using your thumb and forefinger, blend each colour into the wing or throat. Create the red gill slashes just back from the hook point using a fine-point red marker.
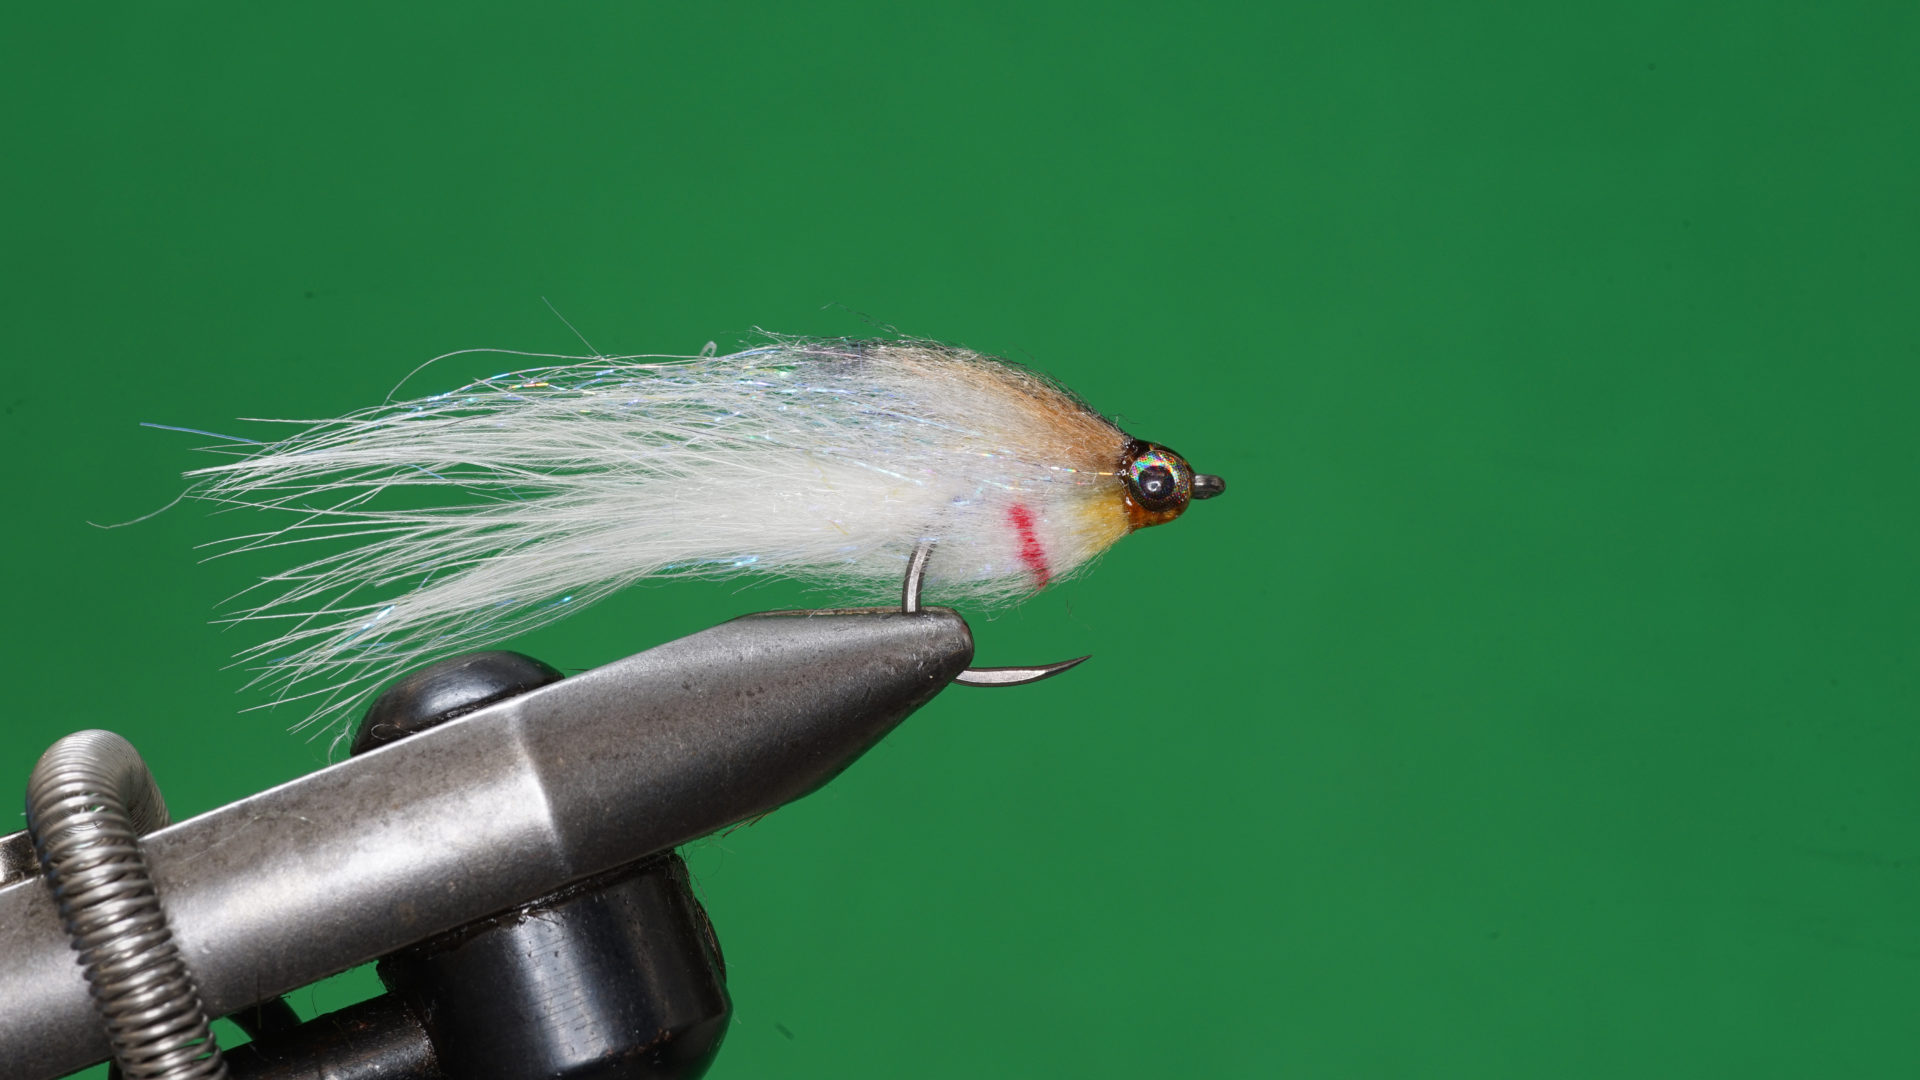 Baby Fat Minnow: Step 7.