It seems like summer is just flying by, and that means that hunting season will be here before you know it. Hunting for grouse is arguably one of my favourite parts of fall; early September bird hunting is highly anticipated around here. While we typically eat the grouse that we harvest fresh, if it has been a good year, I like to freeze some for use later during the year. Another method of storing grouse is pressure canning it. This allows it to be shelf stable, frees up valuable freezer space and the meat can be used for soups, frying or even sandwiches.
Advertisement
Keep in mind the golden rule of canning: you must use a pressure canner to can meat, a water bath canner is insufficient. This is because meat is a low-acid food, which needs to be pressure canned to be safely consumed. Out of the two different methods of packing food into jars prior to canning, hot pack and cold pack, I prefer to use the hot pack method for wild game because the meat tends to be leaner than that from domestic meat. If you are planning to can grouse right after a hunt, let it chill overnight before processing. This allows the meat to relax, otherwise you run the risk of a tough final product.
Advertisement
Pressure canners come in two different styles, the weighted gauge and the dial gauge. While both will pressure can food, there are slight differences in how each canner operates. With that in mind, this is a brief overview of how to prepare the jars and meat for canning; refer to the user manual of your pressure canner for operational directions (follow instructions for chicken in the manual).
Advertisement
A Brief Overview On How To Can Grouse Using The Hot Pack Method
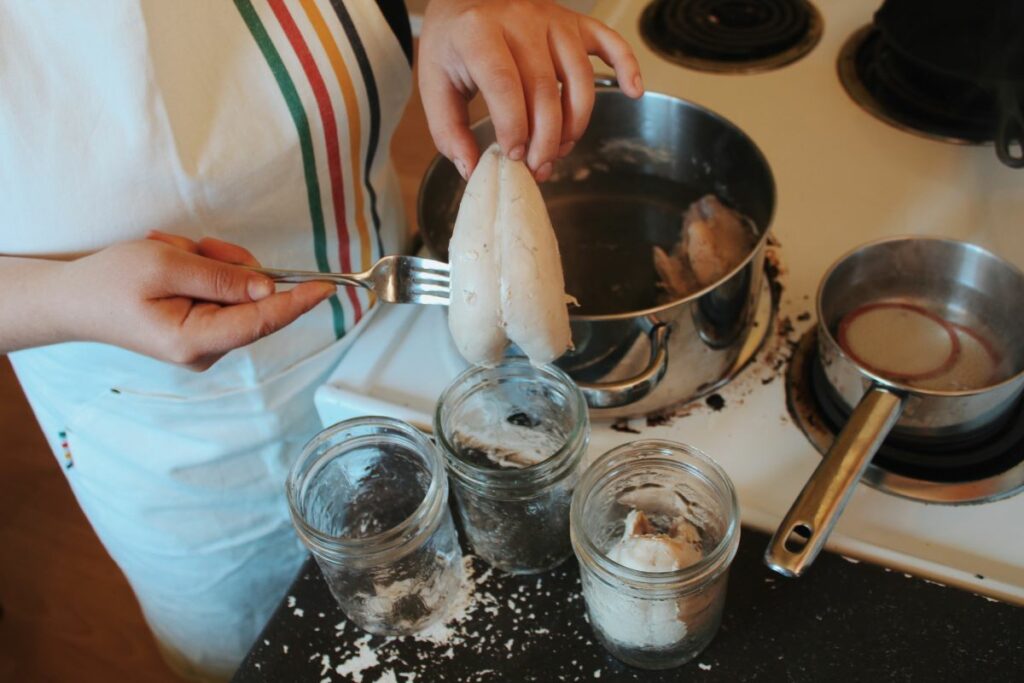
Start with clean jars and new lids (you can reuse the rings if they are in good condition). Jars that are going to be pressure canned do not need to be sterilized before use, but I am in the habit of doing so anyway. I find that one grouse will fit into a pint jar; if you’re boning out the meat, you will be able to fit more per jar. Keep lids in hot water until they are needed.
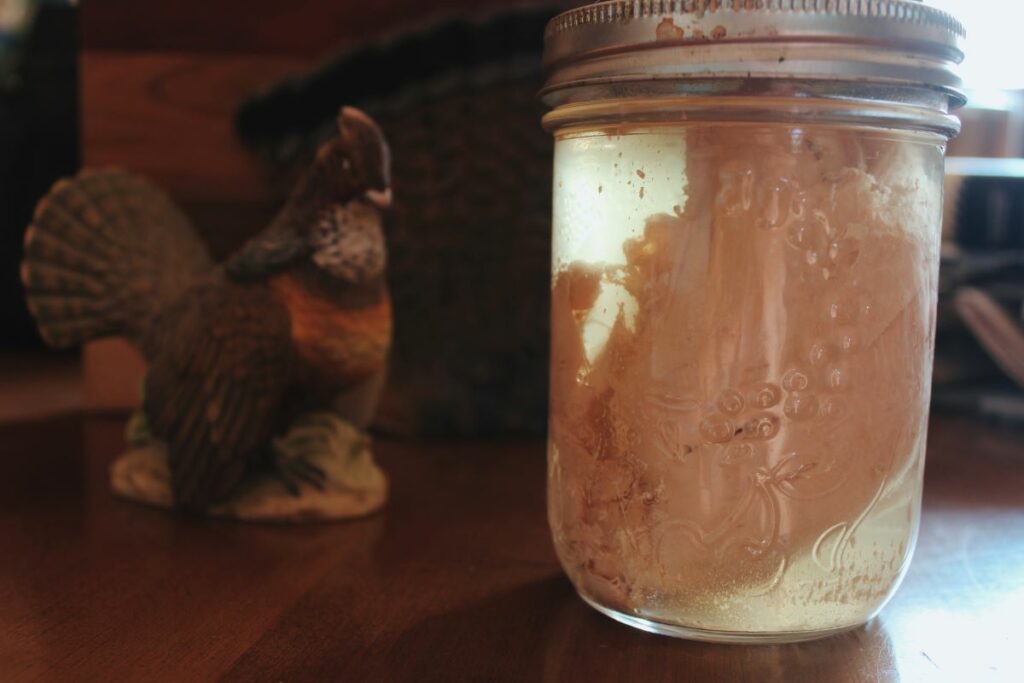
Bring a pot of water to a boil. Boil the grouse for three to five minutes (you want the meat to be cooked almost halfway through, use a meat thermometer to double check). Prepare the jars by adding 1/2 tsp of salt for every pint jar. Pack the meat into the jar – one whole grouse body (without the legs) should fit into a wide mouth pint jar. Top off with hot water. Leave one inch of headspace. Wipe the rims of the jars clean, place lids and hand tighten rings. Process according to your pressure canner’s user manual.
After processing, remove from the pressure canner (you must wait until the pressure is fully down before unlocking lid) and leave jars for a day before moving them or removing rings. Check that the jars have sealed (the lid is curved down and doesn’t move when tapped on). Wipe jars clean and store upright in a cool, dry place.
Please note: For detailed information on pressure canning, it is recommended to follow the pressure canner manufacturer’s instructions – for grouse, follow the directions for canning chicken.