I am continuously amazed by how many tyers continue to design and develop a seemingly endless stream of new and innovative flies. However, despite this bounty, it is still good to know that traditional old-school flies, such as one of my personal favourites, the Carey Special, still deserve a place in any well-stocked stillwater fly box.
Advertisement
The Carey Special traces its roots back to 1920 when Colonel Tom Carey and Dr. Lloyd Day collaborated on a pattern originally called the Monkey Faced Louise or Dredge. Their design featured a dense pheasant rump hackle and a dubbed fur body from a dead marmot Dr. Day had found on his drive to rendezvous with Colonel Carey for a fishing trip. Since this initial prototype, the Carey Special has undergone many mutations. Still, the fly’s core remains the same: a pheasant rump tail and hackle, coupled with a body using a variety of materials.
Advertisement
Pheasant rump remains the pattern’s key ingredient for both the tail and hackle in many modern variations. You have the choice of using either brown or blue-phase pheasant. Of the two, I lean most times towards the blue phase. There are other hackle and tail options worth trying too, including webby hen hackle, peacock breast feathers and, a personal favourite, guinea fowl. A Carey tied with a dyed olive, green or yellow guinea hackle, coupled with a peacock olive chenille body is perhaps my favourite suggestive dragonfly nymph.
No matter the hackle choice, it is always best to select your hackles from a complete cape. A cape provides you with a comprehensive range of sizes and feather styles. Loose pheasant rump doesn’t usually offer the size range of a cape and can be damaged when stuffed into the bag during the packaging process. I prefer to use the thin-stemmed, longer-fibered feathers from the rear of the patch for the front hackle. The smaller, spade-like feathers found at the base of the cape for tail are better suited to form a neat, gathered tail.
Advertisement
The original Carey Special used three to four pheasant rump feathers to form a dense front hackle. Most Carey Specials today feature a single feather, and I have to admit a preference for a sparse hackle, feeling the individual fibers move best with the strip pause retrieve I most often use when fishing a Carey Special. I feel a strip pause best animates the fly, as the fibers collapse against the body on the strip and flare on the pause, providing a pulsating motion trout find hard to resist.
It is crucial to select the correct fiber length to match the overall size of the fly. Although the choice of fiber length is yours, I prefer feathers with a fiber length no longer than the tips of the typically half shank tail. Most times, if I can, I favour hackle feathers with fibers that reach back no further than half the tail. Once selected, strip the soft flue from the base from the stem. Although you can tie in the hackle by the tip, I prefer to tie it in by the stem, wet fly style, with the most prominently coloured or convex side of the feather facing me. I always leave a small section of the stem exposed. The exposed stem allows you to properly position the hackle fibers as you wind and sweep them back. Once tied off, I pinch the hackle on all sides to train and flow the fibers along the body. Brushing the finished fly with a toothbrush also helps break apart the individual hackle fibers so they can move independently of each other.
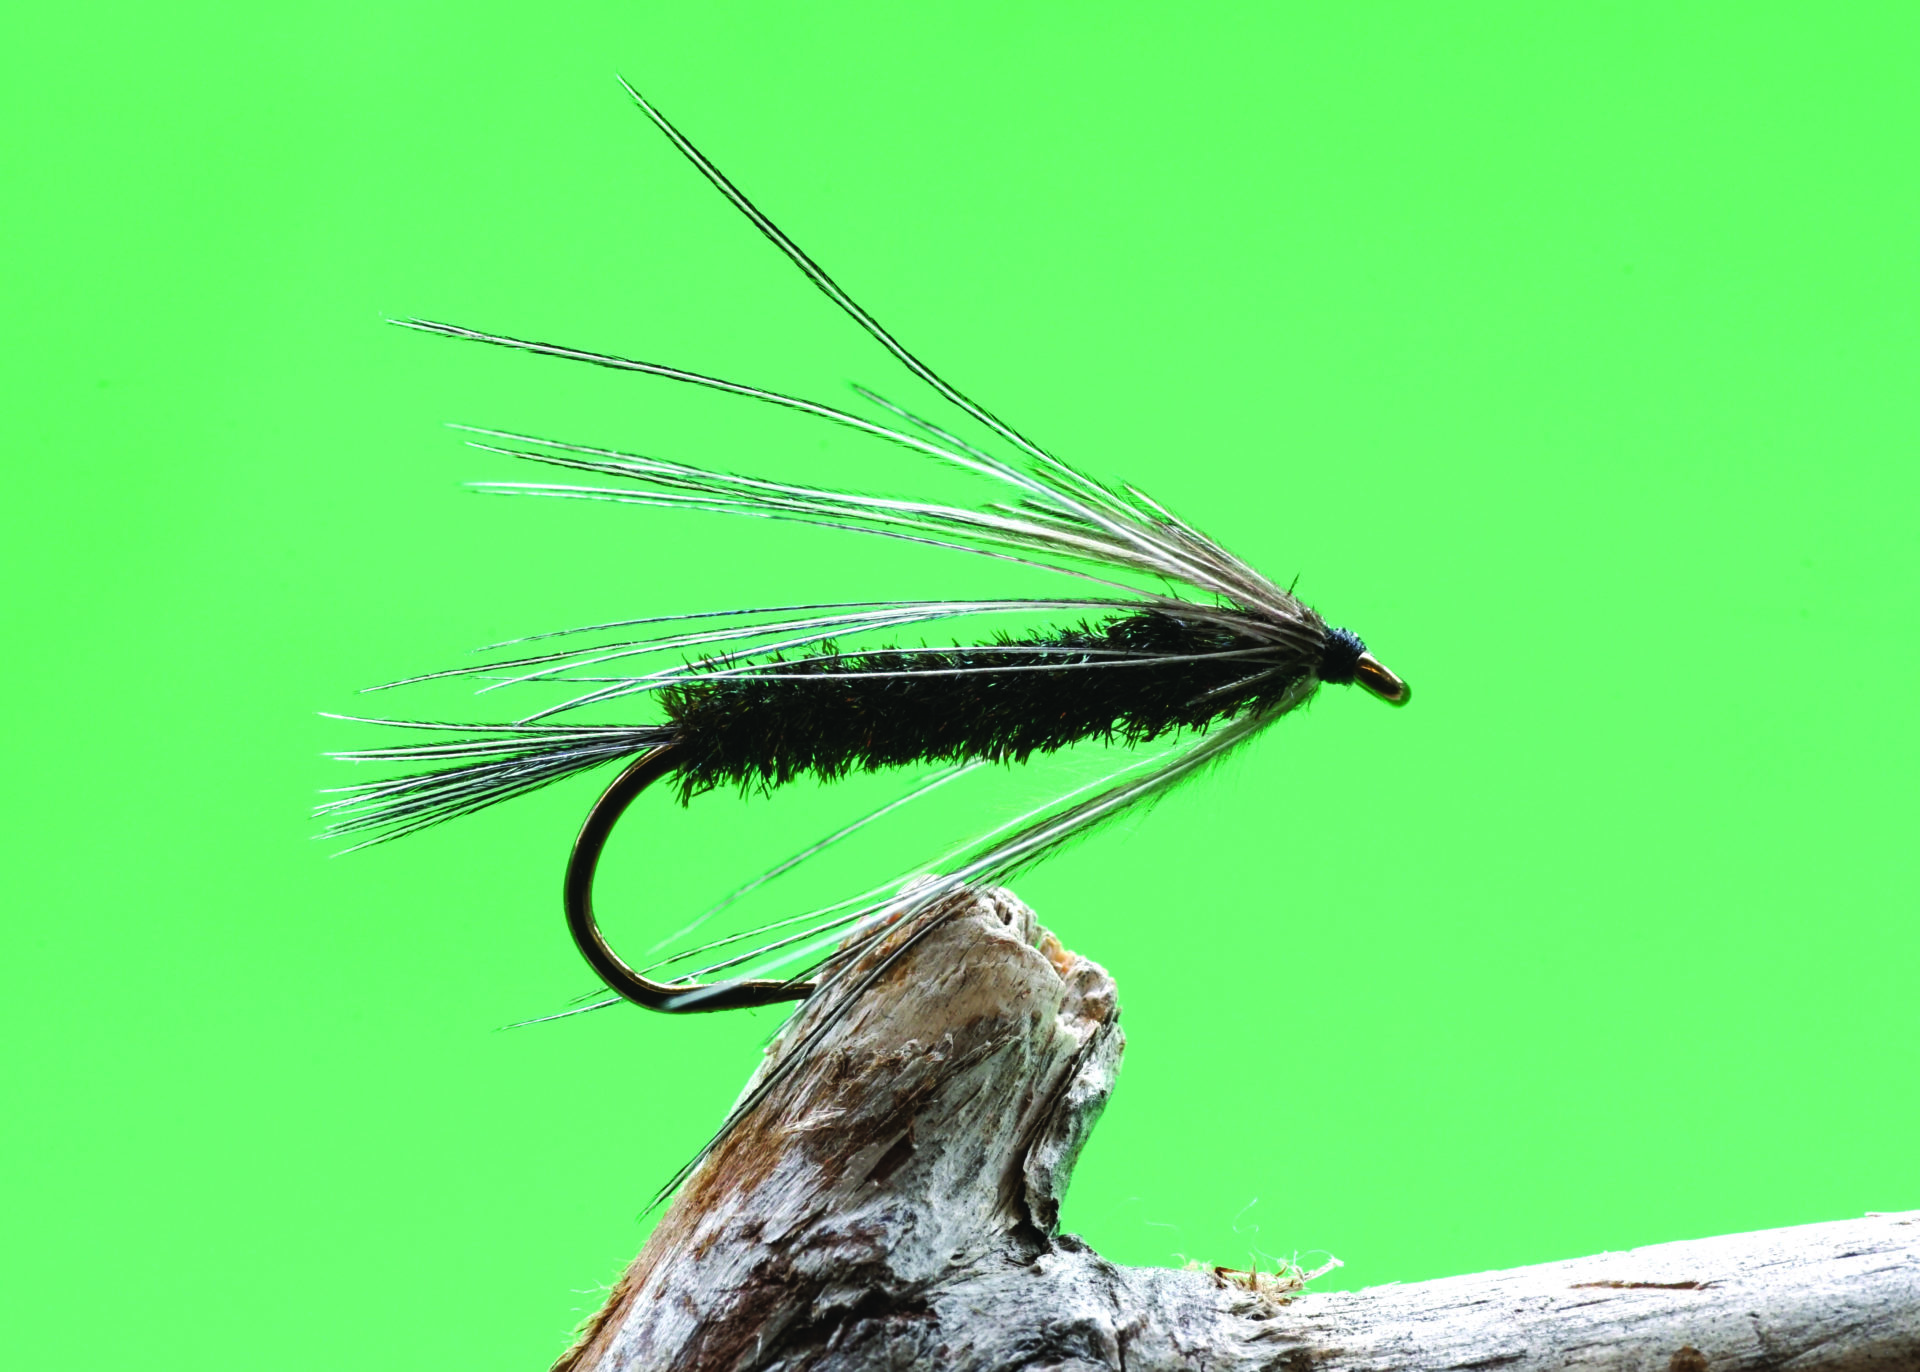
When it comes to body makeup of a Carey Special, the sky is the limit. I have experimented with numerous options, including dubbing, chenille, Crystal Chenille, yarn, pheasant tail fibers and peacock herl. You can use a pheasant rump hackle tied in by the tips, which you then twist and wind forward to create a Self-Bodied Carey. When using fragile body materials such as peacock or pheasant, twisting the fibers as you wind them adds durability. You can also coat the hook shank with brushable superglue before wrapping the pheasant or peacock forward or incorporate a thread or wire rib for added strength. Duncan Laird ties a unique Carey featuring a spun and clipped deer hair body, coupled with a blue phase pheasant rump tail and hackle. Duncan blends six to 10 different colours of dyed and natural deer hair trimmed from the hide in a container. Once spun and clipped to a robust cigar shape, the color variations merge to form a convincing, natural-looking body.
The Carey Special in all of its variants remains one of my favourite suggestive stillwater flies. Although I often use it in large sizes to suggest dragonfly nymphs, it also does an admirable job imitating caddis pupa and leeches. Tied with a thin yarn or chenille body and sparse hackle, a Carey Special makes an excellent chironomid larva or bloodworm imitation. The Carey Special is an excellent searching fly, as it suggests everything and nothing. To fish, a Carey Special looks too good not to eat.
Peacock Carey
- Hook: 2xl or 3xl streamer or nymph
- Thread: Black 8/0 or 70 Denier
- Tail: Natural pheasant rump fibres (blue or brown phase)
- Body: Peacock herl
- Hackle: Natural pheasant rump fibres (blue or brown phase)
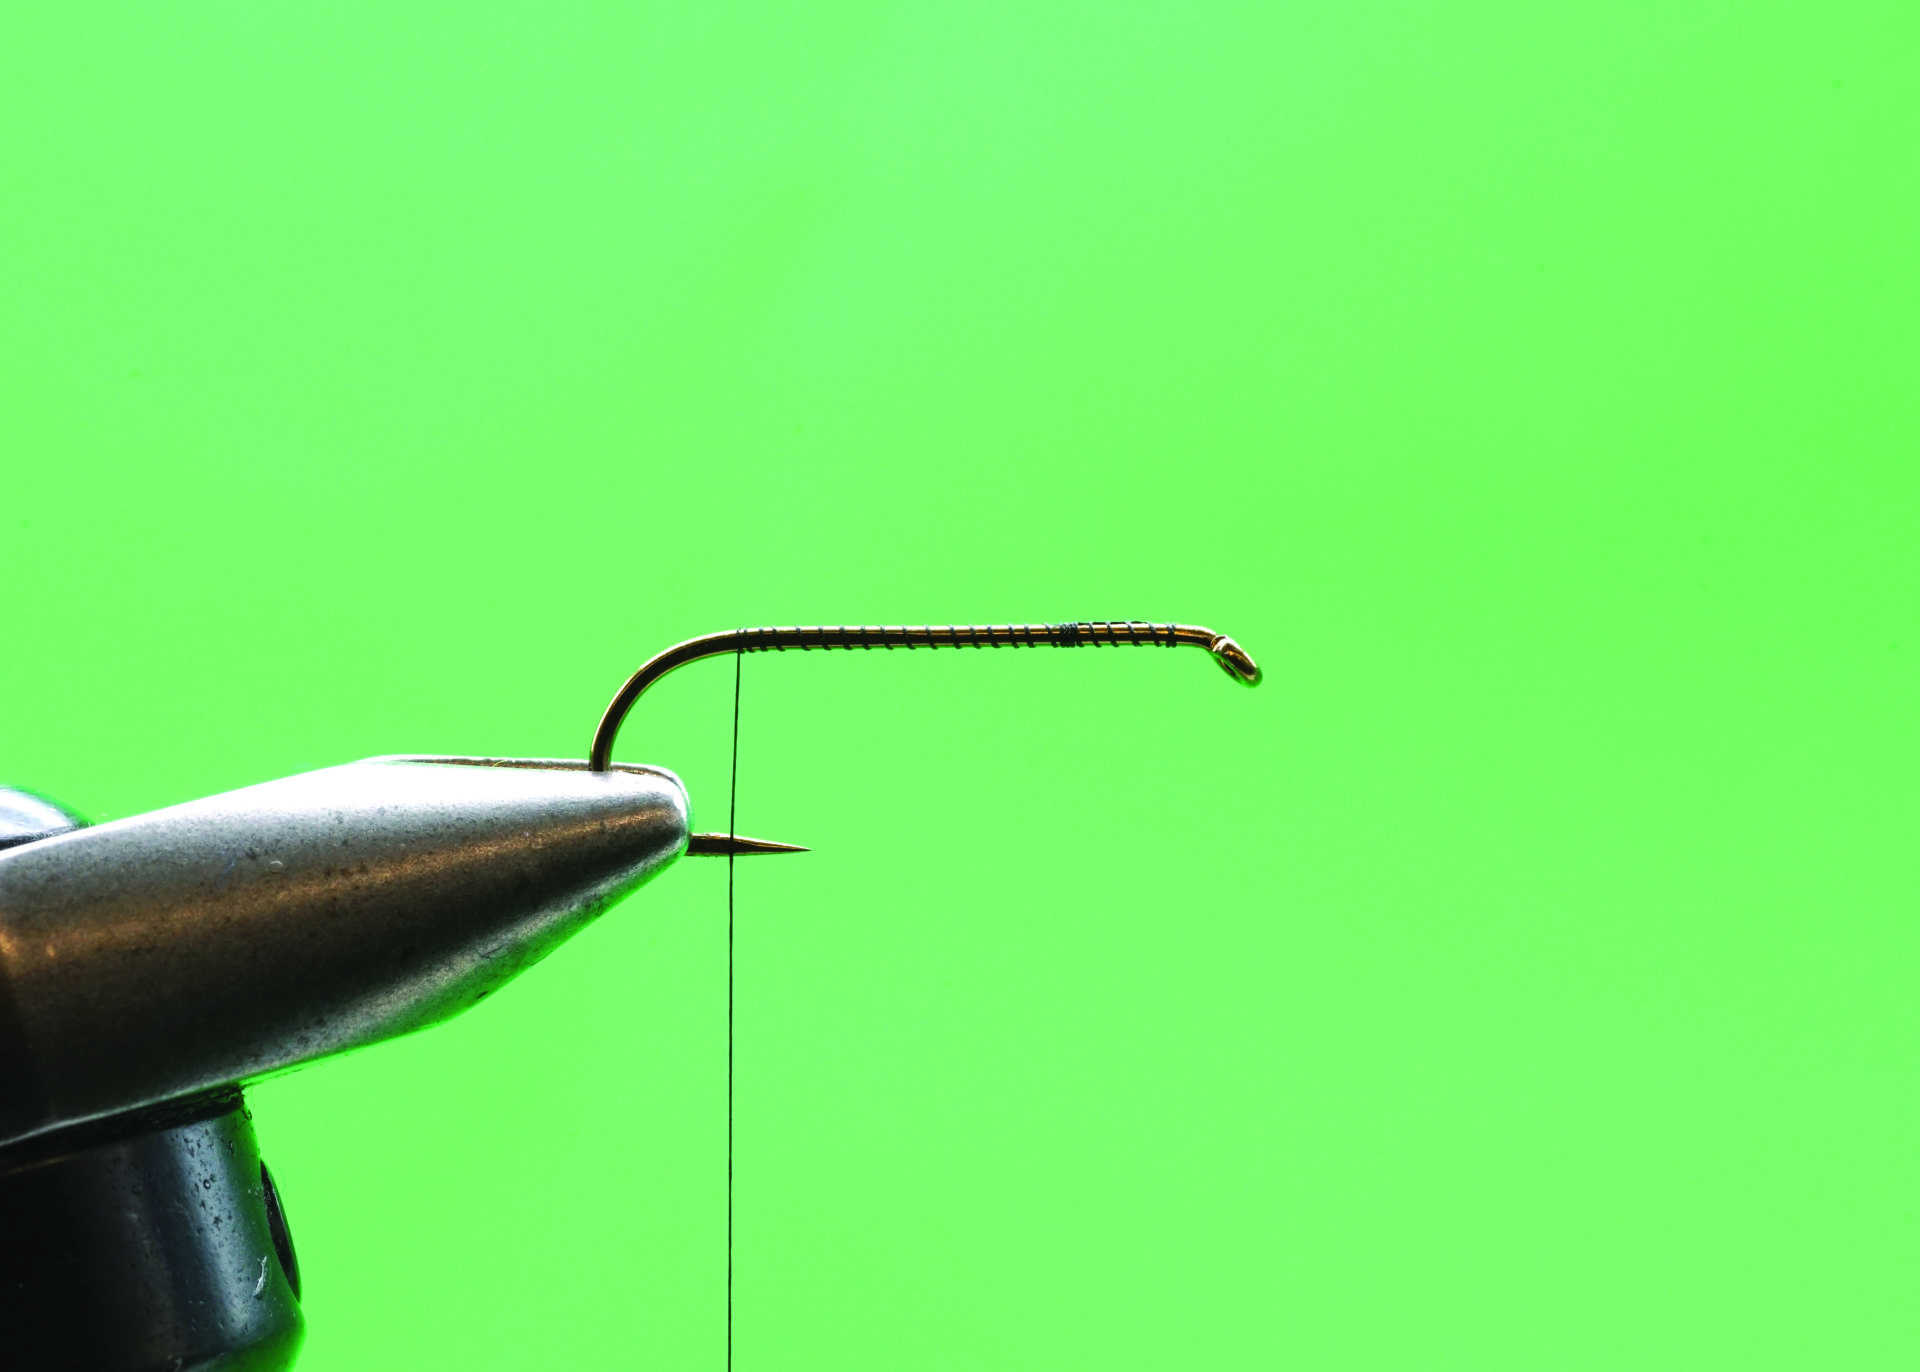
Tying Instructions
- Cover the hook shank with tying thread. Leave the thread hanging at the rear of the shank.
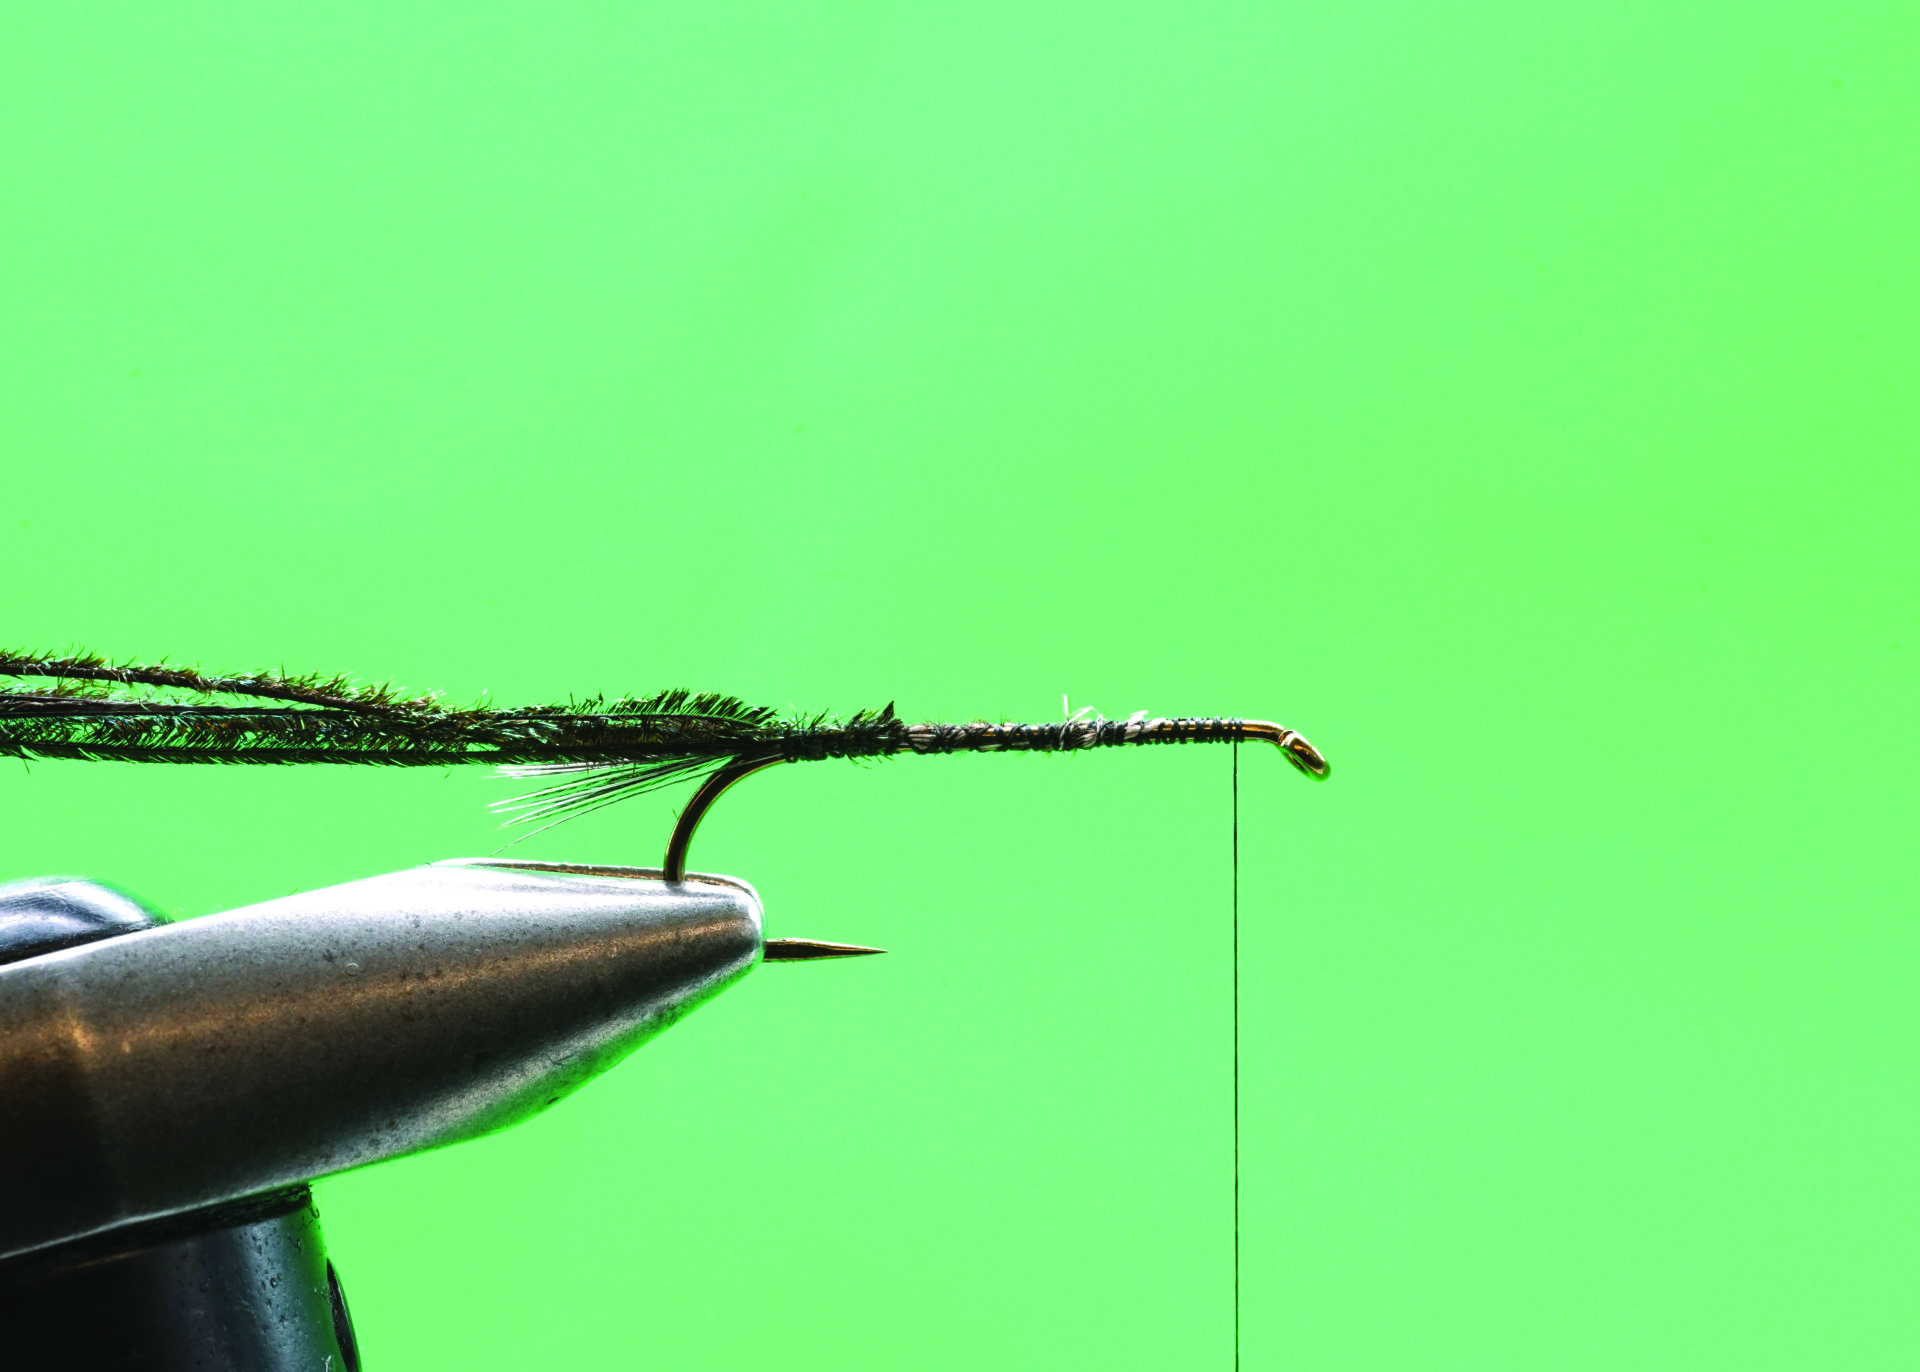
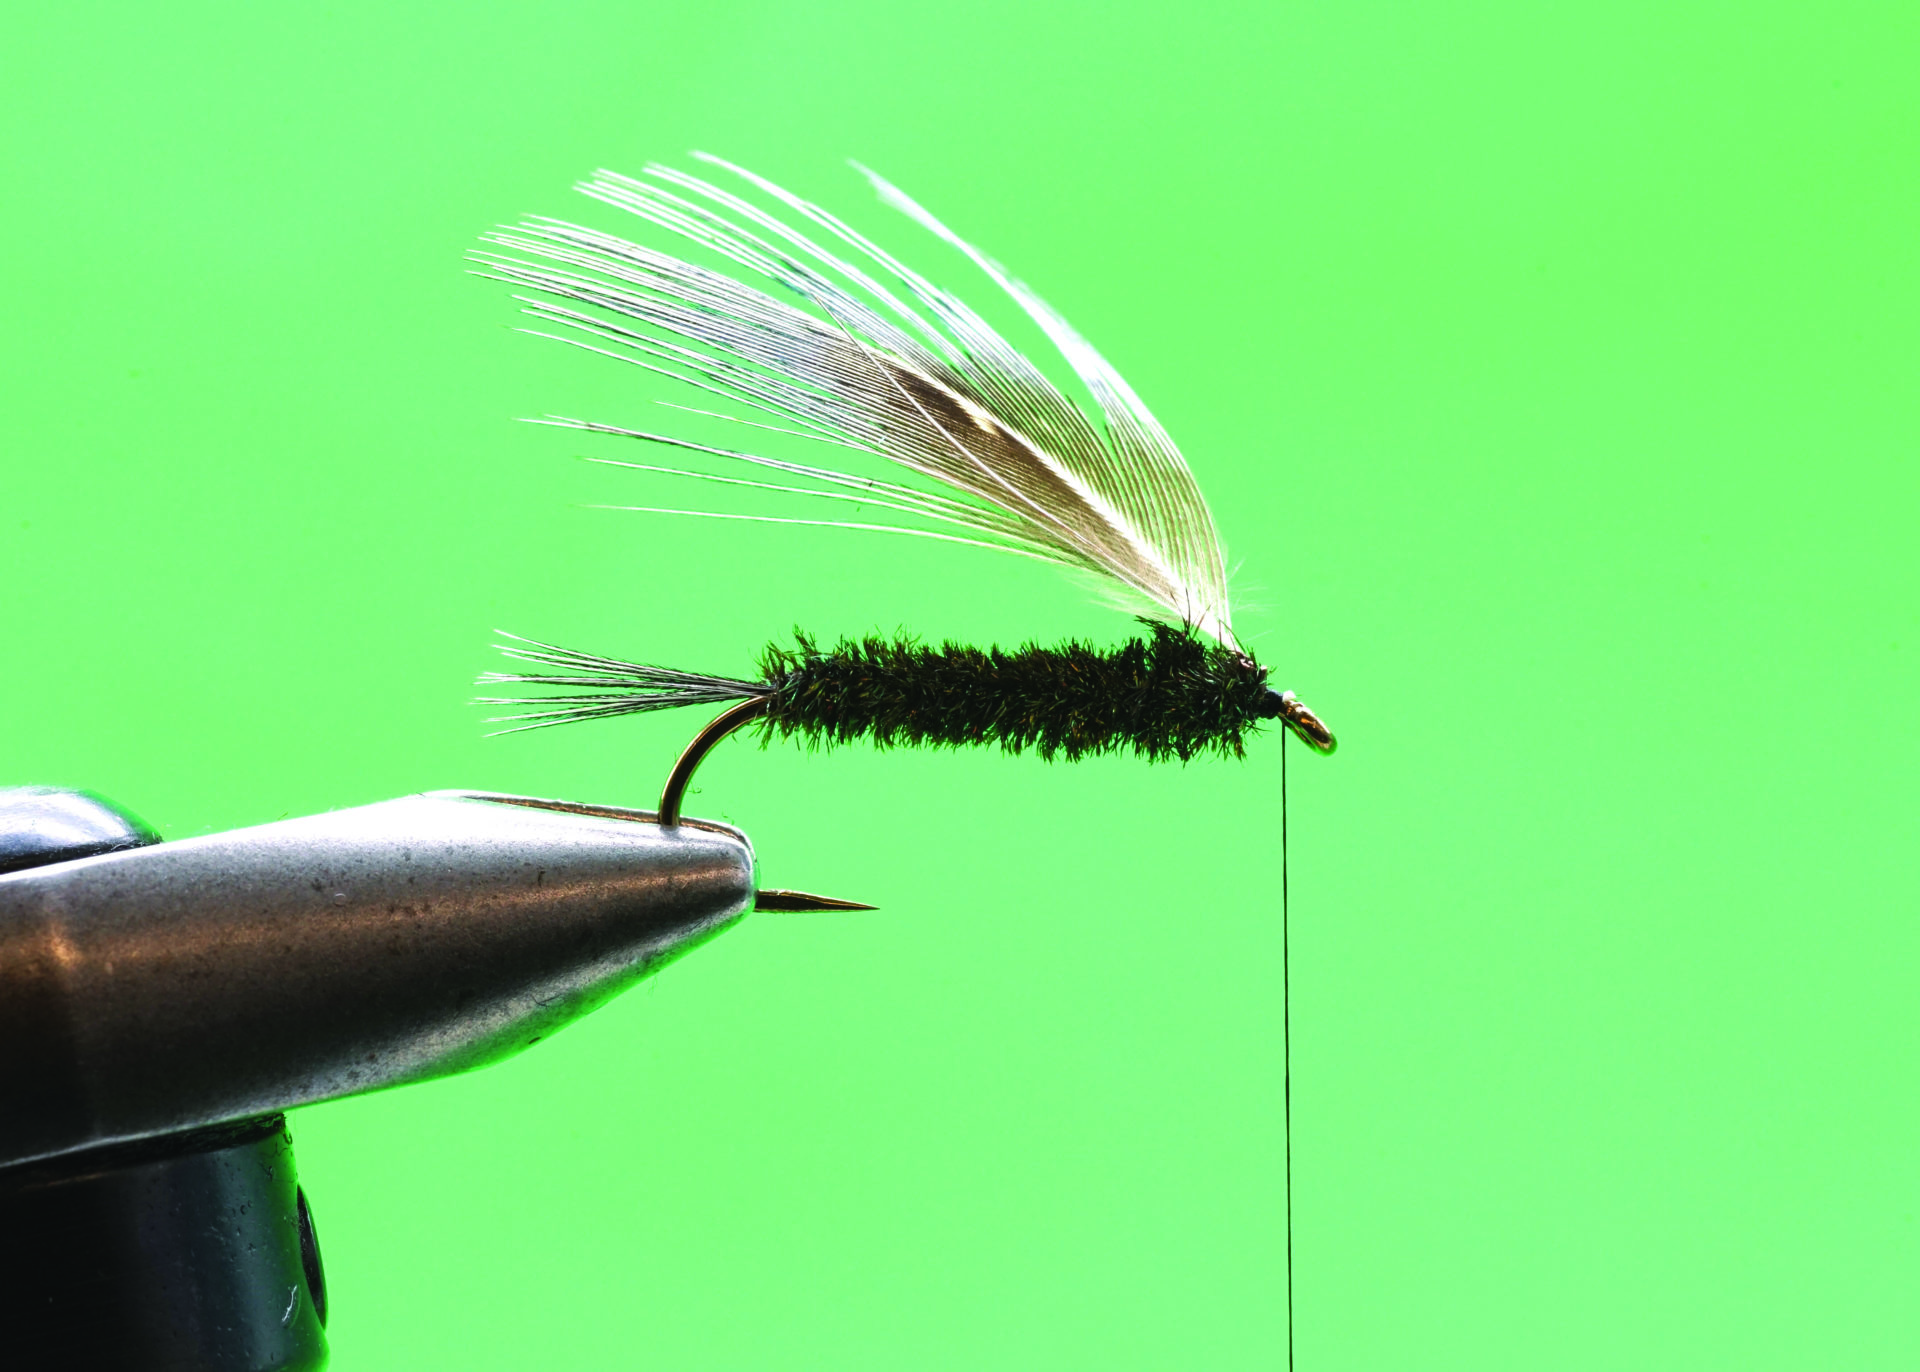
 Peacock Carey: Step 1.
- Tie in a clump of natural pheasant rump fibres at the rear of the hook to form a tail half the shank length.
 Peacock Carey: Step 2.
- Take four to six peacock herl fibres and align them by the tips. Trim the brittle tips even to aid tie in. Secure the peacock herl in at the base of the tail by the trimmed tips. Advance the tying thread forward so it hangs approximately two hook eye lengths back from the hook eye.
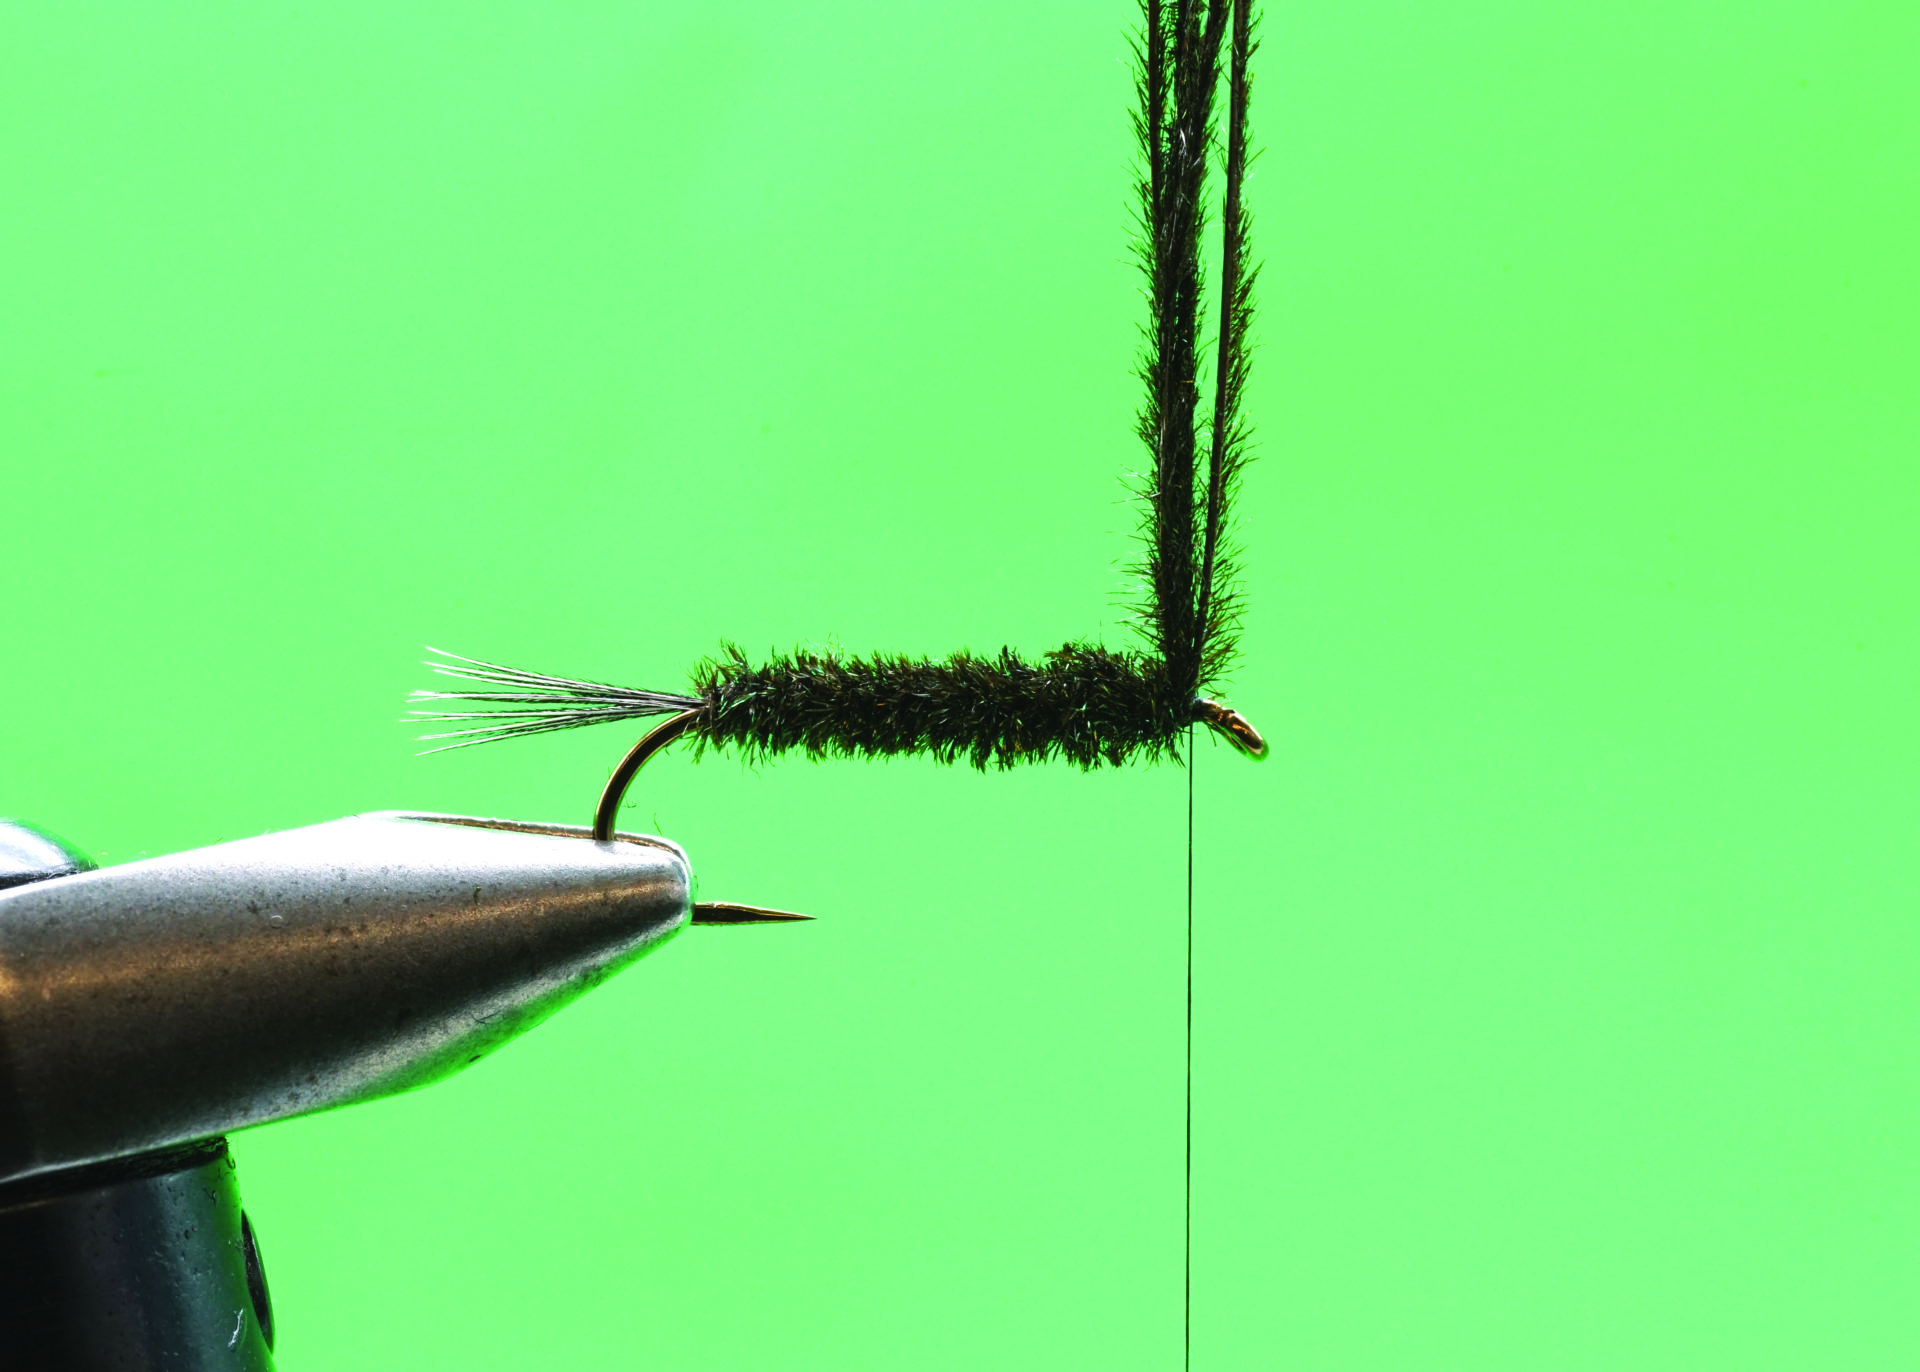
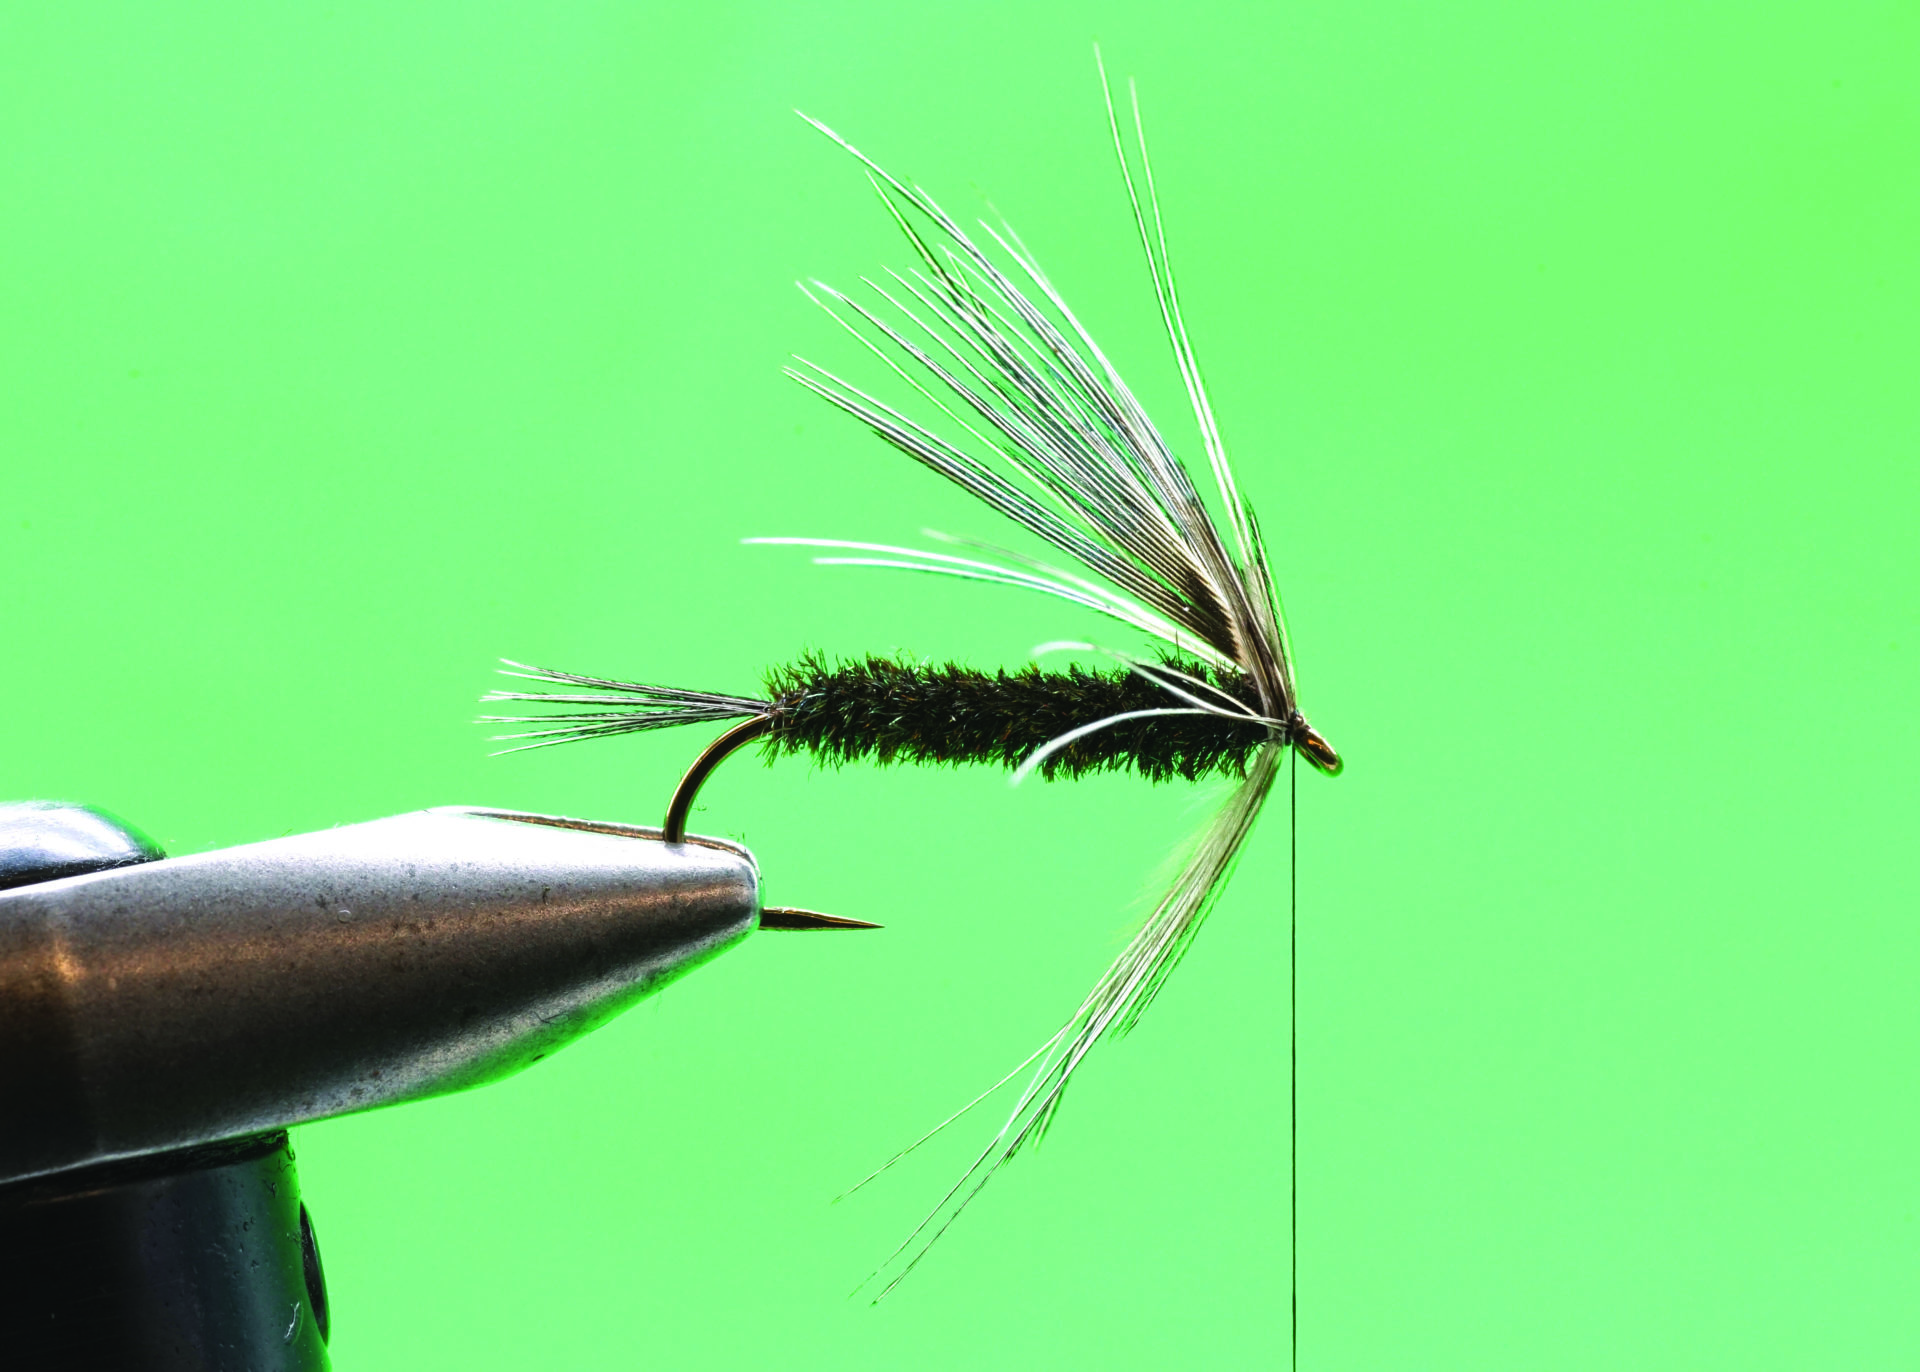
 Peacock Carey: Step 3.
- Stroke the peacock herl fibres together. Wind the peacock herl fibres forward using close-touching turns. You can twist the herl fibres as you wrap to add additional strength to the herl. Twist the herl just a few times at first to avoid breaking the fragile tips. As you advance the herl forward you can increase the frequency of the twists. Tie off the peacock herl two hook eye lengths back from the hook eye and trim the excess.
 Peacock Carey: Step 4.
- Select a natural pheasant rump feather for the hackle so the individual fibres of the feather reach back no further the than the tip of the tail. Strip the soft flue from the feather to expose the main portion of the feather that will be used for the hackle. Tie in the prepared hackle directly in front of the body, wet fly style, with the most prominently marked or convex side of the feather facing you. If possible, try to leave a small section of the hackle stem exposed to allow proper positioning of the first wrap.
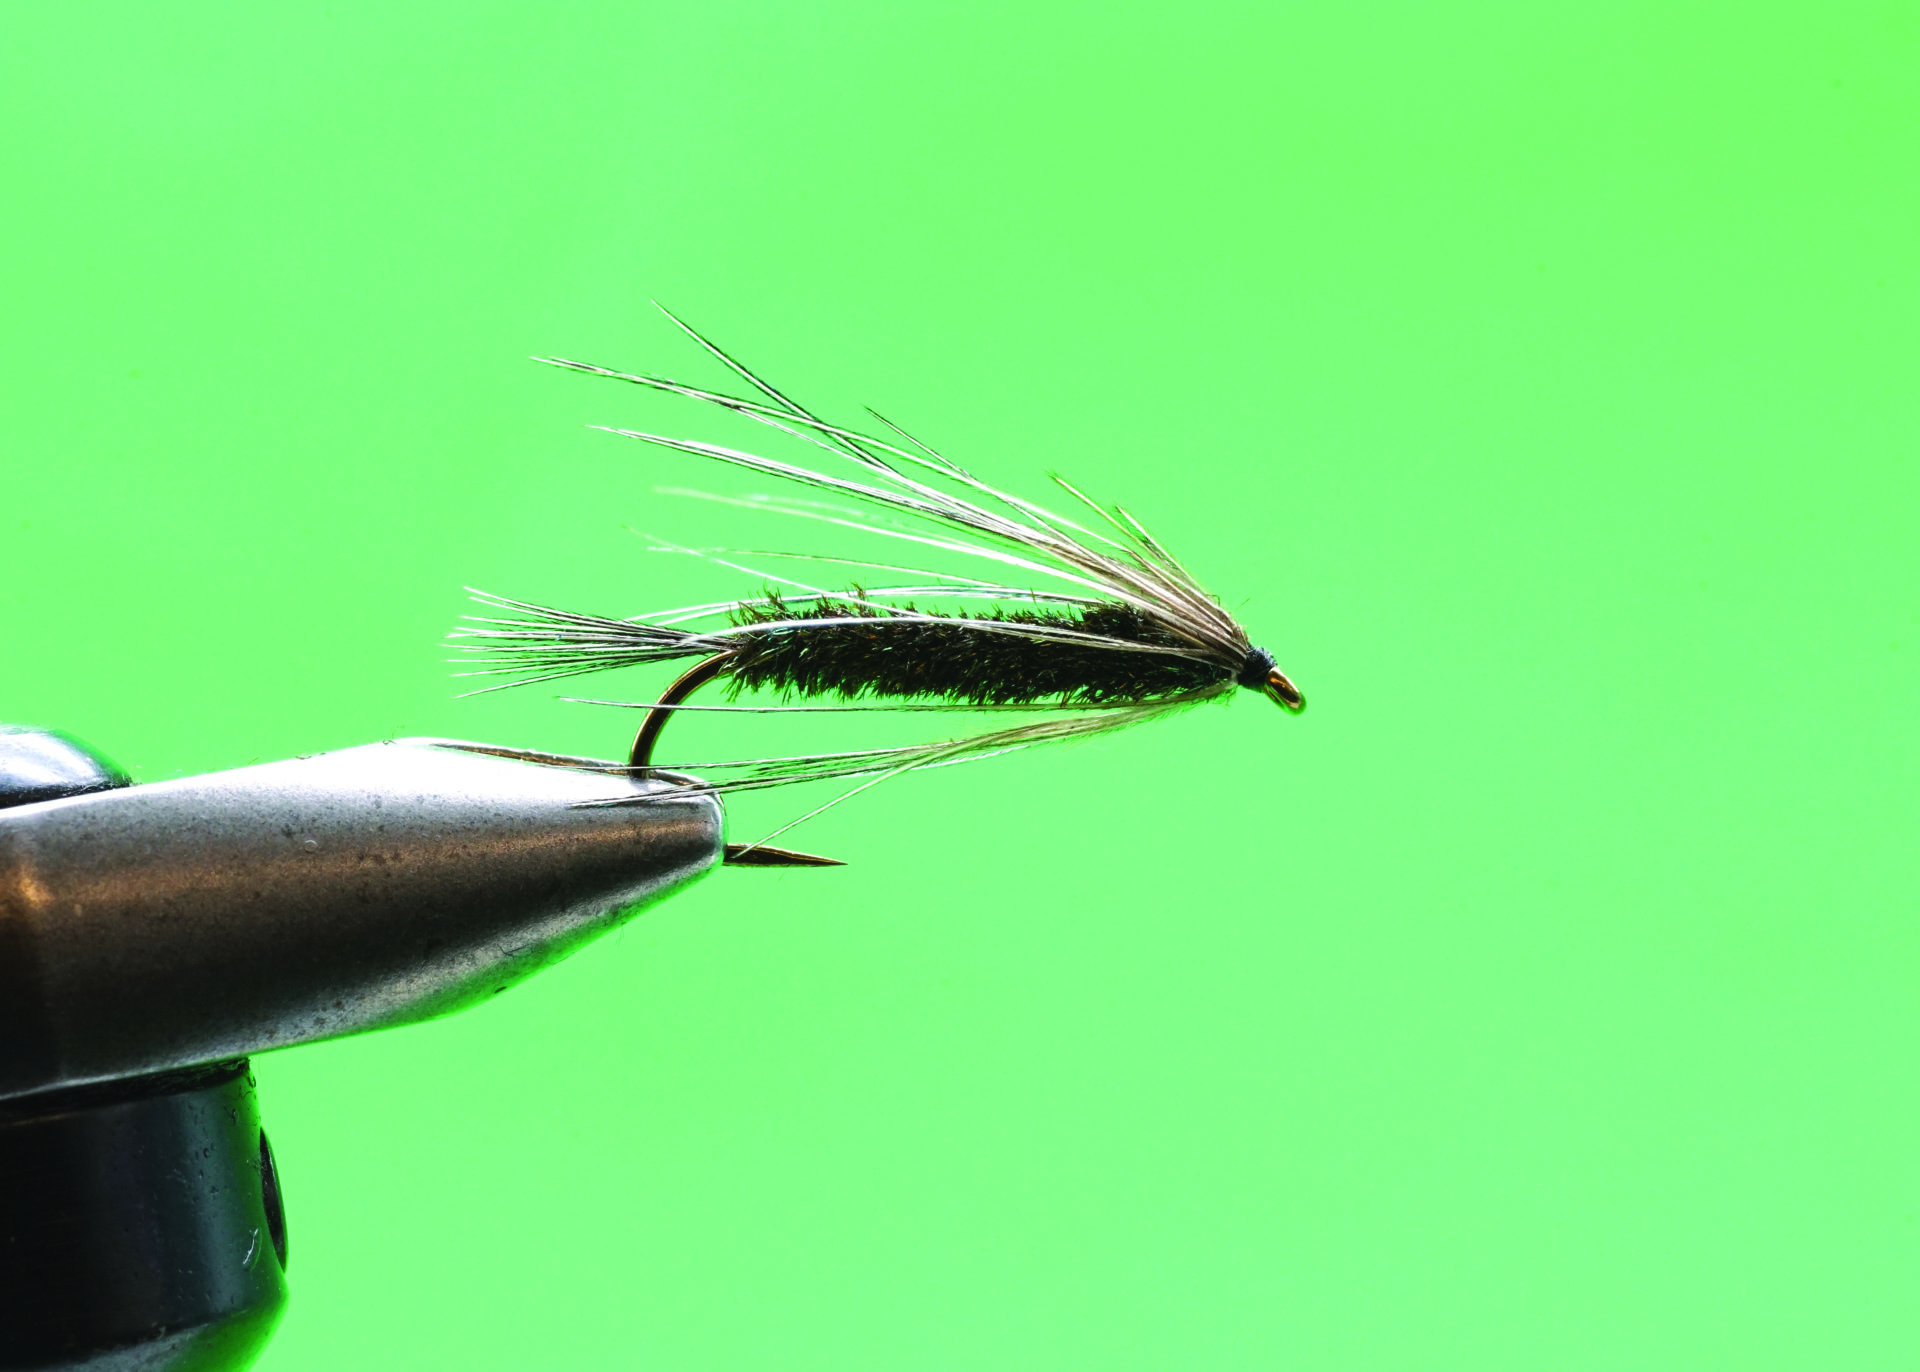
 Peacock Carey: Step 5.
- Using a pair of hackle pliers, wind the pheasant rump feather directly in front of the body three to four times to form a sparse hackle. Tie of the pheasant rump using three to four turns of thread. Do not trim the tip. To reinforce the tie off area, fold the tip section back over the hackle and secure in place using another three to four turns of thread.
 Peacock Carey: Step 6.
- With the hackle no secure, trim the excess tip section. Build a neat tapered head, whip finish and apply head cement. Pinch and train the hackle to flow along the body by pinching it along both sides, top and bottom.
 Peacock Carey: Step 7.