I have long been a fan of Randall Kaufmann’s patterns and tying techniques. His stonefly nymph is one of my favourites. A Kaufmann Stone is one of my go-to patterns when imitating larger stonefly nymphs for both trout and steelhead. Stonefly nymphs make excellent searching patterns as the larger species spend three years or more as nymphs. Trout and steelhead are accustomed to seeing stonefly nymphs of varying sizes and colours drifting by. They are a large, tough to resist, morsel.
Advertisement
A primary feature of the Kaufmann Stone is its robust dubbed body and thorax. There is a diverse range of dubbing options available for the body including stonefly specific mixes. I prefer coarse, ‘spectrumized’, dubbing blends of mohair, seal’s fur or Angora Goat featuring a range of colours combined with rabbit fur. Mixed together, this combination produces one overriding shade. Randall Kaufmann’s original dubbing blends featured a 50/50 mix of Angora goat and rabbit. Randall used a range of different Angora goat colours within his stonefly blends including claret, amber, orange, rust, black, brown, blue, purple and ginger. To this mix Randall added a predominant equal amount of Hairtron dubbing in black, brown or golden brown. I mirror Randall’s philosophy, tying my stonefly nymphs in three main colour schemes, black, brown and golden yellow.
There are two primary considerations to remember when tying a Kaufmann Stone. First, make sure the body is stout, almost oversized, to match the robust physique of a natural stonefly nymph. To ensure a quick descent, all of my Kaufmann Stones are weighted using shank diameter lead wire or lead free wire. The weighted under body also forms a foundation to augment the overall look of the body and thorax. When weighting the fly keep the wide, flat, streamlined body of a natural stonefly nymph in mind. Lashing lead wire down the shank and over wrapping it with a second layer is one option. Wrapping the wire around the shank and squashing the lead wraps flat with pliers is another. Adding an additional wrap of lead over the front third of the shank helps build up the thorax. Depending on current speed and water depth different weight configurations may be necessary. Tying on a curved hook is a good idea. A weighted curved hook rolls on its back, riding hook bend down. This drift profile allows you to present your nymph just above the bottom, where trout and steelhead prefer to reside, with a minimum of hang-ups and subsequent fly loss. The second body consideration is finishing the body at 50%-60% point on the hook to provide enough space to form the three-notched wing pads, thorax and small dubbed head.
Advertisement
The original wing pads on the Kaufmann Stone were formed from trimmed hook gape wide white tip turkey tail segments. Prepared properly, white tip turkey tail is still my preferred wing pad option. White tip turkey quills, as with most quill based wing pads and wing cases, need reinforcement to increase durability and avoid splitting.
To reinforce a quill you can treat the whole feather or cut out the segments and strengthen them separately prior to trimming and tying in. To treat a complete feather, use an artist’s fixative. For treating individual segments, which I tend to do most often, use Softex or flexible head cement.
Advertisement
There are also synthetic wing pad options available such as Skinny Skin and Thin Skin. These plastic based products are easy to work with and are available in a number of unique patterns. Simply cut the material to the appropriate width and shape.
No matter the material, notch the wing pads prior to tie in. Once the wing pad has been trimmed to a hook gape width, fold the material evenly along its length. If you are using white tip turkey wing pads square the ends of the slip prior to folding. With the material folded, trim on a 45-degree angle from the folded edge towards the squared end to create a distinct V-notched wing pad. If you are using a turkey tail slip, the butt end that was attached to the main quill is the most durable end to notch.
The Kaufmann Stone is a simple. It possesses all of the key pattern triggers; size, shape and colour. Combined with proper presentation techniques, the Kaufmann Stone is tough to beat, whether I am trying to match the hatch or prospecting likely looking water during non-hatch periods.
Tying Instructions
-

 Via Phil Rowley
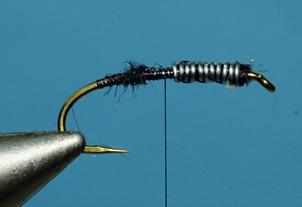
Lash a hook diameter length of lead wire or lead free wire down each side of the hook along the middle two thirds of the shank. Overwrap the front portion lead wire with a smaller diameter lead wire or lead-free wire. Build up a neat tapered ramp of dubbing or tying thread to lock the lead in place and to provide an even transition between the hook shank and weighted underbody. Coat the underbody with brushable superglue for added security.
-

 Via Phil Rowley
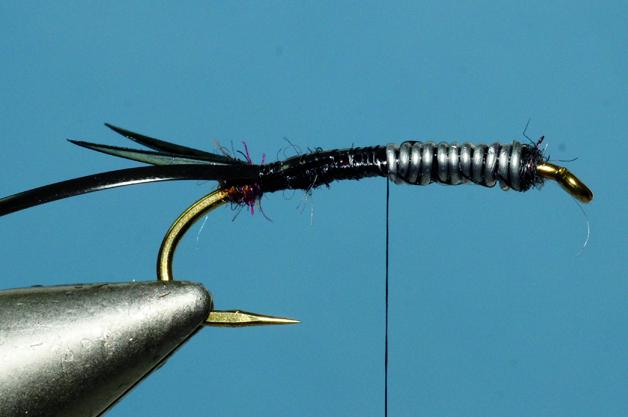
Form a small dubbing ball at the hook bend. Tie in a single goose biot on each side of the dubbing ball so the natural curve of the biot points away from the hook. The finished split tails should extend approximately one-third to one-half the shank length. Tie in the V-rib with the flat side facing out along the near side of the shank. Rubbing and stretching the V-rib helps make it more pliable and easier to work with.
-

 Via Phil Rowley
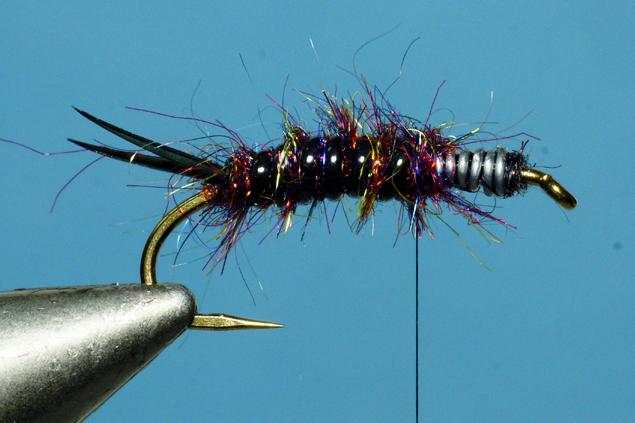
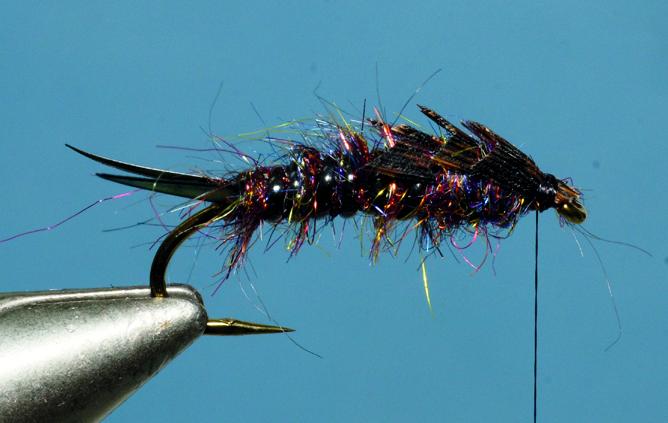
Use a dubbing loop to form a robust shaggy body that extends no further forward than the 60% point on the hook shank. Wrap the V-rib with the rounded side out forward over the body.
-

 Via Phil Rowley
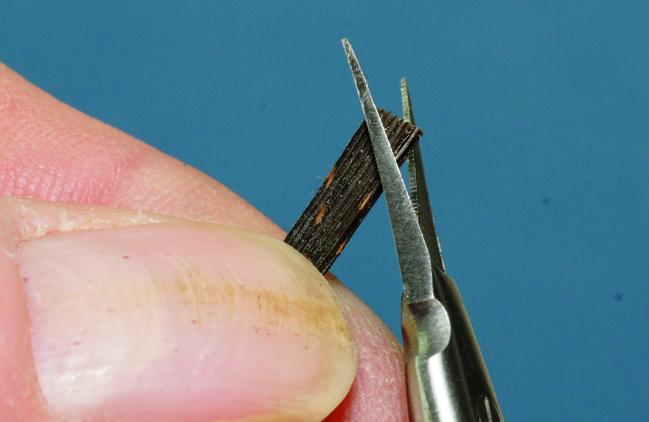
Trim a hook gape wide section of the wing pad material. Fold the wing pad material in half along its own length From the folded end of the wing pad material trim one end on a 45 degree angle toward the end to form a notch wing pad. If you are using a section of white tip turkey quill, be sure to reinforce it prior to trimming. Trim the butt end of the quill section for maximum durability. Repeat this process to create the two remaining wing pad sections.
-

 Via Phil Rowley
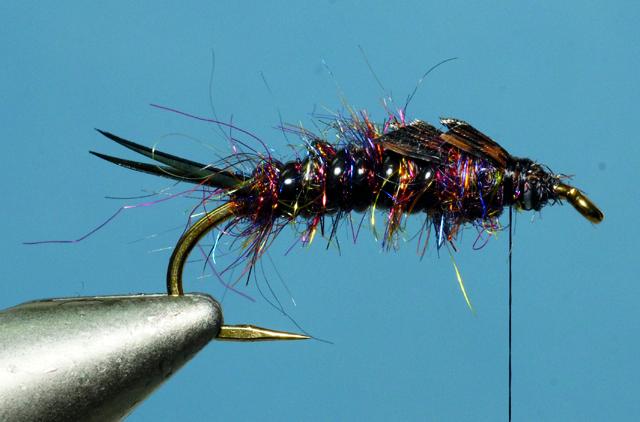
Tie in the first wing pad so the notched tip extends to the midpoint of the shank. Use your thumb to hold the wing pad in place and envelop the top half of the body. Trim the remaining section of the wing pad material forward of the initial tie in point.
-

 Via Phil Rowley
Twist some dubbing onto the tying thread and dub forward half the distance to the hook eye. Keep the robust look of a natural stonefly in mind. Tie in the second wing pad so the notched end extends to the mid-point on the first wing pad. Use your thumb to hold the wing pad in place and envelop the top half of the body. Trim the remaining section of the wing pad material forward of the initial tie in point.
-

 Via Phil Rowley
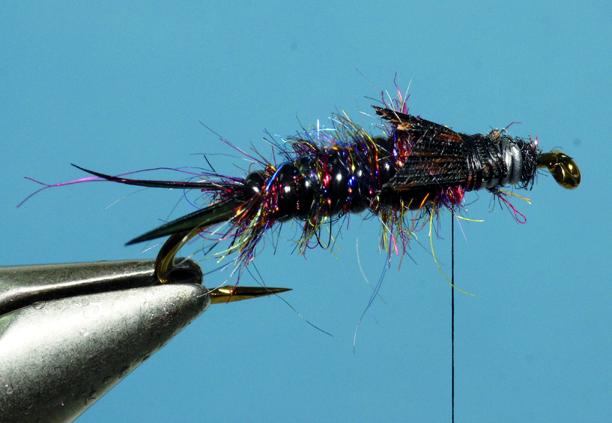
Twist some more dubbing onto the tying thread and dub forward so there are approximately two hook eye lengths of the shank remaining. Tie in the third and final wing pad so the notched tip extends to the midpoint on the second wing pad. Use your thumb to hold the wing pad in place and envelop the top half of the body. Trim the remaining section of the wing pad material forward of the initial tie in point.
-

 Via Phil Rowley
Tie in the goose biot antenna on each side of the hook directly at the hook eye so the natural curvature of the biots helps further divide the antenna. Place a few thread wraps under the antenna at the hook eye to help raise the biots. Trim the excess goose biot. Dub a small head between the third wing pad section and the goose biot antenna. Whip finish at the base of the antenna.